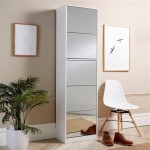
Creating a 3-Way Mirror: A DIY Guide
A three-way mirror, also known as a tri-fold mirror or a Hollywood mirror, is a valuable tool for anyone who wants to see their entire reflection, especially when trying on clothes or getting ready. These mirrors are often found in dressing rooms, dance studios, and professional makeup artist's kits. However, they can be quite expensive to purchase. Luckily, creating a three-way mirror can be a fun and rewarding DIY project that can save you money and give you a custom-sized mirror that perfectly fits your needs. This article will guide you through the process of building a three-way mirror from scratch.
Materials and Tools
Before beginning your project, gather the necessary materials and tools. You will need:
- Three mirror panels. These can be purchased pre-cut or you can cut them yourself from a sheet of mirror glass. Consider the size you need for your space and the desired height of the mirror.
- A sturdy base. This can be made from wood, metal, or even something like an old door. The base needs to be wide enough to support the three mirror panels and stable enough to prevent tipping.
- Hinges. You will need hinges to connect the mirror panels to the base and to each other. Choose strong hinges that are designed for heavy-duty use, as mirror glass can be quite heavy.
- Screws or fasteners. These will be used to attach the hinges to the mirror panels and the base.
- Wood glue. This will help to secure the joints and prevent the mirror panels from coming loose.
- Measuring tape and pencil.
- Level.
- Drill with screwdriver bit.
- Safety glasses and gloves.
Building the Base
The first step is to build the sturdy base for your mirror. This will vary depending on the material you choose and the desired look of your mirror.
- Wooden base: You can create a simple base by assembling three pieces of wood to form a triangle. This is a great option for lightweight construction and offers flexibility in designing the shape.
- Metal base: For a more durable and sleek look, you can use metal tubing or steel plates to create the base. This option requires more advanced tools and skills.
- Recycled base: If you want to be eco-friendly, you can use an existing door, a piece of furniture, or any other sturdy object to create the base.
Once the base is built, ensure it is stable and level. You may need to add feet or other supports to prevent the mirror from tipping over.
Attaching the Mirror Panels
With the base completed, you can attach the mirror panels. This process involves:
- Marking hinge placement: Measure and mark the locations for the hinges on the mirror panels and the base. The placement will depend on the size and shape of your base, but it should be symmetrical.
- Drilling pilot holes: Before attaching the hinges, drill pilot holes through the mirror panels and the base. This will prevent the mirror from cracking when you screw in the hinges.
- Attaching the hinges: Carefully attach the hinges to the mirror panels and the base with screws. Ensure the hinges are securely fastened to prevent the mirror from collapsing.
- Connecting the panels: Connect the mirror panels together using the hinges, ensuring they open and close smoothly.
After attaching the panels, double-check that they are all level and secure. You can use wood glue to strengthen the joints and prevent the mirror panels from coming loose.
Additional Tips
While assembling your three-way mirror, keep these additional tips in mind:
- Safety first: Always wear safety glasses and gloves when handling mirrors.
- Cleanliness matters: Clean the mirror panels before attaching them to the base. This will prevent any dust or dirt from being trapped between the panels.
- Customization: Add your personal touch to your three-way mirror. You can paint the base, add decorative trim, or even create a custom stand for the mirror.
- Practice makes perfect: Once the mirror is assembled, practice opening and closing the panels to ensure they move smoothly.
Building a three-way mirror is a valuable and rewarding DIY project. Not only will you save money, but you will also have a custom-designed mirror that perfectly fits your needs. By following these steps, you can successfully create a functional and stylish three-way mirror for your home.

How To Make A Tutorial Diy Three Way Mirror Sewing

Cbhm Three Way Mirror For B Bedroom Diy Room

Do It Yourself Ladies Diyl 3 Way Mirror All You Need 1 Power Drill Long Mirrors 4 6 Door Hinges Some S Obvio Home Diy Remodel Bedroom

Diy Dollar Tree 3 Way Vanity Mirror

C Bryan S Furniture Projects Stickley End Table Diy Vanity Mirror Trifold

Diy Three Way Angled Mirror

3 Way Mirror Trifold Tri Fold Makeup Diy Haircut Tool To Self Cut Trim Or Shave At Home Travel With Height Adjustable Telescoping Hooks Com

Hair Cutting 3 Way Mirror Portable Trifold Diy Haircut Tools Glass Com

Pin By Christina Jones On Done It Three Way Mirror Diy Wardrobe Home

3 Way Mirror Trifold Tri Fold Makeup Diy Haircut Tool To Self Cut Trim Or Shave At Home Travel With Height Adjustable Telescoping Hooks Com

