How To Decorate A Mirror Frame With Beads
Decorating a mirror frame with beads is a simple yet effective way to add personality and flair to any living space. This project can be tailored to match diverse styles, from minimalist chic to bohemian exuberance, depending on the chosen bead types and arrangement. The following guide outlines the necessary materials and steps to achieve beautiful results.
Gathering the Necessary Materials
Before beginning, it is crucial to assemble all necessary materials to ensure a smooth and uninterrupted crafting process. Collecting everything in advance allows for better focus on the creative aspects of the project.
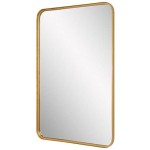
- Mirror with Frame: The frame serves as the base for the bead embellishments. Select a mirror with a frame that provides adequate surface area for beading. Wood, plastic, and metal frames are all suitable.
- Beads: The range of beads available is vast. Consider various sizes, shapes, colors, and materials like glass, wood, plastic, or metal to create a unique design. Variety adds visual interest and texture.
- Strong Adhesive: A robust adhesive is essential for securely attaching beads to the frame. Select an adhesive appropriate for the frame material and bead type. Consult product labeling for compatibility guidelines.
- Precision Applicator: A precision applicator, such as a toothpick or craft syringe, allows for precise application of the adhesive, minimizing mess and ensuring a clean finish.
- Protective Covering: Protecting the mirror surface is vital. Masking tape or newspaper prevents adhesive or beads from accidentally marring the glass. This step simplifies cleanup.
- Tweezers (Optional): Tweezers can be helpful for placing smaller beads or achieving intricate designs. They offer greater control and precision than fingers.
- Design Template (Optional): A pre-planned design template can be useful, especially for complex patterns. This ensures symmetry and consistency in the final result.
Preparing the Mirror and Frame
Proper preparation guarantees successful adhesion and a polished final product. Following these steps will contribute to a cleaner and more professional outcome.
- Clean the Frame: Thoroughly clean the mirror frame with a suitable cleaning solution to remove any dust, dirt, or grease. This ensures optimal adhesion of the beads and prevents them from falling off later.
- Protect the Mirror: Carefully cover the mirror surface with masking tape or newspaper, leaving only the frame exposed. This prevents accidental damage and simplifies cleaning.
- Dry the Frame: Ensure the frame is completely dry before starting the beading process. Moisture can interfere with adhesive bonding.
Applying the Beads
The application process requires patience and precision. Taking time and care during this stage ensures a polished and professional-looking finished product.
- Apply Adhesive: Using the precision applicator, apply a small amount of adhesive to a section of the frame. Avoid applying adhesive to the entire frame at once, as it can dry prematurely.
- Place Beads: Carefully place the beads onto the adhesive according to the desired design. Press gently to secure them in place.
- Maintain Consistency: Work in small sections, applying adhesive and placing beads methodically. This ensures a consistent application and prevents the adhesive from drying out.
- Adjust as Needed: If a bead is misplaced, adjust it immediately before the adhesive sets. Tweezers can be helpful for making minor adjustments.
Drying and Finishing
Allowing adequate drying time ensures the beads remain securely attached to the frame. Rushing this process can compromise the integrity of the finished product.
- Drying Time: Allow the adhesive to dry completely according to the manufacturer's instructions. Avoid touching or moving the mirror during this time.
- Remove Protective Covering: Once the adhesive is dry, carefully remove the masking tape or newspaper from the mirror surface.
- Inspect and Touch Up: Inspect the finished frame for any loose or missing beads. Apply additional adhesive and reattach beads as needed.
Choosing a Beading Pattern
A well-chosen beading pattern enhances the overall aesthetic of the finished mirror. Selecting a pattern beforehand can significantly impact the final design.
- Uniform Patterns: Covering the entire frame with a single type and size of bead creates a simple yet elegant look.
- Alternating Patterns: Alternating different colors, sizes, or shapes of beads adds visual interest and dimension. Consider alternating large and small beads or different colored beads.
- Geometric Patterns: Create geometric patterns by arranging the beads in specific shapes or lines. This requires careful planning and execution.
- Freeform Designs: Embrace a more organic and spontaneous approach by arranging beads without a predetermined pattern. This allows for greater creative freedom.
Working with Different Bead Types
Understanding the characteristics of different bead types helps in selecting the right beads for a project and using the appropriate techniques during application.
- Seed Beads: These small beads are ideal for intricate details and filling in spaces. They can be woven, strung, or glued.
- Bugle Beads: These elongated beads add texture and can be used to create lines or patterns.
- Pony Beads: Larger than seed beads, pony beads are versatile and work well for bolder designs.
- Crystal Beads: These beads add sparkle and elegance. They are available in various shapes and sizes.
- Wooden Beads: These beads offer a natural and rustic look. They can be painted or left natural.
Maintaining the Beaded Mirror Frame
Maintaining the beaded mirror frame properly keeps it looking its best and ensures its longevity.
- Dusting: Regularly dust the frame with a soft, dry cloth or a feather duster to prevent dust buildup.
- Cleaning: For more thorough cleaning, use a slightly damp cloth. Avoid using harsh chemicals that could damage the beads or adhesive.
- Handling: Handle the mirror with care to avoid dislodging any beads.

Simple Inexpensive Easy Diy Beaded Mirrors Artsy Rule Mirror

Diy Beaded Glass Framed Mirror Crafty Nest

How To Make A Unique Diy Beaded Wall Mirror Art

Diy Mirror Frame Ideas You Can Make With Junk Reuse Repurpose Upcycle Jewelry Frames

Diy Metallic Gold Wall Decor Beaded Leaf Mirror Design

45 Gorgeous Glass Gems Craft Ideas Decorated Mirror Diy Decor Decorate Frame

Craft Ideas 2067 Pandahall Com Beaded Mirror Old Jewelry Crafts Vintage Diy

Full Length Wood Bead Mirror Diy Thistlewood Farm

Diy Farmhouse Beaded Mirror

Designer Dupe Diy Bauble Mirror The Collected House