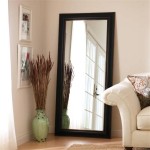
Full-Length Mirror with Storage Inside DIY
A full-length mirror is a staple in many homes, providing a convenient way to check one's appearance before heading out. Combining this functionality with hidden storage can significantly enhance its utility, particularly in smaller spaces where maximizing storage is crucial. Building a DIY full-length mirror with built-in storage offers a customizable solution to suit individual needs and aesthetics while potentially saving money compared to purchasing a pre-made unit.
Planning and Design
Careful planning is the foundation of any successful DIY project. For a full-length mirror with storage, this involves determining the desired dimensions, storage capacity, and overall style. Accurate measurements of the intended location are vital to ensure a proper fit. Sketching the design, including the frame, storage compartments, and door mechanism, can help visualize the final product and identify potential challenges early on. Consider the existing décor and choose materials and finishes that complement the surrounding environment.
Storage needs should dictate the internal configuration. Shelving is suitable for folded clothes, shoes, or accessories, while drawers might be preferable for smaller items or items requiring more concealment. The depth of the storage area will influence the overall depth of the mirror unit and should be considered in relation to the available space. Planning the door mechanism, whether hinged, sliding, or bi-fold, is another crucial design element. Each mechanism has its advantages and disadvantages regarding space requirements and ease of access.
Material Selection and Preparation
The choice of materials impacts the project's durability, aesthetics, and cost. Common options for the frame include wood, MDF, or plywood. Wood offers a classic look and can be stained or painted, while MDF and plywood provide a more affordable and readily available alternative. The mirror itself can be purchased pre-cut to the desired dimensions from glass suppliers or hardware stores. For the storage compartments, consider using lighter materials like plywood or even repurposed shelving units to minimize the overall weight. Hardware, such as hinges, drawer slides, handles, and screws, should be selected based on the chosen design and materials.
Before assembly, ensure all materials are properly prepared. Wood may require sanding and priming before painting or staining. MDF and plywood should be sealed to prevent moisture absorption. Accurate cutting of the frame and storage components is crucial for a clean and professional-looking finished product. Using a miter saw for angled cuts and a table saw or circular saw for straight cuts ensures precision. Mark all cut lines carefully and double-check measurements to avoid costly mistakes.
Assembly and Finishing
Assembling the frame is typically the first step. Depending on the chosen material and design, wood glue, screws, or a combination of both can be used to join the frame pieces. Ensure the frame is square and secure before proceeding. Next, construct the storage compartments according to the planned design. This might involve building shelves, installing drawers, or attaching pre-made storage units. Securely attach the storage components to the frame, ensuring they are level and stable.
Once the frame and storage are assembled, carefully install the mirror. Mirror adhesive or clips can be used to secure the mirror to the backing of the frame. Ensure the mirror is centered and properly aligned. Finally, install the chosen door mechanism. This might involve attaching hinges, installing sliding tracks, or mounting bi-fold hardware. Test the door mechanism to ensure smooth and proper operation. Finishing touches, such as painting or staining the frame, adding decorative trim, or installing handles, can enhance the overall appearance and personalize the mirror.
Safety Considerations
Working with large mirrors and power tools requires careful attention to safety. Always wear appropriate safety glasses when cutting materials or working with the mirror. Gloves can protect hands from splinters and sharp edges. When handling the mirror, use caution to avoid breakage. Consider using a mirror handling suction cup for larger mirrors. Properly dispose of any broken glass fragments immediately. Ensure adequate ventilation when working with paints, stains, or adhesives.
Securely anchoring the finished mirror to the wall is crucial, especially in households with children or pets. Use appropriate wall anchors and screws to prevent tipping and ensure stability. Consult local building codes for specific anchoring requirements. Regularly inspect the mirror and its hardware for any signs of damage or wear and tear. Addressing any issues promptly can prevent potential hazards.

Diy Bathroom Mirror Storage Case Shanty 2 Chic

Diy Bathroom Mirror Storage Case Shanty 2 Chic

How To Build A Sliding Mirror Jewelry Cabinet Designed Decor

Full Length Mirror With Sliding Storage Cabinet Ana White

Pin On Diy Projects

How To Build A Mirrored Wall Mount Jewelry Cabinet Interior Frugalista

Easy Diy Storage Ideas The Owner Builder Network Home Decor Interior

Diy Jewelry Organizer Shanty 2 Chic
Jewelry Storage Mirror Diy A Beautiful Mess

Full Length Mirror With Sliding Storage Cabinet Ana White


