How To Frame a Mirror with Clips
Framing a mirror with clips offers a sleek, modern alternative to traditional framing methods. This approach provides a minimalist aesthetic while securing the mirror safely. This article details the process of framing a mirror using clips, outlining the necessary materials, tools, and steps for successful completion.
Necessary Materials
Gathering the correct materials beforehand streamlines the framing process. The following items are essential:
- Mirror clips designed for the mirror's thickness and weight.
- Framing material (wood, metal, or plastic).
- Measuring tape or ruler.
- Pencil or marker.
- Screws appropriate for the framing material and wall type.
- Drill with appropriate drill bits.
- Level.
- Safety glasses.
- (Optional) Shims for uneven walls.
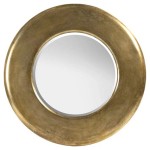
Choosing the Right Clips
Mirror clips come in various sizes, shapes, and materials. Selecting the correct clip is crucial for both aesthetics and functionality. Consider these factors:
- Mirror thickness: Clips are designed for specific thickness ranges. Using the wrong clip can lead to instability or damage the mirror.
- Mirror weight: Heavier mirrors require more robust clips. Ensure the chosen clips can support the mirror's weight.
- Material: Clips are typically made of metal or plastic. Metal offers greater strength and durability, while plastic can be a more cost-effective option for lighter mirrors.
- Style: Clips come in various styles, from simple and functional to decorative and ornate. Choose a style that complements the mirror and the surrounding décor.
Preparing the Frame
Accurate measurements and precise cuts are crucial for a professional-looking finished product. The following steps outline frame preparation:
- Measure the mirror: Precisely measure the mirror's length and width to determine the required frame dimensions.
- Cut the frame material: Cut the framing material according to the measured dimensions, ensuring 45-degree angles for mitered corners if desired.
- Finish the frame: Sand and finish the frame material as desired before attaching the clips. This includes painting, staining, or sealing the frame.
Attaching the Clips to the Frame
Proper placement and secure attachment of the clips are paramount for a sturdy and stable frame. Adhere to these guidelines:
- Mark clip positions: Carefully mark the desired positions of the clips on the back of the frame. Evenly spaced clips provide optimal support.
- Pre-drill holes: Pre-drilling pilot holes prevents the frame material from splitting when inserting screws.
- Attach the clips: Securely attach the clips to the frame using appropriate screws.
Mounting the Framed Mirror
Mounting the framed mirror requires careful attention to detail and precise execution. Follow these steps:
- Position the mirror: Carefully position the mirror within the frame, ensuring it sits flush against the back of the frame.
- Secure the mirror with clips: Gently tighten the clips to secure the mirror in place. Avoid over-tightening, which could damage the mirror or frame.
- Mark wall mounting points: Hold the framed mirror against the wall in the desired location and mark the mounting points.
- Drill mounting holes: Drill holes at the marked points using appropriate drill bits for the wall type.
- Insert wall anchors (if necessary): For heavier mirrors or less stable wall types, insert wall anchors into the drilled holes.
- Mount the framed mirror: Securely mount the framed mirror to the wall using appropriate screws.
- Use a level: Throughout the mounting process, use a level to ensure the mirror hangs straight.
Final Adjustments and Considerations
After mounting, minor adjustments might be necessary for a perfect finish. Consider these points:
- Check for stability: Ensure the mirror is securely mounted and does not wobble or shift.
- Adjust clip tightness: Make any necessary adjustments to the clip tightness to ensure a snug fit without over-tightening.
- Clean the mirror Clean the mirror surface to remove any fingerprints or dust accumulated during the framing process.
Alternative Clip Styles and Applications
Beyond traditional clip styles, various other options exist, offering diverse aesthetic and functional benefits:
- Offset clips These clips create a subtle gap between the frame and the mirror, adding a layer of visual depth.
- Decorative clips Clips with ornate designs or finishes can enhance the overall aesthetic of the framed mirror.
- Concealed clips These clips are hidden from view, providing a seamless and minimalist appearance.
- French cleats For heavier mirrors, French cleats offer a more robust and secure mounting solution when used in conjunction with clips.

How To Frame A Bathroom Mirror Over Plastic Clips Somewhat Simple

How To Frame A Mirror With Clips In 5 Easy Steps

How To Frame A Bathroom Mirror Over Plastic Clips Somewhat Simple

How To Frame A Bathroom Mirror Over Plastic Clips Somewhat Simple

How To Build A Diy Frame Hang Over Bathroom Mirror Love Our Real Life

Diy Bathroom Mirror Frame Without Removing Clips Her Happy Home

How To Frame A Mirror With Clips In 5 Easy Steps

How To Frame A Mirror With Clips Glue The Wall

How To Frame A Bathroom Mirror

How To Frame A Bathroom Mirror Over Plastic Clips Somewhat Simple