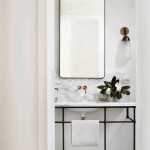
How to Frame a Bathroom Mirror with Pallet Wood
Adding a frame to a bathroom mirror can significantly enhance the aesthetic of the space. Pallet wood, with its rustic charm and sustainable appeal, offers an affordable and customizable option for framing. This article provides a comprehensive guide on how to frame a bathroom mirror using pallet wood, covering material selection, preparation, construction, and finishing touches.
Key Point 1: Preparing the Pallet Wood
The initial step involves sourcing and preparing the pallet wood. Pallets are commonly available from industrial areas, construction sites, and retail stores. Before acquiring any pallets, it's crucial to ascertain that they are safe for use. Look for the "HT" stamp, which indicates that the pallet has been heat-treated and is safe for indoor projects. Avoid pallets marked with "MB," as this signifies methyl bromide fumigation, a hazardous chemical.
Once a suitable pallet is obtained, dismantle it carefully. Pallet wood is often held together with nails or screws, which can be challenging to remove without damaging the wood. A pry bar, a hammer, and potentially a reciprocating saw can be used to disassemble the pallet. Exercise caution during this process to prevent injury.
After dismantling the pallet, the wood requires thorough cleaning. Use a stiff brush and soapy water to remove dirt, grime, and any loose debris. For stubborn stains or mildew, consider using a diluted bleach solution. Allow the wood to dry completely before proceeding.
Following cleaning, inspect the wood for any remaining nails, staples, or splinters. Remove these with pliers or a nail punch. Sanding the wood is essential to create a smooth and safe surface. Begin with a coarse grit sandpaper (e.g., 80-grit) to remove any imperfections and then progress to a finer grit (e.g., 120-grit or 220-grit) for a polished finish. The level of sanding will depend on the desired aesthetic – a rougher finish will retain more of the pallet's character, while a smoother finish will provide a more refined look.
Consider the dimensions of the mirror during the wood preparation stage. Determine the desired width of the frame and select pieces of pallet wood that are appropriate for this width. Account for any mitering or overlapping that will occur during the construction process.
Key Point 2: Constructing the Frame
With the pallet wood prepared, the next step involves constructing the frame. Accurately measuring the mirror is paramount to ensure a snug and professional-looking fit. Measure both the height and width of the mirror at multiple points, as mirrors are not always perfectly square.
Based on the measurements, cut the pallet wood to size. There are two primary methods for joining the frame pieces: butt joints and mitered joints. Butt joints are simpler to execute, involving cutting the wood pieces to the exact length and butting them together at the corners. Mitered joints, on the other hand, require cutting the wood at a 45-degree angle to create a seamless corner. Mitered joints offer a more refined appearance but require more precise cuts.
If using mitered joints, a miter saw is highly recommended for achieving accurate and consistent angles. An alternative is to use a miter box and a hand saw, although this requires more physical effort and precision. For butt joints, a standard circular saw or hand saw can be used.
Once the wood pieces are cut, assemble the frame using wood glue and nails or screws. Apply a generous amount of wood glue to the joining surfaces and clamp the pieces together until the glue dries. Reinforce the joints with nails or screws to provide additional strength. Ensure that the nails or screws are countersunk to prevent them from protruding from the surface.
Clamps are essential during the assembly process to ensure that the frame is square and the joints are tight. Use corner clamps or standard bar clamps to hold the frame in place while the glue dries. Allow the glue to dry completely, typically for at least 24 hours, before proceeding.
After the glue has dried, remove the clamps and inspect the frame for any gaps or imperfections. Fill any gaps with wood filler and sand smooth. Address any uneven surfaces with sandpaper to ensure a consistent finish.
Key Point 3: Attaching the Mirror and Applying Finishing Touches
Attaching the mirror to the frame requires careful consideration to ensure a secure and stable connection. Several methods can be employed, depending on the size and weight of the mirror and the design of the frame.
One common method involves using mirror clips or retaining clips. These clips are small metal or plastic brackets that are screwed into the frame and hold the mirror in place. Position the clips evenly around the perimeter of the mirror to distribute the weight and prevent it from slipping.
Another option is to use construction adhesive specifically designed for mirrors. Apply the adhesive to the back of the mirror in a serpentine pattern and carefully press it into the frame. Use spacers or shims to maintain a consistent gap between the mirror and the frame while the adhesive cures. Allow the adhesive to cure completely according to the manufacturer's instructions.
For larger or heavier mirrors, it may be necessary to create a recessed area on the back of the frame to provide additional support. This can be achieved by routing out a channel along the inner edge of the frame, allowing the mirror to sit flush with the back of the wood. This method requires more advanced woodworking skills but offers a more secure and professional installation.
Once the mirror is securely attached to the frame, apply the desired finishing touches. This may include staining, painting, or sealing the wood. If staining, choose a color that complements the bathroom décor. Apply the stain evenly and wipe off any excess with a clean cloth. Allow the stain to dry completely before proceeding.
If painting, use a primer to prepare the surface and ensure proper adhesion. Apply several thin coats of paint, allowing each coat to dry before applying the next. Consider using a paint specifically formulated for bathrooms to resist moisture and mildew.
Whether staining or painting, apply a clear sealant to protect the wood and enhance its durability. A polyurethane sealant is a good choice for bathrooms due to its water resistance. Apply several coats of sealant, allowing each coat to dry before applying the next.
Finally, inspect the frame for any imperfections and make any necessary touch-ups. Clean the mirror with a glass cleaner to remove any fingerprints or smudges. The framed mirror is now ready to be hung in the bathroom. Choose appropriate mounting hardware based on the weight of the mirror and the type of wall. Ensure that the mirror is securely mounted to prevent it from falling.

Rachel Schultz Framing A Bathroom Mirror With Pallets

Rachel Schultz Framing A Bathroom Mirror With Pallets

Rachel Schultz Framing A Bathroom Mirror With Pallets

Diy Pallet Bathroom Vanity And Mirror Pallets Pro

Bathroom Renovation Diy Mirror Makeover My Happy Simple Living

Diy Rustic Farmhouse Pallet Wood Round Mirror

How To Frame A Bathroom Mirror Mirrors Diy Pallet Shelves

How To Build And Decorate With Rustic Mirror Frames

Pallet Bathroom Mirror Shelf Diy 101 Pallets

How To Frame A Bathroom Mirror The Creative Mom