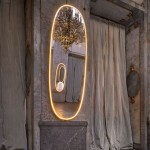
Crafting an Elegant and Functional DIY Full-Length Mirror Jewelry Cabinet
Jewelry, a precious adornment that enhances our style and complements our wardrobe. However, storing and organizing it can be a constant challenge, often resulting in tangled necklaces, lost earrings, and a cluttered vanity. To solve this dilemma, embark on a rewarding DIY project to create a full-length mirror jewelry cabinet, a functional and stylish solution that will elevate your space.
Benefits of a DIY Full-Length Mirror Jewelry Cabinet
A custom-crafted mirror jewelry cabinet offers an array of advantages:
- Organization: Ample storage compartments and compartments keep your jewelry meticulously organized, preventing tangling or loss.
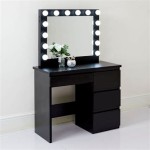
- Accessibility: A full-length mirror provides a convenient way to admire your appearance while accessorizing.
- Space-Saving: The cabinet's slim profile and wall-mounted design maximize space utilization, keeping your room clutter-free.
- Customization: Personalize your cabinet to match your decor and storage needs by choosing the size, finish, and interior layout.
Materials and Tools Required
Gather the necessary materials and tools before starting your project:
- Full-length mirror
- Plywood or MDF (for the cabinet frame)
- Wood glue
- Nails or screws
- Cabinet hinges
- Jewelry organizers (such as necklace hooks, ring inserts, and earring holders)
- Paint or stain (optional)
- Wall mount
- Basic carpentry tools (saw, drill, sander, etc.)
Step-by-Step Instructions
Step 1: Create the Cabinet Frame: Cut the plywood or MDF to the desired size of the cabinet frame. Assemble the frame using wood glue and nails or screws.
Step 2: Install the Mirror: Carefully place the mirror inside the frame and secure it using mirror clips or adhesive.
Step 3: Add the Jewelry Organizers: Install necklace hooks, ring inserts, and earring holders inside the cabinet based on your preferences and storage requirements.
Step 4: Attach the Cabinet Door: Build a small door and attach it to the front of the cabinet using cabinet hinges.
Step 5: Finish and Mount: Paint or stain the cabinet to match your decor. Mount the cabinet on the wall using a suitable wall mount.
Tips for Success
- Measure accurately to ensure a proper fit for the mirror and jewelry organizers.
- Use high-quality materials and sturdy construction to ensure durability.
- Consider adding lighting inside the cabinet for better visibility.
- Customize the cabinet's interior to meet your specific storage needs.
- Hang the cabinet at an appropriate height for convenient use and full-body reflection.
Conclusion
With a little planning and effort, you can craft a beautiful and functional DIY full-length mirror jewelry cabinet that will keep your accessories organized, accessible, and stylishly displayed. This custom-made solution not only enhances your space but also simplifies your jewelry routine, allowing you to shine with confidence every day.

How To Build A Mirrored Wall Mount Jewelry Cabinet Interior Frugalista

Diy Full Length Mirror With Storage Addicted 2

Diy Jewelry Organizer Shanty 2 Chic

How To Build A Mirrored Wall Mount Jewelry Cabinet Interior Frugalista

Diy Jewelry Organizer Shanty 2 Chic

How To Build A Sliding Mirror Jewelry Cabinet Designed Decor

Diy Jewelry Organizer Shanty 2 Chic

How To Build A Mirrored Wall Mount Jewelry Cabinet Interior Frugalista

Diy Full Length Mirror With Storage Addicted 2

How To Build A Sliding Mirror Jewelry Cabinet Designed Decor