How To Make an Antique-Looking Mirror
Creating an antique-looking mirror involves replicating the effects of time and wear on a standard mirror. Several techniques can achieve this aged appearance, allowing for customization based on the desired level of antiquity and the overall aesthetic.
One primary method utilizes specialized antiquing solutions. These commercially available products are typically applied to the back of the mirror's reflective surface. Following the manufacturer's instructions is crucial, as application methods and drying times vary between products. Some solutions create a subtle aged effect, while others produce a more pronounced, heavily antiqued look. Depending on the product, the antiquing process may involve multiple coats or specific drying techniques, such as exposing the treated surface to heat or moisture.
Alternatively, a DIY approach can be employed using various materials. A diluted mixture of hydrochloric acid and water can be carefully applied to the back of the mirror. This method requires extreme caution due to the corrosive nature of hydrochloric acid. Appropriate safety gear, such as gloves and eye protection, is essential. The acid mixture etches the mirror's silvering, creating a speckled, aged appearance. Controlling the dilution ratio and application time allows for varying degrees of antiquing, from a lightly speckled effect to a more heavily deteriorated look. Thorough rinsing and drying are critical after applying the acid solution to neutralize the corrosive process and prevent ongoing damage.
Another DIY method involves applying a mixture of vinegar and water to the back of the mirror. This less aggressive approach gently degrades the reflective backing, creating a subtler antique effect. Multiple applications may be necessary to achieve the desired level of aging. As with the acid method, proper ventilation is important when working with vinegar solutions.
Beyond chemical solutions, a variety of paint techniques can contribute to an antique aesthetic. Applying a layer of black paint to the back of the mirror and then partially removing it can mimic the look of aged, flaking silvering. This technique offers significant control over the final appearance, as specific areas can be targeted for paint removal, creating customized patterns of wear and tear. Acrylic paints are often preferred for this method due to their versatility and ease of manipulation.
Adding a layer of tinted varnish or glaze over the painted backing can further enhance the aged effect. Tinted varnishes can create a subtle, overall discoloration, mimicking the effects of time on glass and reflective surfaces. Experimenting with different varnish colors allows for customized antique finishes, ranging from warm browns and yellows to cooler grays and blues.
Creating faux "spots" and "blemishes" using dark paint or a combination of paint and clear resin can add another dimension of realism. These details can simulate specific types of deterioration often seen in genuine antique mirrors, such as small areas of corrosion or discoloration. Careful placement and varying sizes of these blemishes can enhance the overall illusion of age.
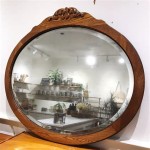
Framing plays a significant role in the final impression of an antique mirror. Choosing a frame with an aged or distressed finish complements the antiquing techniques applied to the mirror itself. Ornate frames with carved details or chipped paint can contribute to the overall antique aesthetic. Alternatively, a simple, weathered wooden frame can provide a more understated, rustic charm.
When working with any of these methods, proper preparation is essential. The mirror surface should be thoroughly cleaned and dried before any antiquing solutions or paints are applied. This ensures even application and prevents imperfections in the final finish. Working in a well-ventilated area is crucial, especially when using chemical solutions or spray paints. Protecting surrounding surfaces with drop cloths or newspaper is also recommended.
Experimentation is key to achieving the desired antique effect. Testing the chosen technique on a small, inconspicuous area of the mirror is advisable before applying it to the entire surface. This allows for adjustments to the solution concentration, application method, or paint colors. Multiple layers or applications may be required to achieve the desired level of antiquing, and patience is crucial throughout the process.
Finally, understanding the characteristics of genuine antique mirrors can inform the chosen techniques. Researching different eras and styles of antique mirrors can provide inspiration and guidance for replicating specific antique looks. Observing the subtle nuances of genuine antique mirrors, such as the variations in silvering deterioration and the types of imperfections present, can significantly enhance the authenticity of the finished product.

The Ultimate Guide On Diy Antique Mirrors So Much Better With Age

Diy Antique Mirror Easy To Do And Looks Authentic My Creative Days

The Ultimate Guide On Diy Antique Mirrors So Much Better With Age

How To Antique A Mirror Tutorial Jenna Sue Design

How To Antique A Mirror Easy No Scratching The Navage Patch

10 Tutorials On How To Antique A Mirror So Much Better With Age

How To Diy Antique Mirror Frame With Gilding Wax Open Doors Hearts

How To Antique A Mirror Tutorial Jenna Sue Design

Anthropologie Inspired Diy French Gold Mirror So Much Better With Age

How To Antique A Mirror Tutorial Jenna Sue Design

