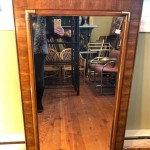
Gluing a Wood Frame to a Mirror: A Comprehensive Guide
Adding a wood frame to a mirror elevates its aesthetic appeal and integrates it seamlessly into any decor. While specialized clips and brackets offer framing solutions, gluing provides a clean, minimalist look, particularly beneficial for thinner frames. This guide offers a comprehensive overview of the process, highlighting essential materials, preparation steps, and gluing techniques for a secure and lasting bond.
Choosing the Right Adhesive
Adhesive selection plays a crucial role in the success of this project. The adhesive must bond effectively with both glass and wood, offer sufficient strength to support the frame's weight, and remain flexible enough to accommodate slight movements due to temperature and humidity changes. Common options include:
- Neutral cure silicone sealant: A versatile option known for its strong adhesion, flexibility, and resistance to moisture. It's ideal for bathroom mirrors or areas with high humidity.
- Construction adhesive: Provides excellent bonding strength and is suitable for heavier frames. Ensure the chosen adhesive is specifically formulated for use with glass.
- Mirror mastic: Specifically designed for adhering mirrors and other glass surfaces, mirror mastic offers high strength and a fast-setting formula.
Avoid using superglue or cyanoacrylate adhesives, as these can create brittle bonds that are prone to cracking under stress. Similarly, avoid acidic silicone sealants, which can damage the mirror's backing.
Preparing the Mirror and Frame
Proper preparation is paramount for achieving a strong and lasting bond. Begin by thoroughly cleaning both the mirror and the frame surfaces where the adhesive will be applied. Use a glass cleaner for the mirror and a damp cloth for the frame to remove dust, dirt, and any residual oils.
For optimal adhesion, lightly sand the frame's back surface where it will contact the mirror. This creates a slightly rougher texture that promotes better bonding. After sanding, wipe away any dust with a clean, dry cloth.
If applying the frame to a pre-existing mirror already mounted on a wall, ensure adequate support for the mirror during the gluing process. Temporary supports or bracing can prevent shifting and ensure proper alignment.
Applying the Adhesive
Apply the chosen adhesive to the back of the wood frame where it will contact the mirror. For liquid adhesives, use a caulking gun to dispense a continuous bead along the inner edge of the frame. For thicker adhesives, consider using a notched trowel to create ridges that ensure even coverage and allow for airflow during curing.
Avoid applying excessive adhesive, as this can squeeze out and create a messy finish. The adhesive should be sufficient to create a secure bond but not so much that it overflows.
Positioning and Securing the Frame
Carefully position the frame onto the mirror's edge, ensuring proper alignment. Apply gentle but firm pressure to distribute the adhesive evenly and create a strong bond. Use painter's tape or clamps to hold the frame in place while the adhesive cures. Follow the manufacturer's instructions for the recommended curing time, which typically ranges from a few hours to 24 hours.
If using clamps, ensure they are padded to prevent damage to the frame or mirror. Distribute the clamps evenly around the frame's perimeter to maintain consistent pressure.
Finishing Touches
Once the adhesive has fully cured, carefully remove any excess adhesive using a razor blade or a specialized adhesive remover. Be cautious not to scratch the mirror or frame during this process. If using a solvent-based adhesive remover, ensure adequate ventilation.
Safety Precautions
When working with adhesives, always follow the manufacturer's safety instructions. Wear appropriate personal protective equipment, such as gloves and eye protection. Work in a well-ventilated area to avoid inhaling fumes. Keep adhesives away from children and pets.
Troubleshooting Common Issues
If the frame doesn't adhere properly, it may be due to insufficient surface preparation, inadequate adhesive, or improper clamping pressure. Ensure both surfaces are clean and dry before applying the adhesive. Use an appropriate amount of adhesive and apply consistent clamping pressure during the curing process. If the frame still doesn't adhere, consider using a stronger adhesive or consulting a professional.

Diy Stick On Mirror Frame Sawdust Sisters

Mirror Frame Diy How To Update A Basic Bathroom Our Faux Farmhouse

How To Build A Diy Frame Hang Over Bathroom Mirror Love Our Real Life

How To Add A Diy Wood Frame Bathroom Mirror

Mirror Frame Diy How To Update A Basic Bathroom Our Faux Farmhouse

How To Make A Simple Mirror Frame With Wood Upgrade An Old

How To Glue Wood A Mirror Surface Hunker

How To Build A Diy Frame Hang Over Bathroom Mirror Love Our Real Life

Diy Stick On Mirror Frame Sawdust Sisters

Diy Wood Mirror Frame For Bathroom Vanity Tidbits