Elevate Your Décor with a DIY Mirror Frame Crown Molding
Mirror frames can transform a room, adding a touch of elegance and sophistication. While purchasing a pre-made frame with crown molding might seem like the easier option, creating your own DIY mirror frame using crown molding allows for a more personalized and budget-friendly approach. This project is achievable for those with basic DIY skills and provides a rewarding experience of crafting a unique piece for your home.
Gathering Your Materials
Before embarking on your project, ensure you have all the necessary materials. This includes:
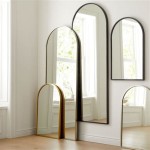
- Mirror: Choose a mirror that aligns with your desired size and style.
- Crown Molding: Select crown molding that complements the décor of your room. Consider the material, size, and design of the molding.
- Wood Glue: Choose a quality wood glue for strong adhesion.
- Finishing Nails: These will secure the molding to the mirror.
- Wood Filler: Use wood filler to conceal any gaps or imperfections.
- Sandpaper: Choose various grits for smoothing the surface.
- Primer: A primer will create a smooth surface for paint.
- Paint: Select a paint color that complements your décor and the crown molding.
- Paintbrush and Roller: These tools will apply the primer and paint evenly.
- Measuring Tape: Accurate measurements are crucial for a cohesive frame.
- Miter Saw or Jigsaw: These tools will cut the crown molding to the desired lengths.
- Clamps: Clamps will hold the molding in place while the glue dries.
It is advisable to purchase extra crown molding to account for potential errors during cutting. Having spare pieces provides room for adjustments and ensures a smooth completion of the project.
Crafting the Frame
Once you have gathered all the materials, begin the process of creating the frame by:
- Measuring the Mirror: Measure the length and width of the mirror accurately. Add the desired width of the crown molding to each side to determine the overall dimensions of the frame.
- Cutting the Crown Molding: Using a miter saw or jigsaw, cut the crown molding to the required lengths. Ensure that the mitered corners are precise for a clean and professional finish.
- Assembling the Frame: Apply wood glue to the mitered corners of the crown molding and carefully join them together. Use clamps to hold the corners firmly in place until the glue dries. Ensure the frame is square before securing it.
- Attaching the Frame to the Mirror: Once the glue has dried, attach the frame to the mirror using finishing nails. Drive the nails carefully to avoid damaging the mirror. Consider using a nail gun for a faster and more secure attachment.
- Filling Gaps and Imperfections: Examine the frame for any gaps or imperfections. Use wood filler to smooth out these areas. Allow the filler to dry completely before sanding.
- Sanding and Priming: Sand the frame thoroughly using various grits of sandpaper to achieve a smooth surface. Apply a primer to the entire frame to create an even base for the paint. Allow the primer to dry completely before proceeding.
- Painting the Frame: Paint the frame with your chosen color using a paintbrush or roller. Allow the paint to dry completely before handling the mirror. Apply additional coats if necessary to achieve the desired coverage and finish.
Enhancing Your Creation
After completing the basic framing process, you can enhance your DIY mirror frame with additional elements:
- Adding Decorative Elements: Consider adding decorative accents like moldings, trim, or even a small shelf to enhance the frame's visual appeal. These elements can complement the room's décor and highlight the mirror.
- Employing Different Finishes: Explore various finishes such as distressing, waxing, or glazing to create unique and personalized looks.
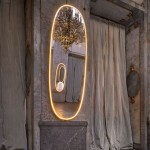
- Incorporating Lighting: Consider integrating lighting elements around the mirror frame to create a dramatic and eye-catching focal point. This can enhance the room's ambiance and functionality.
Creating a DIY mirror frame with crown molding offers a rewarding experience of transforming a simple mirror into a statement piece. With careful planning and execution, you can achieve a unique and beautiful addition to your home décor that reflects your personal style and creativity.

Bathroom Mirror Framed With Crown Molding Large Mirrors Frame Makeover

Bathroom Mirror Framed With Crown Molding Frame Mirrors Diy Large

Crafty Again

Mirror Molding Framing A With Crown Mirrormate

Crown Molding Shelves Foter Home Decor House Design

Crafty Again

Framing A Builder Grade Mirror That Is Not Between Two Walls

How To Frame A Mirror Sand And Sisal

How To Frame A Bathroom Mirror Nest For Less

How To Upgrade Your Builder Grade Mirror Frame It