Building a Wood Frame for Your Mirror
A simple wood frame can elevate the look of any mirror, adding warmth, texture, and a touch of personality to your decor. Whether you're aiming for a rustic, modern, or traditional aesthetic, building a wood frame yourself is a rewarding DIY project that allows you to customize the design to your liking. This guide will provide a step-by-step walkthrough of the process, equipping you with the knowledge and skills to create a beautiful and functional mirror frame.
Step 1: Gather Your Materials and Tools
Before embarking on your framing project, ensure you have all the necessary materials and tools at hand. This will streamline the process and minimize potential delays. Here's a comprehensive list:
- Wood: Select your preferred wood type based on your desired aesthetic and budget. Common choices include pine, oak, walnut, and cedar. Consider using pre-cut molding or buying raw lumber and cutting it to size.
- Mirror: Choose a mirror that fits your frame design and the space you intend to place it. Ensure the dimensions are compatible with the frame.
- Wood Glue: Use a high-quality wood glue for a strong and durable bond between the frame pieces.
- Wood Filler: Fill any gaps or imperfections in the wood using a wood filler that matches the color of your chosen wood.
- Sandpaper (various grits): Sand the wood to achieve a smooth and even surface. Use progressively finer grits for a polished finish.
- Wood Stain or Paint: Apply a stain or paint to enhance the wood's natural color or create a desired finish.
- Paintbrush or Stain Brush: Use an appropriate brush for applying stain or paint evenly.
- Finishing Oil or Wax: Protect the wood with a layer of finishing oil or wax to enhance its durability and appearance.
- Measuring Tape: Accurately measure the mirror and wood pieces.
- Saw (Mitre Saw or Hand Saw): Cut the wood to size. A mitre saw provides precise cuts for perfect corners, while a hand saw can be used for simpler projects.
- Clamps: Secure the frame pieces together while the glue dries.
- Screwdriver or Drill: If necessary, use screws to reinforce the frame.
- Safety Glasses and Mask: Protect your eyes and lungs from sawdust and other particles during cutting and sanding.
Step 2: Measuring and Cutting the Frame
Precision is key when cutting the frame pieces, ensuring a well-proportioned and aesthetically pleasing final product. Begin by measuring the mirror carefully, adding the desired frame width to each side to determine the length and width of the frame pieces. For a standard frame, each piece will be equal in length and width. However, for more elaborate designs, the pieces may vary in size.
Once you have determined the dimensions, use a saw to cut the wood to the desired lengths. If using a mitre saw, set the angle to 45 degrees to create perfect mitre joints, which provide a seamless appearance. For hand-cut frames, use a pencil to mark the cut lines and carefully saw along the lines for clean, accurate cuts.
Step 3: Assembling the Frame
With the frame pieces cut, it's time to assemble them into a complete frame. Start by applying a thin layer of wood glue to the cut edges of each piece. Then, carefully align the pieces at the corners, ensuring they are flush and form a perfect right angle. Secure the joints with clamps, applying even pressure to ensure a strong bond.
For added strength, consider using screws to reinforce the corners. Drill pilot holes slightly smaller than the screws to prevent splitting the wood. After the glue has set, remove the clamps and inspect the frame for any imperfections. Fill any gaps or unevenness with wood filler, allowing it to dry completely before sanding.
Step 4: Finishing Touches
The final steps involve refining the frame's appearance and protecting the wood. Begin by sanding the frame thoroughly, using progressively finer grits of sandpaper to achieve a smooth and even finish. Start with a coarser grit to remove any rough edges, then move to finer grits to create a polished surface.
Next, apply a wood stain or paint to enhance the wood's natural color or create a desired finish. If using stain, follow the manufacturer's instructions for proper application and drying time. If painting, apply thin coats of paint, allowing each coat to dry completely before applying the next.
Finally, protect the frame with a layer of finishing oil or wax. This will enhance the wood's durability, prevent moisture damage, and create a beautiful sheen. Apply the oil or wax evenly, allowing it to dry thoroughly before handling the frame.
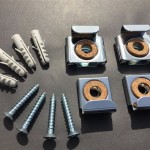
Once the frame is completely finished, attach the mirror to the back of the frame using mirror clips or a strong adhesive. Ensure the mirror is centered and level. Now you can enjoy your custom-built wood frame that perfectly complements your mirror and adds a touch of elegance to your space.

Iheart Organizing Diy Wood Framed Mirror

Diy Farmhouse Wood Frame Mirror She Gave It A Go

Wood Mirror Diy Shanty 2 Chic

Diy Wood Framed Bathroom Mirror Christina Maria Blog

Diy Rustic Wood Frame Mirror Amanda Katherine

Diy Reclaimed Wood Frames The Space Between

30 Diy Mirror Frames Scratch And Stitch

Diy Framed Mirror Jaime Costiglio

Mirror Frame Diy How To Update A Basic Bathroom Our Faux Farmhouse

How To Make A Simple Mirror Frame With Wood Upgrade An Old


