DIY Bathroom Mirror Frame Mosaic
A mosaic mirror frame adds a unique, artistic touch to any bathroom. Creating a mosaic frame is a rewarding DIY project achievable with readily available materials and some patience. This article provides a comprehensive guide to designing and installing your own mosaic mirror frame.
Planning and Preparation
Careful planning is crucial for a successful mosaic project. Begin by determining the desired size and shape of the frame. Measure the mirror precisely to ensure the frame fits correctly. Consider the existing bathroom décor and choose mosaic tiles that complement the color scheme and style. Sketching the design on paper beforehand helps visualize the final product and avoids potential design flaws during the installation process.
Choosing Materials
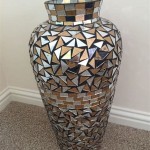
The type of tile used significantly impacts the aesthetic and durability of the mosaic. Glass tiles offer vibrant colors and are easy to clean, making them ideal for bathroom environments. Ceramic tiles provide a more rustic look and are also suitable for wet areas. Other options include porcelain, stone, and even broken pieces of pottery or china for a truly unique design. Selecting a suitable adhesive is equally important. Thin-set mortar is a popular choice for its strong bonding properties and water resistance, while specialized mosaic adhesives are also available.
Creating the Frame Base
The frame base provides a stable foundation for the mosaic. Plywood or MDF (medium-density fiberboard) are commonly used materials due to their affordability and ease of cutting. Cut the chosen material to the desired dimensions, ensuring the frame's inner edge leaves enough space for the mirror to fit snugly. A slightly larger outer edge provides ample space for the mosaic design. Sand the edges of the frame to create a smooth surface for tile adhesion.
Applying the Mosaic Tiles
Before applying the tiles, lay them out on the frame base to finalize the design. This allows adjustments and ensures a visually appealing arrangement. Once satisfied with the layout, begin applying the tiles using the chosen adhesive. Spread a thin layer of adhesive on the frame base and firmly press each tile into place. Maintain consistent spacing between tiles for a professional finish. Tile spacers can be helpful in achieving uniform grout lines.
Grouting the Mosaic
Grouting fills the spaces between the tiles, securing them in place and creating a waterproof seal. After the adhesive has fully cured (refer to the adhesive manufacturer's instructions), apply the grout using a grout float, pressing it firmly into the gaps. Remove excess grout with a damp sponge, being careful not to dislodge the tiles. Allow the grout to dry completely before cleaning the tiled surface.
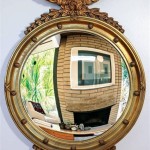
Installing the Mirror
Once the grout has dried, carefully insert the mirror into the frame. Secure the mirror using mirror adhesive or clips designed specifically for this purpose. Ensure the mirror is centered within the frame and sits flush against the backing. Seal the edges between the mirror and frame with silicone sealant to prevent moisture from entering behind the mirror.
Finishing Touches and Mounting
After the sealant has cured, any remaining grout haze can be removed with a grout haze remover. Add finishing touches such as decorative trim or paint to the frame's outer edges, if desired. Finally, mount the completed mosaic mirror frame to the bathroom wall using appropriate hardware, ensuring it is securely fastened.
Safety Precautions
Throughout the project, prioritize safety. Wear safety glasses when cutting tiles and using power tools. Gloves should be worn when handling adhesives and grout to protect skin. Work in a well-ventilated area when using adhesives and sealants. Always follow manufacturer instructions for all materials and tools.
Troubleshooting
Common issues during mosaic projects include uneven tile spacing, messy grout lines, and loose tiles. Careful planning, using appropriate tools like spacers, and following drying times for adhesives and grout can mitigate these problems. If tiles become loose after grouting, they can be re-adhered using additional adhesive.

Diy Mosaic Tile Bathroom Mirror Centsational Style

Diy Mosaic Tile Bathroom Mirror Centsational Style

How To Mosaic Tile A Mirror Caffeine And Cabernet

No Grout Mosaic Tile Mirror The Diy Village

How To Mosaic Tile A Mirror Caffeine And Cabernet

Diy Mosaic Tile Bathroom Mirror Centsational Style

Diy Mosaic Wood Tile Mirror Frame Addicted 2 Decorating

Diy Mirror Frame With Glass Mosaic Tile Armchair Builder Blog Build Renovate Repair Your Own Home Save Money As An Owner

Diy Mosaic Tile Bathroom Mirror Centsational Style

How To Decorate A Mirror With Tile Sand And Sisal