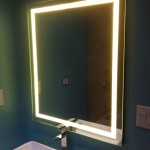
DIY Bathroom Mirror Frame Tile
A tiled mirror frame elevates a standard bathroom mirror, transforming it into a stylish focal point. This project is accessible to DIY enthusiasts of varying skill levels and provides a significant visual upgrade without requiring a complete bathroom renovation. This article will guide you through the process of creating a beautiful and durable tiled mirror frame.
Planning and Preparation
Accurate measurements are crucial for success. Measure the mirror's dimensions precisely and decide on the desired width of the tile frame. This will determine the quantity of tiles needed. Factor in the spacing between tiles, typically 1/8" to 1/4". Sketching the design on paper can be helpful in visualizing the final product and calculating material requirements.
Choosing the appropriate tile is another important consideration. Smaller tiles, such as mosaic or subway tiles, generally work well for intricate designs and curved edges. Larger tiles create a bolder, more contemporary look. Consider the bathroom's existing décor and choose tile that complements the overall style. Glass tiles offer a reflective quality, while ceramic and porcelain provide durability and a wide range of design options.
Gather all the necessary materials before beginning the project. This includes the chosen tiles, thin-set mortar, grout, spacers, a notched trowel, a tile cutter or wet saw (depending on the tile type), masking tape, a level, a measuring tape, and safety glasses.
Preparing the Mirror and Surface
Clean the mirror surface thoroughly with glass cleaner to ensure proper adhesion of the masking tape. Apply masking tape carefully along the mirror’s edge, creating a straight line that delineates the inner boundary of the tile frame. This protects the mirror from scratches and mortar residue. Clean the wall surface around the mirror to remove any dust, dirt, or grease. If the existing paint is glossy, lightly sanding the surface can improve adhesion.
Applying the Tiles
Mix the thin-set mortar according to the manufacturer's instructions. Using the notched trowel, apply a thin, even layer of mortar to a small section of the wall, covering an area slightly larger than the size of a few tiles. Begin placing the tiles onto the mortar bed, starting from one corner and working outwards. Insert spacers between each tile to maintain consistent spacing. Use a level to ensure the tiles are straight and flush with each other.
Continue applying mortar and setting tiles in small sections, allowing each section to set slightly before moving on. Periodically clean any excess mortar from the tile surfaces with a damp sponge before it dries. If necessary, use a tile cutter or wet saw to cut tiles to fit around the edges or corners of the mirror. For curved mirrors, specialized tile nippers may be required.
Grouting and Finishing
Once the thin-set mortar has cured completely (typically 24 hours), remove the spacers. Mix the grout following the manufacturer's instructions and apply it to the spaces between the tiles using a grout float, working it diagonally across the tile surface to fill the gaps completely. Remove excess grout with a damp sponge, being careful not to pull grout out of the joints. Allow the grout to dry according to the manufacturer's instructions. Once dry, buff the tiles with a clean cloth to remove any grout haze.
Sealing and Maintenance
Applying a grout sealer is highly recommended to protect the grout from moisture and staining, especially in a bathroom environment. Apply the sealer according to the manufacturer’s instructions. Regular cleaning with a mild soap and water solution will keep the tiled mirror frame looking its best. Avoid using harsh chemicals or abrasive cleaners that could damage the tile or grout.
Choosing the Right Adhesive
The adhesive used will depend on the weight of the tiles and the surface of the wall. Thin-set mortar is commonly used and suitable for most tile types. For heavier tiles or uneven surfaces, a stronger adhesive, such as a modified thin-set, may be necessary. Consult with a tile specialist if uncertain about which adhesive is appropriate for the chosen tiles and wall surface.
Dealing with Obstacles
Electrical outlets or light fixtures near the mirror may require careful planning and execution. Ensure the power is turned off before working near any electrical components. Measure and cut tiles precisely to fit around these obstacles. Specialized outlet extenders may be necessary if the tile frame adds significant depth to the wall.

Diy Mosaic Tile Bathroom Mirror Centsational Style

Diy Mosaic Tile Bathroom Mirror Centsational Style

Diy Mosaic Tile Bathroom Mirror Centsational Style

How To Mosaic Tile A Mirror Caffeine And Cabernet

Diy Mosaic Tile Bathroom Mirror Centsational Style

Mirror Frame Diy How To Update A Basic Bathroom Our Faux Farmhouse

How To Decorate A Mirror With Tile Sand And Sisal

Diy Framed Bathroom Mirrors Living With Lady

Diy Mosaic Wood Tile Mirror Frame Addicted 2 Decorating

Diy Mosaic Tile Bathroom Mirror Centsational Style