How To Remove A Glue Mirror From Wall
Removing a glued mirror from a wall can be a challenging task, requiring patience and the right approach. Improper removal can damage the wall, the mirror, or both. This guide outlines several methods for safely removing a glued mirror, ranging from simple techniques to more involved procedures.
Before beginning any removal process, it is crucial to protect the surrounding area. Lay down drop cloths or old blankets to catch any falling glass shards. Wearing safety glasses and work gloves is also highly recommended to prevent injury.
Method 1: Using a Wedge and Wire
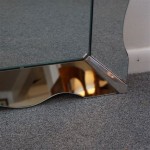
This method is best suited for smaller mirrors glued with construction adhesive or similar compounds. It involves inserting a thin, sturdy wire behind the mirror and using a wedge to create leverage. Dental floss or piano wire works well for the wire, while a putty knife or thin wooden wedge can serve as the lever. Start by carefully inserting the wire behind a corner of the mirror. Once a small gap is created, insert the wedge and gently tap it further in. Slowly and carefully work the wire across the back of the mirror, using a sawing motion to break the adhesive bond. As the wire progresses, insert additional wedges to maintain leverage and prevent the mirror from re-adhering. This method requires patience and a steady hand.
Method 2: Applying Heat
Heat can soften certain types of adhesive, making mirror removal easier. A hairdryer or heat gun can be used for this purpose. Direct the heat towards the back of the mirror, focusing on small sections at a time. Be careful not to overheat the mirror, as this can cause it to crack. As the adhesive softens, use a putty knife or similar tool to gently pry the mirror away from the wall. This method is most effective with adhesives that become pliable when heated. Test a small, inconspicuous area first to determine the adhesive's reaction to heat.
Method 3: Using Adhesive Remover
Commercial adhesive removers can be effective in dissolving the bond between the mirror and the wall. These products are available in various formulations, so choosing one appropriate for the specific type of adhesive is essential. Follow the manufacturer's instructions carefully. Typically, the remover is applied to the edges and back of the mirror, allowing it to penetrate and weaken the adhesive. After the recommended dwell time, attempt to pry the mirror away from the wall using a putty knife or similar tool. This method may require multiple applications, depending on the adhesive's strength.
Method 4: Using a Hammer and Chisel
This method is best used as a last resort, as it carries a higher risk of damaging the wall. It is typically employed when other methods have failed or are unsuitable due to the mirror's size or type of adhesive. Cover the entire mirror surface with masking tape to contain glass shards during the removal process. Using a chisel and hammer, carefully chip away at the mirror and adhesive in small sections. Start at the edges and work inwards. Proceed with caution, as applying excessive force can damage the wall. This method requires patience and meticulous attention to detail.
Repairing the Wall After Mirror Removal
Regardless of the removal method used, some wall damage is likely to occur. Adhesive residue, small holes, or even sections of missing drywall may need repair. Adhesive residue can often be removed with a solvent or scraping tool. Minor wall damage can be repaired with spackle or joint compound. Larger holes may require patching with a drywall repair kit. Once the repairs are complete, the wall can be sanded smooth and repainted.
Choosing the Right Removal Method
The most suitable removal method depends on several factors, including the size of the mirror, the type of adhesive used, and the desired level of wall preservation. For small mirrors glued with weaker adhesives, the wedge and wire or heat method may be sufficient. For larger mirrors or stronger adhesives, adhesive removers or the hammer and chisel method might be necessary. Consider the potential risks and benefits of each method before proceeding.
Safety Precautions
Throughout the mirror removal process, prioritizing safety is paramount. Always wear safety glasses and work gloves to protect against glass shards and sharp tools. Ensure adequate ventilation when using chemical adhesive removers. If unsure about any step of the process, consider consulting a professional handyman or contractor.
Disposing of the Mirror
Once the mirror is removed, dispose of it responsibly. Wrap the broken pieces in thick cardboard or heavy-duty plastic bags and clearly label them as "broken glass." Check with local waste management regulations for proper disposal procedures in your area. Some municipalities may have specific requirements for disposing of broken glass and mirrors.

How To Remove A Mirror Glued The Wall Forbes Home

How To Remove A Wall Mirror 11 Steps With Pictures Wikihow

How To Remove A Wall Mirror Diy Weekend Project Bedroom Rustic Mirrors

How To Remove A Bathroom Mirror Lowe S

How To Remove A Wall Mirror 11 Steps With Pictures Wikihow

How To Safely And Easily Remove A Large Bathroom Builder Mirror From The Wall Site Title

How To Safely And Easily Remove A Large Bathroom Builder Mirror From The Wall Site Title

How To Remove A Glued Bathroom Mirror From The Wall

How To Remove A Bathroom Mirror Lowe S

Removing A Glued On Mirror From Wall