How To Hang A Mirror Without a Frame On The Wall
Hanging a frameless mirror can significantly enhance the aesthetic appeal of any room, adding depth, light, and a touch of modern elegance. Unlike framed mirrors, frameless mirrors require a different approach to hanging, prioritizing secure adhesion and a clean, minimalist look. This article provides a comprehensive guide on how to successfully hang a frameless mirror on a wall, covering essential materials, preparation steps, and various hanging methods.
Preparing for Installation
Before proceeding with the installation, thorough preparation is crucial. This step involves gathering the necessary tools and materials, assessing the wall's suitability, and ensuring the mirror's surface is clean and ready for mounting. Neglecting these initial steps can lead to installation errors, compromising the mirror's stability and aesthetic appeal.
First, gather the following tools and materials: a frameless mirror, a measuring tape, a pencil, a level, a drill (if necessary), appropriate drill bits (matching the wall type), wall anchors (if necessary), mirror adhesive, mounting clips or Z-clips (optional), painter's tape, safety glasses, and gloves. The type of wall anchors needed will depend on the wall's construction (drywall, plaster, brick, etc.). It is essential to select anchors rated for the weight of the mirror to ensure secure mounting.
Next, assess the wall's suitability for hanging a frameless mirror. Check for any existing damage, such as cracks, holes, or uneven surfaces. Repair any imperfections before proceeding. Determine the wall's composition to select the appropriate hanging method and hardware. Drywall requires wall anchors, while plaster or brick may necessitate drilling and specialized mounting solutions. If unsure, consult with a professional for guidance.
Clean the back of the mirror thoroughly with a glass cleaner to remove any dirt, dust, or residue. This is essential for ensuring proper adhesion of the mirror adhesive or mounting hardware. Use a lint-free cloth to avoid leaving streaks or fibers on the surface. Also, clean the area of the wall where the mirror will be hung.
Selecting the Appropriate Hanging Method
Choosing the right hanging method is paramount to ensure the frameless mirror is securely mounted and visually appealing. Several methods are available, each with its advantages and disadvantages. The selection process should consider the mirror's size and weight, the wall's construction, and the desired aesthetic outcome.
One common method involves using mirror adhesive. This method provides a clean, seamless look, as there are no visible clips or hardware. Apply a generous amount of mirror adhesive to the back of the mirror in vertical beads, ensuring the adhesive covers a significant portion of the surface area. Avoid applying adhesive too close to the edges to prevent squeezing out when pressed against the wall. Position the mirror on the wall according to the marked guidelines and press firmly. Use painter's tape to secure the mirror in place while the adhesive cures, typically for 24-48 hours, as per the adhesive manufacturer's instructions. This method is generally suitable for smaller to medium-sized mirrors.
Another method entails using mounting clips. Mounting clips provide additional support, particularly for heavier mirrors. These clips are typically installed along the top and bottom edges of the mirror, securing it to the wall. Use a level to ensure the clips are aligned horizontally and vertically. Predrill pilot holes for the screws, if necessary, and insert wall anchors if mounting on drywall. Position the mirror between the clips and ensure it is securely held in place. Mounting clips offer a more robust mounting solution and are suitable for larger mirrors.
Z-clips, also known as French cleats, offer a third mounting method that provides a secure and concealed hanging solution. A Z-clip consists of two interlocking metal strips, one attached to the back of the mirror and the other to the wall. This creates a strong, weight-bearing connection that distributes the mirror's weight evenly. Attach one Z-clip strip to the back of the mirror using a strong adhesive or screws, ensuring it is level. Attach the mating Z-clip strip to the wall, using a level to ensure proper alignment. Slide the mirror onto the wall clip, allowing the two strips to interlock. This method is ideal for heavier mirrors and offers a clean, frameless appearance.
Executing the Installation
Once the preparation is complete and the hanging method is selected, the installation process can begin. This stage requires precision and attention to detail to ensure the mirror is securely mounted and aesthetically pleasing. Rushing through this process can lead to errors and potentially compromise the mirror's stability.
Begin by marking the desired location of the mirror on the wall using a measuring tape, pencil, and level. Accurate measurements are essential to ensure the mirror is centered and aligned correctly. Use a level to draw horizontal and vertical guidelines on the wall, indicating the mirror's precise position. These guidelines will serve as a reference during the installation process.
If using mirror adhesive, follow the application instructions provided by the manufacturer. Apply the adhesive to the back of the mirror in vertical beads, ensuring even coverage. Carefully position the mirror on the wall, aligning it with the marked guidelines. Press firmly and hold in place for a few minutes to allow the adhesive to make initial contact. Secure the mirror with painter's tape to prevent it from shifting while the adhesive cures. Allow the adhesive to cure for the recommended time, typically 24-48 hours, before removing the tape.
If using mounting clips, install the clips along the top and bottom edges of the marked location on the wall. Use a level to ensure the clips are aligned horizontally. Predrill pilot holes for the screws, if necessary, and insert wall anchors if mounting on drywall. Secure the clips to the wall using screws. Carefully position the mirror between the clips and ensure it is securely held in place. Double-check the mirror's alignment and make any necessary adjustments.
For Z-clips, ensure the Z-clip strip on the mirror interlocks securely with the Z-clip strip on the wall. Use a level to verify the mirror is plumb and level. If necessary, make minor adjustments to the wall-mounted Z-clip strip to achieve perfect alignment. Once the mirror is securely mounted, visually inspect the installation to ensure it is stable and aesthetically pleasing.
After the mirror is installed, remove any remaining painter's tape or protective films. Clean the mirror surface with a glass cleaner to remove any fingerprints or smudges. Inspect the installation for any imperfections or areas that require further attention. Address any issues promptly to ensure the mirror remains securely mounted and visually appealing.
Finally, consider adding decorative touches to enhance the mirror's presence. This could include installing accent lighting, adding decorative trim around the mirror's edges, or incorporating other design elements that complement the mirror and the room's overall aesthetic. The goal is to create a cohesive and visually appealing space that showcases the frameless mirror's beauty and functionality.

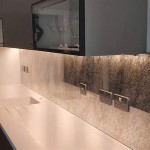
How To Install A Mirror Without Frame Merrypad

How To Hang A Frameless Mirror On Wall

How To Install A Mirror Without Frame Merrypad

How To Hang A Frameless Mirror On Wall E Architect

How To Hang A Frameless Mirror June 2024 Your Guide Hanging

Oval Frameless Wall Mirror Installation Fab Glass And

How To Hang A Heavy Mirror At Home

How To Hang A Frameless Mirror On The Wall With Pictures

How To Hang A Heavy Mirror On Drywall Without Damaging It Or The Wall Quora

How To Hang A Frameless Mirror On Wall E Architect