Installing Mirror Tiles on a Wall: A Comprehensive Guide
Mirror tiles offer a versatile and visually appealing solution for enhancing the aesthetics of any interior space. Their reflective properties can create the illusion of increased size, brighten dimly lit areas, and add a touch of sophistication to various design schemes. The installation process, while generally straightforward, requires careful planning, preparation, and execution to ensure a professional and lasting result. This article provides a comprehensive guide to installing mirror tiles on a wall, covering essential considerations, necessary tools and materials, and detailed step-by-step instructions.
Before embarking on the installation, a thorough assessment of the wall surface is crucial. The wall must be structurally sound, clean, and as level and smooth as possible. Any imperfections, such as cracks, holes, or unevenness, will detract from the final appearance and potentially compromise the adhesion of the mirror tiles. Addressing these issues before installation is paramount.
Key Point 1: Assessing and Preparing the Wall Surface
The success of a mirror tile installation hinges significantly on the condition of the wall surface. A poorly prepared surface leads to a substandard outcome, regardless of the quality of the tiles or the precision of the installation technique. Therefore, meticulous preparation is an indispensable step.
The first step involves a visual inspection of the wall. Look for any signs of damage, such as cracks, chips, or peeling paint. Use a level to check for any significant deviations from a perfectly flat plane. Minor imperfections can often be addressed with patching compounds, while more substantial issues may require professional attention.
Clean the wall thoroughly to remove any dirt, dust, grease, or other contaminants. A solution of mild detergent and water is typically sufficient. Rinse the wall with clean water and allow it to dry completely before proceeding.
If the wall has been painted, it is important to determine the type of paint used. Glossy or semi-gloss paints can hinder the adhesion of the mirror tile adhesive. In such cases, sanding the painted surface with a medium-grit sandpaper is recommended to create a more textured surface that promotes better bonding. After sanding, remove any dust particles with a clean cloth.
For walls with significant imperfections, applying a skim coat of drywall compound may be necessary to create a smooth, even surface. Follow the manufacturer's instructions for mixing and applying the compound. Allow the compound to dry completely and sand it smooth before proceeding with the installation.
Priming the wall after patching and sanding is also recommended. A primer helps to seal the surface, improve adhesion, and prevent the adhesive from being absorbed into the wall. Choose a primer that is compatible with the adhesive being used. Apply the primer evenly and allow it to dry completely before installing the mirror tiles.
Ultimately, the goal is to create a surface that is clean, smooth, level, and properly prepared for the adhesive to bond effectively. This meticulous preparation will ensure a professional-looking and long-lasting installation.
Once the wall is prepared, gather the necessary tools and materials. This includes the mirror tiles themselves, a suitable mirror adhesive, a measuring tape, a level, a tile cutter (if necessary), a notched trowel, a caulk gun, spacers, a clean cloth, and safety glasses.
Choosing the right adhesive is critical for a secure and durable installation. Opt for a mirror adhesive specifically designed for this purpose. These adhesives are formulated to prevent damage to the reflective backing of the mirror tiles and provide a strong, permanent bond to the wall surface. Carefully review the manufacturer's instructions for the chosen adhesive and adhere to the recommended application guidelines.
Key Point 2: Planning the Layout and Cutting Tiles
Careful planning of the layout is essential to achieving a visually appealing and symmetrical installation. Before applying any adhesive, it is advisable to dry-fit the mirror tiles on the wall to determine the optimal placement and identify any necessary cuts. This allows for adjustments and prevents mistakes that could be costly or time-consuming.
Begin by identifying the center point of the wall. Use a measuring tape and a level to draw a vertical line through the center. This line will serve as a reference point for aligning the first row of tiles. Similarly, establish a horizontal reference line, ensuring it is perfectly perpendicular to the vertical line.
Starting from the center point, dry-fit the mirror tiles along the reference lines. Use spacers between the tiles to maintain consistent spacing and create a uniform grid pattern. Adjust the layout as needed to ensure that the tiles are evenly distributed and that any cut tiles will be of a reasonable size.
In many installations, it will be necessary to cut some of the mirror tiles to fit around corners, edges, or obstacles. A tile cutter, specifically designed for glass or mirror tiles, is the recommended tool for this task. Score the tile along the desired cut line using the tile cutter, and then apply gentle pressure to snap the tile cleanly along the score line. Always wear safety glasses when cutting mirror tiles to protect your eyes from flying shards of glass.
For more complex cuts, such as curves or intricate shapes, a wet saw with a diamond blade may be required. A wet saw uses water to cool the blade and minimize chipping or cracking during the cutting process. Follow the manufacturer's instructions for operating the wet saw and always wear appropriate safety gear.
Once all the tiles have been dry-fitted and any necessary cuts have been made, carefully remove the tiles and set them aside in the order in which they will be installed. This will help to ensure a smooth and efficient installation process.
With the wall prepared and the layout planned, the actual installation can begin. Apply the mirror adhesive to the back of each tile using the notched trowel. The notched trowel ensures an even distribution of adhesive and creates channels for air to escape, preventing air pockets that can weaken the bond. Apply the adhesive in a consistent pattern, following the manufacturer's recommendations.
Carefully position the first tile on the wall, aligning it with the reference lines and pressing it firmly into place. Use spacers to maintain the desired spacing between the tiles. Repeat this process for each remaining tile, working in a systematic manner to ensure consistent alignment and spacing. Periodically check the level of the tiles to ensure that they are perfectly aligned and that the installation is proceeding according to plan.
Key Point 3: Adhesive Application and Tile Placement
The technique used to apply the adhesive and place the tiles is critical for ensuring a strong, lasting bond and a visually appealing finished product. Consistent adhesive application and precise tile placement are the hallmarks of a professional installation.
When applying the adhesive to the back of the mirror tiles, ensure that the entire surface is covered with a consistent layer. The notched trowel is designed to create ridges of adhesive, which provide ample surface area for bonding while also allowing air to escape. Avoid applying excessive amounts of adhesive, as this can cause the tiles to slide or sag during the curing process. Also avoid applying too little adhesive, as this can result in a weak bond.
When placing the tiles on the wall, align them carefully with the reference lines and adjacent tiles. Press each tile firmly into place, applying even pressure to ensure that the adhesive makes full contact with the wall surface. Use a level to check the alignment of the tiles as you proceed, making any necessary adjustments before the adhesive begins to set.
The use of spacers is essential for maintaining consistent spacing between the tiles. Choose spacers of the appropriate size to create the desired grout line. Insert the spacers between the tiles as you place them, ensuring that they are evenly distributed and that they do not interfere with the alignment of the tiles.
After installing a few rows of tiles, take a step back and visually inspect the installation for any inconsistencies or misalignments. Make any necessary corrections while the adhesive is still pliable. Once the adhesive has set, it will be much more difficult to make adjustments.
Continue installing the tiles, working in a systematic manner until the entire wall is covered. Allow the adhesive to cure completely according to the manufacturer's instructions before removing the spacers and applying grout (if desired). The curing time can vary depending on the type of adhesive used and the environmental conditions.
After the adhesive has cured, remove the spacers and clean any excess adhesive from the surface of the tiles. Apply grout to the joints between the tiles if a grouted look is desired. Follow the manufacturer's instructions for mixing and applying the grout. Once the grout has cured, clean the tiles thoroughly to remove any grout residue.
Finally, apply a bead of caulk along the edges of the mirror tile installation where it meets the wall, ceiling, or other surfaces. The caulk provides a watertight seal and prevents moisture from penetrating behind the tiles. Choose a caulk that is specifically designed for use with mirrors and that is compatible with the grout (if used).
The completed mirror tile installation should enhance the aesthetic appeal of the room, create the illusion of increased space, and brighten the interior. The careful planning, preparation, and execution outlined in this guide will help to ensure a professional-looking and long-lasting result.

Mirror Walls And Tiles Mirrorworld

Mirror Walls And Tiles Mirrorworld

How To Hang Mirrors On Tile 3 Ways A Bonus The Palette Muse

How To Use Decorative Mirror Tiles In Interior Design

Mirror Walls And Tiles Mirrorworld

How To Hang Mirrors On Tile 3 Ways A Bonus The Palette Muse

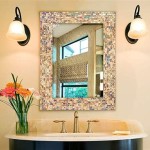
How To Hang A Mirror On Tile Wall Remington Avenue

How To Use Decorative Mirror Tiles In Interior Design

How To Hang Mirrors On Tile 3 Ways A Bonus The Palette Muse

Mirror Walls And Tiles Mirrorworld