Spraying A Mirror Frame: A Comprehensive Guide
Refurbishing a mirror frame through spraying can transform an outdated or worn piece into a fresh, aesthetically pleasing addition to any space. The process, while seemingly simple, requires careful planning, proper preparation, and the correct techniques to achieve a professional-looking finish. This article provides a detailed guide on how to effectively spray paint a mirror frame, covering everything from choosing the right paint to troubleshooting common issues.
Selecting Appropriate Spray Paint and Supplies
The choice of spray paint is paramount to the success of the project. Several factors should be considered, including the frame’s material, the desired finish, and the environment where the painting will occur. For wooden frames, both oil-based and water-based paints are viable options. Oil-based paints offer excellent durability and a smooth finish but require mineral spirits for cleanup and can have stronger fumes. Water-based paints are more environmentally friendly, have lower odor, and are easier to clean up with soap and water, though they may not be as durable. Metal frames require a paint specifically formulated for metal to prevent rust and ensure proper adhesion. These paints often contain a rust-inhibiting primer, streamlining the process.
Consider the desired finish when selecting spray paint. Gloss paints offer a shiny, reflective surface, while matte paints provide a flat, non-reflective finish. Semi-gloss paints provide a balance between the two. Specialty paints, such as metallic, textured, or chalkboard paints, can also be used to achieve unique effects. It is essential to read the label carefully to understand the paint's properties, drying time, and recommended application techniques.
Beyond the paint itself, a comprehensive set of supplies is crucial. These include:
*Drop cloths or plastic sheeting:
To protect the surrounding area from overspray. *Painter’s tape:
For masking off areas that should not be painted, such as the mirror itself. *Sandpaper (various grits):
For smoothing the frame's surface and creating a better adhesion surface for the paint. *Primer (if necessary):
To provide a consistent base for the paint and improve adhesion, especially on porous surfaces like wood. *Tack cloth:
To remove dust and debris from the frame before painting. *Respirator or mask:
To protect against inhaling paint fumes. *Gloves:
To protect hands from paint. *Well-ventilated area:
Essential for safe application and proper drying of the paint.Preparing the Mirror Frame for Painting
Proper preparation is arguably the most critical step in achieving a professional-looking result. Neglecting this stage can lead to poor paint adhesion, uneven coverage, and a subpar final product. The preparation process typically involves the following steps:
*Cleaning:
The frame should be thoroughly cleaned with a mild detergent and water to remove any dirt, grease, or grime. This ensures that the paint will adhere properly to the surface. After cleaning, the frame should be allowed to dry completely. *Sanding:
Sanding the frame creates a slightly rough surface that provides better adhesion for the paint. The grit of sandpaper used will depend on the condition of the frame. For frames with a smooth or glossy finish, a medium-grit sandpaper (120-180 grit) is recommended to scuff the surface. For frames with rough or damaged areas, a coarser grit sandpaper (80-100 grit) may be necessary to smooth out imperfections. After sanding, the frame should be wiped down with a tack cloth to remove any sanding dust. *Repairing imperfections:
Any dents, scratches, or cracks in the frame should be repaired before painting. Small imperfections can be filled with wood filler or spackle, depending on the frame's material. Once the filler is dry, it should be sanded smooth to blend seamlessly with the surrounding surface. For larger repairs, more extensive techniques may be required, such as patching or replacing damaged sections of the frame. *Masking:
Carefully mask off the mirror surface with painter’s tape. Ensure the tape is firmly adhered to the frame to prevent paint from seeping underneath. Multiple layers of tape may be necessary for intricate frame designs. Additional protection can be provided by covering the mirror with plastic sheeting or paper. *Priming (optional but recommended):
Applying a primer coat before painting can significantly improve the adhesion and durability of the paint, especially on porous surfaces like wood or metal. Choose a primer that is compatible with the chosen paint type. Apply the primer in thin, even coats, following the manufacturer's instructions. Allow the primer to dry completely before proceeding to the painting stage.Applying the Spray Paint: Techniques and Best Practices
Once the frame is properly prepared, the spray painting process can begin. This stage requires patience, a steady hand, and adherence to best practices to achieve a smooth, even finish. The following guidelines should be followed:
*Shake the can:
Before using the spray paint, shake the can vigorously for at least two minutes. This ensures that the paint is properly mixed and will spray evenly. *Test spray:
Before applying the paint to the frame, test spray on a piece of cardboard or scrap material. This allows to adjust the spray nozzle and get a feel for the paint flow. *Maintain proper distance:
Hold the spray paint can approximately 8-10 inches away from the frame. This distance allows the paint to atomize properly and prevents drips and runs. Holding the can too close can result in uneven coverage and a heavy application of paint, while holding it too far away can result in a dusty or textured finish. *Use smooth, even strokes:
Apply the paint in smooth, even strokes, overlapping each stroke slightly. Avoid holding the spray nozzle in one place for too long, as this can lead to drips and runs. Keep the can moving at a consistent speed to ensure even coverage. *Apply thin coats:
Apply multiple thin coats of paint rather than one thick coat. This allows the paint to dry properly and prevents drips and runs. Allow each coat to dry completely before applying the next coat. Typically, two to three coats of paint are sufficient to achieve full coverage. *Work in a well-ventilated area:
Spray painting should always be done in a well-ventilated area to prevent the inhalation of paint fumes. If working indoors, open windows and doors or use a fan to circulate air. A respirator or mask should be worn to further protect against inhaling paint fumes. *Allow sufficient drying time:
After applying the final coat of paint, allow the frame to dry completely before handling it. The drying time will vary depending on the type of paint used and the environmental conditions. Refer to the manufacturer's instructions for recommended drying times.After the paint has dried completely, carefully remove the painter’s tape from the mirror. Inspect the frame for any imperfections, such as drips, runs, or missed spots, and touch them up as needed. Once the touch-ups are dry, the mirror can be re-hung or placed in its desired location.
Different materials may need slightly different applications. For example, painting plastic frames requires additional steps in preparation to ensure paint bonds correctly. Specific plastic bonding primers are available that will enhance the adherence of the paint. These primers create a surface that the paint can grip on, preventing peeling or chipping. These specialty primers are essential for a durable and long-lasting finish on plastic mirror frames. Similarly, painting metal frames requires a metal-specific primer that inhibits rust formation beneath the paint layer, protecting the frame from corrosion over time. These primers often contain zinc or other anti-corrosive agents that create a barrier between the metal and the environment.
Achieving a flawless, professional-looking finish may require additional steps, such as wet sanding. Wet sanding involves using very fine-grit sandpaper (2000 grit or higher) with water to smooth out any imperfections in the paint finish. This technique can remove orange peel texture, dust particles, and other minor blemishes, resulting in a smoother and more uniform surface. After wet sanding, the frame should be polished with a polishing compound to restore the shine and clarity of the paint.
Proper disposal of paint cans is also crucial. Check local regulations regarding the disposal of aerosol cans. Many municipalities consider empty spray paint cans hazardous waste and require specific disposal methods. Some retailers offer recycling programs for used spray paint cans. Never puncture or incinerate spray paint cans, as they may explode.

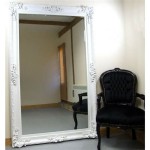
Spray Painted Gold Yard Mirror How To Paint A Frame

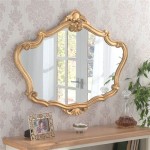
How To Paint A Mirror Frame Gold Easily In Two Steps

Painted Mirror Using Paint Glaze To Enhance Details Sand And Sisal

Chalk Paint And Antiquing A Frame Diy Dekor Ramar

How To Paint Gold Mirror Frame Keeping The Ornate Features Vickymyerscreations

How To Paint A Mirror Meg Del Design Furniture Diy Blog

How To Paint A Mirror Frame Gold Remodelando La Casa

How To Paint A Mirror Frame The Easy Way By Just Woods

How To Paint A Mirror Frame

Painting A Mirror Frame Easy Yet Stunning Ideas Girl In The Garage