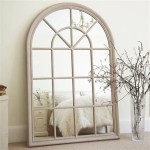
Hanging a Mirror Securely Using D-Rings: A Comprehensive Guide
Hanging a mirror adds depth, light, and style to any room. However, the process requires careful planning and execution to ensure the mirror is securely mounted and remains stable over time. Mirrors, particularly larger ones, can be quite heavy, thus necessitating appropriate hanging hardware. Mirrors equipped with D-rings offer a convenient and often reliable method for wall mounting. This article provides a comprehensive guide to hanging a mirror using D-rings, covering the tools required, the steps involved, and best practices for ensuring a safe and aesthetically pleasing installation.
Understanding D-Rings and Their Function
D-rings are metal loops, typically D-shaped, attached to the back of a mirror's frame. They function as the anchor points from which the mirror is suspended on the wall. They are generally secured with screws or staples, which are fastened to the frame. The strength of the D-rings and their attachment points is crucial for supporting the mirror’s weight. Before proceeding with any installation, it is essential to inspect the D-rings and their connection to the frame. Check for any signs of looseness, rust, or damage. If issues are found, reinforcement may be necessary before hanging the mirror. Replacement of the D-rings with stronger ones might be a viable choice, especially for heavier mirrors.
The spacing between the D-rings is also a significant factor. This distance dictates the distance between the hanging points on the wall. Accurate measurement of this spacing is vital for accurate and level installation. Inconsistent spacing can lead to an uneven hanging, causing the mirror to tilt or appear crooked. Standardized spacing, provided it aligns with stud locations, simplifies the hanging process. However, a mismatch necessitates the use of drywall anchors or other specialized hardware.
The orientation of the D-rings is also something to consider. Typically, they should be positioned so that the straight part of the "D" is pointing downwards, allowing the hanging wire or hooks to rest securely within the curve. Incorrect orientation can compromise the stability of the hanging system. Verify that the D-rings are properly oriented and securely fastened before commencing the installation.
Essential Tools and Materials for Mirror Installation
Successful mirror installation hinges on having the right tools and materials readily available. The following list outlines the essential items required for hanging a mirror with D-rings:
*Measuring Tape:
This is crucial for accurately measuring the distance between the D-rings and determining the desired mirror placement on the wall. Precise measurements are crucial for achieving a level and aesthetically pleasing installation. *Pencil:
Used to mark the wall where the hanging hardware will be installed. The pencil marks serve as guides for drilling or placing anchors. A soft lead pencil is ideal as it provides a clear mark that is easy to erase if necessary. *Level:
Absolutely essential for ensuring the mirror hangs straight. A bubble level is the most common type, but a laser level can also be used for greater accuracy, especially for larger mirrors. *Stud Finder:
Used to locate wall studs. Hanging the mirror directly on a stud provides the most secure support, particularly for heavier mirrors. Magnetic stud finders and electronic stud finders are the two primary options. *Drill (and Drill Bits):
If drilling into studs or using drywall anchors, a drill is necessary. Select drill bits appropriate for the wall material (wood, drywall, plaster). Having a variety of drill bit sizes is useful for different anchor types. *Screwdriver:
Used to install screws for hanging hardware or drywall anchors. A Phillips head screwdriver and a flathead screwdriver should be available. A power screwdriver can speed up the process but requires careful control to avoid over-tightening. *Hanging Hardware (Hooks, Nails, Screws, Anchors):
The choice of hanging hardware depends on the weight of the mirror and the wall material. For lighter mirrors hung on drywall, picture-hanging hooks might suffice. For heavier mirrors or when studs are not available, drywall anchors or toggle bolts are recommended. *Wire (Optional):
Some installations may require wire to be strung between the D-rings. Choose wire with a sufficient weight rating. Aircraft cable is a robust option for heavy mirrors. *Safety Glasses:
Essential for protecting the eyes from debris when drilling. *Gloves:
Can provide a better grip and protect hands during the installation process.Step-by-Step Guide to Hanging the Mirror
Following a structured process is crucial for a successful and safe mirror installation. The subsequent steps detail the procedure for hanging a mirror utilizing D-rings:
Preparation:
- Lay down a drop cloth to protect the floor from dust and debris.
- Gather all necessary tools and materials.
- Inspect the D-rings on the back of the mirror for any damage or looseness.
Determine Placement:
- Decide on the desired location for the mirror on the wall.
- Use the measuring tape to determine the exact height and center point.
- Lightly mark the desired location on the wall with a pencil.
Locate Wall Studs (If Possible):
- Use a stud finder to identify the location of wall studs in the vicinity of the marked spot.
- Ideally, one or both hanging points should align with a stud for maximum support.
- Mark the center of each stud with a pencil.
Measure D-Ring Spacing:
- Carefully measure the distance between the centers of the D-rings on the back of the mirror.
- Transfer this measurement to the wall, ensuring it is centered on the marked location.
- Mark the points on the wall where the hanging hardware will be installed.
Install Hanging Hardware:
- If hanging directly on studs, pre-drill pilot holes at the marked locations to prevent the wood from splitting.
- Install hooks or screws into the studs, leaving enough of the screw exposed to hang the mirror.
- If not hanging on studs, use appropriate drywall anchors or toggle bolts at the marked locations. Follow the manufacturer's instructions for installation.
Hang the Mirror:
- Carefully lift the mirror and align the D-rings with the installed hooks or screws.
- Gently lower the mirror onto the hanging hardware.
- Ensure the mirror is securely supported by the hardware.
Check for Level:
- Use a level to verify that the mirror is hanging straight.
- If the mirror is not level, adjust the position of the hanging hardware or use shims behind the mirror to correct the alignment.
Final Adjustments:
- Once the mirror is level and securely hung, make any final adjustments to its position.
- Clean the mirror surface to remove any fingerprints or dust.
Considerations for Mirror Weight and Wall Type
The weight of the mirror and the type of wall are critical factors that dictate the selection of appropriate hanging hardware and techniques. Ignoring these factors can result in damage to the wall, a falling mirror, and potential injury.
For lighter mirrors (typically under 10 pounds) hung on drywall, standard picture-hanging hooks or small drywall anchors might be sufficient. However, it's important to check the weight rating of the hardware and ensure it exceeds the mirror's weight. For heavier mirrors, especially those exceeding 20 pounds, relying solely on drywall is risky. Drywall is inherently weak and prone to crumbling under significant weight. In these cases, locating and utilizing wall studs is highly recommended. Wall studs provide a solid, load-bearing structure to which the mirror can be securely attached.
If studs are not accessible at the desired location, consider using heavy-duty drywall anchors or toggle bolts. These anchors provide significantly greater holding power than standard drywall anchors. Toggle bolts, in particular, are designed to distribute the weight over a larger area of the drywall, making them suitable for heavier items. When using drywall anchors or toggle bolts, follow the manufacturer's instructions carefully to ensure proper installation. Over-tightening can damage the drywall, while under-tightening can compromise the anchor's holding power.
For walls made of plaster, the installation process may require slightly different techniques. Plaster can be brittle and prone to cracking, so pre-drilling pilot holes is especially important. Use a drill bit designed for masonry to avoid damaging the plaster. Consider using plaster screws or specialized plaster anchors that are designed to grip the plaster securely. Regardless of the wall type, always prioritize safety and choose hanging hardware that is appropriate for the mirror's weight and the wall's composition.
Finally, if the mirror is exceptionally heavy or if there is any doubt about your ability to safely install it, it is best to consult with a professional installer. A professional will have the experience and expertise to assess the situation and recommend the most appropriate hanging solution.

Home Star Staging D Ring Picture Hangers Got You Down Here S A Trick To Help Hang Them Right Up

How To Hang A Heavy Picture Mirror On Wall Steps

Home Star Staging D Ring Picture Hangers Got You Down Here S A Trick To Help Hang Them Right Up

How To Hang A Mirror With Wire Pictures Wikihow

Heavy Duty Large Picture Mirror Hanging Kit 50kg Hook D Ring Set

How To Hang A Heavy Mirror With Pictures Wikihow

Making A Mark How To Hang Picture Using D Rings

How To Hang A Heavy Mirror The Home Depot

Home Star Staging D Ring Picture Hangers Got You Down Here S A Trick To Help Hang Them Right Up

How To Hang A Heavy Mirror Or Picture True Value

