How To Hang a Frameless Glass Mirror
Hanging a frameless glass mirror can seem daunting, but with the correct tools and techniques, it's a manageable DIY project. This article outlines the necessary steps for securely and aesthetically mounting a frameless mirror on various wall surfaces.
Assessing the Mirror and Wall
Before beginning, careful assessment of both the mirror and the wall is crucial for successful installation. This assessment informs the selection of appropriate mounting hardware and techniques.
* Determine the weight and dimensions of the mirror. Heavier and larger mirrors require stronger mounting systems. * Identify the wall material (drywall, concrete, tile, etc.). Different wall materials necessitate specific fasteners and installation methods. * Locate wall studs using a stud finder. Studs offer the most secure anchoring points, particularly for heavier mirrors. * Check for any electrical wiring or plumbing behind the intended mounting area using a wire detector. * Consider the desired placement and height of the mirror. Standard mirror height positions the center of the mirror at eye level (approximately 60 inches from the floor).Gathering Necessary Tools and Materials
Having the correct tools and materials on hand streamlines the installation process and ensures a secure and efficient outcome.
* Measuring tape and level: Essential for accurate measurements and placement. * Pencil or marker: For marking the desired mirror position and drill points. * Mirror adhesive: Specifically designed for adhering mirrors to walls. Choose an adhesive appropriate for the mirror's weight and the wall material. * J-bars or Z-clips: These specialized mirror clips offer a secure and discreet mounting method. * Drill with appropriate drill bits: The drill bit should correspond to the type of wall anchors being used. * Wall anchors (if necessary): Provide additional support in drywall or other less dense wall materials. Choose anchors rated for the weight of the mirror. * Screwdriver: For securing screws into wall anchors or directly into studs. * Safety glasses and gloves: Essential safety precautions during installation. * Masking tape: Helps protect the mirror and wall surface during installation.Preparing the Wall Surface
Proper wall preparation ensures optimal adhesion and prevents issues down the line.
* Clean the wall surface with a mild detergent and water. Remove any dust, grease, or debris that could interfere with adhesion. * Allow the wall to dry completely before proceeding. * If installing on drywall, consider using drywall anchors for added support, especially with heavier mirrors. * For tiled walls, mark the desired drill points carefully to avoid cracking the tiles. Use a tile drill bit when drilling.Applying the Mirror Adhesive
Applying the adhesive correctly is critical for a strong and lasting bond.
* Follow the manufacturer's instructions for applying the mirror adhesive. * Apply adhesive in a consistent pattern, typically vertical lines or a grid, on the back of the mirror. Avoid placing adhesive too close to the edges of the mirror. * Leave a small gap (approximately 1/4 inch) between the adhesive lines to allow for air circulation and prevent trapped moisture.Mounting the Mirror
Mounting the mirror requires precision and care to ensure proper alignment and a secure hold.
* Carefully position the mirror against the wall, aligning it with the marked placement. * Apply firm, even pressure to the mirror surface to ensure proper adhesion. * Use masking tape to temporarily secure the mirror to the wall while the adhesive cures. * Follow the adhesive manufacturer's instructions for curing time. This typically ranges from 24 to 72 hours.Installing J-Bars or Z-Clips (Optional)
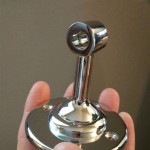
J-bars or Z-clips provide additional support and security, particularly for heavier mirrors. They are installed after the adhesive has cured.
* Measure and mark the locations for the J-bars or Z-clips on the wall and the bottom edge of the mirror. * Attach one part of the clip system to the wall, ensuring it is securely fastened. * Attach the corresponding part of the clip system to the bottom edge of the mirror. * Carefully slide the mirror onto the wall-mounted clips.Final Inspection and Cleaning
Once the mirror is securely mounted and the adhesive has fully cured, perform a final inspection.
* Remove any masking tape used during installation. * Clean the mirror surface with a glass cleaner to remove any fingerprints or smudges. * Inspect the mirror for proper alignment and secure mounting. Ensure that the mirror is firmly adhered to the wall and that there are no gaps or loose areas. * For added safety, consider applying a thin bead of clear silicone sealant along the edges of the mirror where it meets the wall. This helps prevent moisture from getting behind the mirror.By following these steps and taking the necessary precautions, individuals can successfully hang a frameless glass mirror with confidence, achieving a professional and aesthetically pleasing result.

How To Hang A Frameless Mirror On Wall

Oval Frameless Wall Mirror Installation Fab Glass And

How To Hang A Frameless Mirror June 2024 Your Guide Hanging

Frame Less Mirror Round Step By Installation Fab Glass And

How To Hang A Frameless Mirror On The Wall With Pictures

How To Hang A Frameless Mirror Detailed Guide

How To Hang A Large Frameless Mirror Step By Guide Upgradedhome Com

Here S How To Easily Hang A Frameless Wall Mirror

Frameless Antique Mirror Round Hanging Wall Made With Custom Antiqued Perfect For Chic Interior Space

Bathroom Wall Hanging Beveled Mirror Glass Carved Wooden Dressing Mirrors China Silver Made In Com