Making a Wood Frame for a Mirror
Creating a custom wood frame for a mirror elevates its aesthetic appeal and adds a personal touch to any space. Whether aiming for a rustic, modern, or ornate look, the process involves several key steps, from selecting the appropriate wood to applying the final finish. This article provides a comprehensive guide to crafting a beautiful and durable mirror frame.
Selecting and Preparing the Wood
Choosing the right wood is crucial for the frame's overall appearance and longevity. Hardwoods like oak, maple, and cherry offer durability and a rich grain pattern, while softwoods like pine and fir are easier to work with and provide a more rustic aesthetic. Consider the existing décor and the desired style when selecting the wood type. Once chosen, the wood needs to be planed to the desired thickness and width for the frame pieces.
Accurate measurements are essential for a well-fitting frame. Measure the mirror precisely, adding extra length and width for the desired frame overlap. Mark the measurements on the wood and use a miter saw to cut 45-degree angles at the ends of each piece. The precision of these cuts dictates how seamlessly the frame pieces join.
Assembling the Frame
Joining the frame pieces requires careful attention to ensure a tight and secure fit. Wood glue is a primary adhesive in frame construction. Apply a thin, even layer of glue to the mitered edges of each piece before joining them. Various clamping methods can be employed to hold the pieces together while the glue dries. Corner clamps are specifically designed for this purpose, applying even pressure across the joint. Alternatively, band clamps can be used to apply pressure around the entire frame assembly.
Reinforcing the joints adds structural integrity, especially for larger frames. Wood splines, small pieces of wood inserted into slots cut into the mitered edges, enhance the glue joint's strength. Alternatively, dowels can be used to reinforce the corners, providing a robust connection. Pre-drilling pilot holes before inserting screws prevents wood splitting and ensures accurate placement.
Finishing the Frame
Sanding the frame surface creates a smooth base for the finish. Start with a coarser grit sandpaper (e.g., 120 grit) to remove any imperfections or excess glue, and gradually progress to finer grits (e.g., 220 grit) for a polished feel. Thorough sanding ensures an even application of stain or paint and enhances the wood's natural beauty.
Staining or painting allows for customization and protection of the wood. Stains enhance the wood grain and provide a rich color, while paints offer a wider range of color options and create a more uniform surface. Apply the chosen finish according to the manufacturer’s instructions, using multiple thin coats for optimal coverage and durability. Allow sufficient drying time between coats.
Attaching the Mirror and Hardware
Securing the mirror within the frame requires a suitable backing material. Thin plywood or hardboard provides a sturdy and lightweight backing. Cut the backing to fit snugly within the frame's interior dimensions. Mirror adhesive or clips can be utilized to secure the mirror to the backing. Ensure the mirror is centered and evenly spaced within the frame before securing it.
Installing hanging hardware allows for easy display of the finished mirror. D-rings or wire hangers are commonly used for this purpose. Attach the hardware to the back of the frame, ensuring it is securely fastened and positioned to distribute the weight evenly. Consider the weight of the mirror and frame when selecting appropriate hardware.
Considerations for Different Wood Types
Different wood species react differently to finishes and joinery techniques. Hardwoods, being denser, may require pre-drilling for screws to prevent splitting. Softwoods are more prone to dents and scratches, necessitating careful handling throughout the process. Understanding the specific characteristics of the chosen wood ensures appropriate techniques are employed for a successful outcome.
Furthermore, the wood’s natural color and grain should be considered when choosing a finish. Some woods, like cherry, darken naturally over time, while others, like maple, maintain a lighter hue. Testing the finish on a scrap piece of the same wood allows for accurate color prediction and prevents unexpected results.

Iheart Organizing Diy Wood Framed Mirror

Diy Farmhouse Wood Frame Mirror She Gave It A Go

Diy Farmhouse Wood Frame Mirror She Gave It A Go

Wood Mirror Diy Shanty 2 Chic
:strip_icc()/103277918-54b5fa54478a412cab48f001dd21b5ca.jpg?strip=all "How To Make A Diy Farmhouse Mirror Frame")
How To Make A Diy Farmhouse Mirror Frame

Diy Wood Frame Mirror Farmhouse Industrial Bathroom Joyfully Treasured

Iheart Organizing Diy Wood Framed Mirror

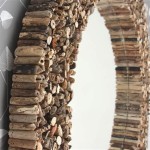
Diy Rustic Wood Frame Mirror Amanda Katherine

Diy Wood Framed Bathroom Mirror Christina Maria Blog

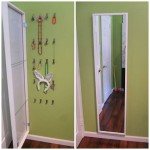
Diy Wood Frame Mirror Makeover With Hooks Funky Junk Interiors