How to Antique a Mirror with Oven Cleaner
Antiquing a mirror involves altering its reflective surface to create an aged and distressed appearance. This technique transforms a modern or new mirror into one that appears vintage and weathered, adding character and charm to any space. While several methods exist for antiquing mirrors, using oven cleaner is a popular and relatively straightforward approach. This article provides a detailed guide on how to antique a mirror with oven cleaner, highlighting the necessary safety precautions, materials, and step-by-step instructions for achieving a desired antique effect.
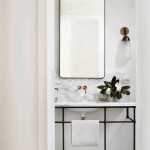
The appeal of antiqued mirrors lies in their ability to introduce a sense of history and depth to interior design. Unlike pristine, flawless mirrors, antiqued mirrors exhibit imperfections, such as mottled spots, cloudiness, and areas of reduced reflectivity. These imperfections contribute to a unique aesthetic that complements various decorating styles, from rustic and farmhouse to vintage and eclectic. Antiqued mirrors can be used as wall décor, backsplashes, or even incorporated into furniture to create a visually striking focal point.
The use of oven cleaner for antiquing mirrors relies on its corrosive properties. The chemicals in oven cleaner, particularly lye (sodium hydroxide), react with the silvering layer on the back of the mirror, etching away portions of it. This process creates the characteristic mottled and distressed look of an antiqued mirror. The degree of antiquing can be controlled by varying the application time and technique, allowing for customization of the final result.
Safety Precautions When Using Oven Cleaner
Working with oven cleaner requires strict adherence to safety protocols due to its corrosive nature. The chemicals present in oven cleaner can cause severe burns to the skin and eyes, and inhaling the fumes can be harmful to the respiratory system. Therefore, it is crucial to prioritize safety throughout the entire process. The following safety measures should be followed meticulously:
Ventilation: Work in a well-ventilated area, preferably outdoors or in a garage with open doors and windows. This minimizes the risk of inhaling harmful fumes. If working indoors is unavoidable, ensure that a fan is used to circulate air and exhaust fumes away from the workspace.
Protective Gear: Wear appropriate protective gear, including chemical-resistant gloves, safety glasses or a face shield, and a long-sleeved shirt and pants. Gloves protect the skin from direct contact with the oven cleaner, preventing burns and irritation. Safety glasses or a face shield protect the eyes from accidental splashes, which can cause serious damage. Long sleeves and pants provide additional skin coverage, minimizing the risk of chemical exposure.
Avoid Skin and Eye Contact: Exercise extreme caution to prevent oven cleaner from coming into contact with skin or eyes. If contact occurs, immediately flush the affected area with copious amounts of water for at least 15 minutes and seek medical attention. Do not rub the affected area, as this can worsen the irritation. If oven cleaner is ingested, seek immediate medical attention and do not induce vomiting.
Read the Label: Carefully read and understand the manufacturer's instructions and safety warnings on the oven cleaner product label before use. The label provides specific information about the product's ingredients, potential hazards, and first aid measures. Adhering to the manufacturer's recommendations is essential for safe and effective use.
Proper Disposal: Dispose of used oven cleaner and any contaminated materials according to local regulations. Do not pour oven cleaner down the drain, as it can damage plumbing and contaminate water sources. Check with local waste management authorities for information on proper disposal methods for hazardous materials.
Materials Required for Antiquing a Mirror
Before beginning the antiquing process, gather all necessary materials to ensure a smooth and efficient workflow. Having all the required tools and supplies readily available will minimize interruptions and allow for a more controlled and precise application.
Mirror: Select a mirror that you wish to antique. The size and shape of the mirror will depend on your personal preference and intended use. It is important to clean the mirror thoroughly before starting the antiquing process to remove any dirt, dust, or grime that may interfere with the oven cleaner's reaction with the silvering.
Oven Cleaner: Choose a spray-on oven cleaner containing lye (sodium hydroxide) as an active ingredient. Check the product label to confirm the presence of lye, as it is essential for etching the silvering. Avoid using self-cleaning oven cleaners, as they may not contain the necessary chemicals for achieving the desired antiqued effect.
Spray Bottle with Water: A spray bottle filled with clean water is needed to dilute the oven cleaner and control the etching process. The water will also be used to rinse the mirror after the oven cleaner has been applied.
Painter's Tape: Painter's tape is used to mask off areas of the mirror that you do not want to be antiqued, such as the edges or specific patterns. This allows for creating a more controlled and intentional antiqued design.
Drop Cloth or Protective Covering: Protect your work surface with a drop cloth or plastic sheeting to prevent accidental spills and damage. Oven cleaner can stain or corrode surfaces, so it is important to protect the surrounding area.
Paper Towels or Rags: Paper towels or rags are needed for cleaning the mirror, wiping away excess oven cleaner, and drying the surface after rinsing.
Optional: Rubber Gloves (Different Type): While chemical resistant gloves are required when using the oven cleaner, having a second pair of rubber gloves, like dishwashing gloves, can be useful when you are spraying water and wiping the mirror. This can help keep the chemical resistant gloves clean.
Step-by-Step Instructions for Antiquing a Mirror
The following steps provide a detailed guide for antiquing a mirror using oven cleaner. It is important to follow these instructions carefully and prioritize safety throughout the process.
Preparation: Begin by cleaning the mirror thoroughly with a glass cleaner and a lint-free cloth. Remove any dirt, dust, or fingerprints to ensure a clean surface for the oven cleaner to react with. Allow the mirror to dry completely before proceeding.
Masking (Optional): If desired, use painter's tape to mask off areas of the mirror that you want to remain untouched. This allows for creating a customized antiqued design with defined areas of reflectivity.
Oven Cleaner Application: Working in a well-ventilated area and wearing appropriate safety gear, spray a light, even coat of oven cleaner onto the back of the mirror. Avoid oversaturating the surface, as this can lead to uneven etching. Start with a thin layer and gradually add more as needed to achieve the desired effect.
Dilution and Control: Immediately after applying the oven cleaner, lightly mist the surface with water from the spray bottle. This will dilute the oven cleaner and slow down the etching process, allowing for greater control over the final result. Experiment with different water-to-oven-cleaner ratios to achieve various levels of antiquing.
Etching Time: Allow the oven cleaner to react with the silvering for a specific amount of time, depending on the desired level of antiquing. Start with a short etching time, such as 1-2 minutes, and gradually increase the time as needed. Monitor the progress closely, observing the formation of mottled spots and cloudiness.
Rinsing: Once the desired level of antiquing has been achieved, thoroughly rinse the back of the mirror with water to remove all traces of oven cleaner. Ensure that all chemicals are completely washed away to prevent further etching.
Drying: Carefully dry the mirror with a clean, lint-free cloth or paper towels. Avoid rubbing the surface too vigorously, as this can damage the delicate antiqued finish.
Repeat (If Necessary): If you are not satisfied with the initial results, you can repeat the process by applying another light coat of oven cleaner, diluting it with water, and allowing it to etch for a shorter period of time. This allows for fine-tuning the antiqued effect and achieving the desired level of distress.
Sealing (Optional): To protect the antiqued finish and prevent further degradation of the silvering, you can apply a sealant to the back of the mirror. Choose a sealant that is specifically designed for use on mirrors or glass. Follow the manufacturer's instructions for application and drying.
It is important to note that the exact etching time and water-to-oven-cleaner ratio will vary depending on the specific oven cleaner used, the type of silvering on the mirror, and the desired level of antiquing. It is always recommended to test the process on a small, inconspicuous area of the mirror first to determine the optimal parameters for your specific project.

How To Refinish Small Furniture With Oven Cleaner Sunshine Valley

How To Make A New Mirror Look Old Bird

How To Refinish Small Furniture With Oven Cleaner Sunshine Valley

Stripping Wood With Oven Cleaner Easy Off Mirror Makeover Farmhouse Living

Miraculous Mirror Makeover How To Strip Wood With Oven Cleaner Hometalk

Stripping Wood With Oven Cleaner Easy Off Mirror Makeover Farmhouse Living

Antique Mirror Solution How To A

Diy Antiqued Mirror And How To Apply Prima Transfers Salvaged Inspirations

How To Make A New Mirror Look Old Bird

Diy Antiqued Mirror And How To Apply Prima Transfers Salvaged Inspirations