How To Frame A Bathroom Wall Mirror
Framing a bathroom wall mirror can significantly elevate the aesthetic appeal of the space, transforming a functional element into a decorative feature. This process, while seemingly simple, requires careful planning, precise execution, and an understanding of the materials involved. This article will provide a comprehensive guide on how to frame a bathroom wall mirror, covering everything from initial measurements to the final attachment.
Several factors contribute to the increasing popularity of framing bathroom mirrors. Primarily, it adds a touch of sophistication and personalization. A framed mirror instantly becomes a focal point, enhancing the overall design scheme of the bathroom. Furthermore, framing offers an opportunity to conceal any imperfections around the mirror's edges, creating a cleaner and more polished look. Finally, a well-chosen frame can complement the existing hardware, fixtures, and color palette, resulting in a cohesive and visually appealing space.
Preparing for the Framing Project
The success of any framing project hinges on meticulous preparation. This stage involves accurate measurements, material selection, and the gathering of necessary tools. Skipping or rushing this phase can lead to errors that will be costly and time-consuming to rectify.
The first step is to measure the mirror accurately. Measure both the height and width of the mirror at multiple points to account for any slight variations. It is crucial to use a precise measuring tape and document all measurements clearly. These measurements will determine the inner dimensions of the frame.
Next, consider the desired width of the frame. Adding a frame that is too narrow may appear insignificant, while an overly wide frame could overwhelm the mirror. A common practice is to choose a frame width that is proportional to the size of the mirror. For smaller mirrors, a frame width of 2-3 inches is often suitable, while larger mirrors may benefit from a 4-6 inch frame.
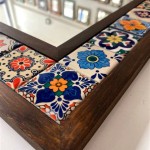
Selecting the appropriate material for the frame is critical, particularly in a bathroom environment where moisture levels are typically elevated. Wood, while aesthetically pleasing, can be susceptible to warping and rotting if not properly treated. Moisture-resistant woods like cedar or redwood, or composite materials specifically designed for bathroom applications, are preferable choices. Metal frames, such as aluminum or stainless steel, offer excellent durability and resistance to moisture. However, these materials can be more challenging to work with and may require specialized tools and techniques.
Once the material is selected, the style of the frame should be determined. Consider the overall design of the bathroom. A modern bathroom might benefit from a sleek, minimalist frame, while a traditional bathroom could accommodate a more ornate and decorative design. The frame's finish should also complement the existing fixtures and hardware. Options include painted finishes, stained finishes, or metallic finishes, among others.
Gather all necessary tools before commencing the project. This typically includes a measuring tape, a pencil, a miter saw or miter box with a hand saw, wood glue or construction adhesive, clamps, sandpaper, paint or stain (if applicable), sealant, and safety glasses. Depending on the chosen attachment method, screws, nails, or mounting hardware may also be required.
Constructing the Frame
With the preparatory work completed, the next stage involves constructing the frame itself. This requires precise cuts and secure assembly to ensure a professional-looking result.
Using the measurements obtained earlier, cut the frame pieces to the appropriate lengths. A miter saw is the ideal tool for achieving clean, accurate 45-degree angles for the corners. If a miter saw is unavailable, a miter box with a hand saw can be used, although this method requires more care and attention to detail. Double-check the measurements and angles before making any cuts.
After cutting the frame pieces, dry-fit them to ensure they fit together properly. This allows for any necessary adjustments to be made before applying adhesive. Make sure all four corners align perfectly and that the frame sits squarely around the mirror.
Apply wood glue or construction adhesive to the mitered edges of the frame pieces. Use a liberal amount of adhesive, but avoid applying so much that it squeezes out excessively when the pieces are joined. Carefully align the corners and clamp the frame together. Clamps should be positioned strategically to apply even pressure across the joints. Wipe away any excess adhesive with a damp cloth.
Allow the adhesive to cure completely according to the manufacturer's instructions. This is typically a minimum of 24 hours. Prematurely removing the clamps can weaken the joints and compromise the structural integrity of the frame.
Once the adhesive is fully cured, remove the clamps and inspect the frame for any gaps or imperfections. Fill any gaps with wood filler, allow it to dry, and then sand the entire frame smooth. Sanding is essential for creating a seamless and professional finish.
If desired, apply paint or stain to the frame. Choose a product that is suitable for the frame material and the bathroom environment. Apply multiple thin coats, allowing each coat to dry completely before applying the next. Sand lightly between coats to achieve a smooth, even finish.
Attaching the Frame to the Mirror
The final step involves attaching the constructed frame to the bathroom mirror. Several methods can be employed, each with its own advantages and disadvantages. The chosen method will depend on the size and weight of the mirror, the type of frame material, and the desired level of permanence.
One common method is to use construction adhesive. Apply a generous bead of construction adhesive to the back of the frame, ensuring that it makes contact with the mirror surface. Carefully position the frame around the mirror and press firmly into place. Use painter's tape to secure the frame to the mirror while the adhesive cures. This will prevent the frame from shifting during the curing process. Allow the adhesive to cure completely according to the manufacturer's instructions.
Another option is to use mirror clips or mounting brackets. These are typically attached to the wall around the mirror and then secured to the frame. This method provides a more secure and permanent attachment. However, it requires more precise measurements and careful installation to ensure that the frame is properly aligned and supported.
For smaller, lighter frames, double-sided adhesive tape designed for mirrors can be used. This tape provides a strong bond and is relatively easy to apply. However, it is not suitable for larger, heavier frames, as it may not provide sufficient support. Ensure the mirror surface is clean and dry before applying the tape, and press the frame firmly into place.
Regardless of the chosen attachment method, ensure that the frame is securely attached to the mirror and that it is level. Use a level to verify that the frame is perfectly aligned before permanently securing it. Once the frame is attached, apply a bead of sealant around the perimeter of the frame where it meets the mirror. This will prevent moisture from seeping behind the frame and damaging the mirror or the wall.
After the sealant has dried, clean the mirror and frame thoroughly. Remove any remaining adhesive residue or fingerprints. Inspect the frame for any imperfections and make any necessary touch-ups. The framed bathroom mirror is now complete and ready to enhance the aesthetic appeal of the bathroom.
Troubleshooting Common Issues
Despite careful planning and execution, unforeseen challenges can arise during the framing process. Addressing these issues promptly and effectively is crucial for achieving a satisfactory outcome.
One common issue is inaccurate measurements. If the frame is too small, it will not fit around the mirror. If it is too large, there will be unsightly gaps. The best way to avoid this is to double-check all measurements before cutting the frame pieces. If an error does occur, it may be possible to salvage the project by adjusting the dimensions of the frame or by using filler to compensate for small gaps.
Another potential problem is uneven cuts. If the mitered corners are not perfectly aligned, the frame will not sit squarely around the mirror. This can be caused by using a dull saw blade or by not holding the frame pieces securely while cutting. Using a high-quality miter saw and taking the time to make accurate cuts will help prevent this issue. If uneven cuts do occur, it may be necessary to re-cut the frame pieces or to use sanding to smooth out the imperfections.
Weak joints can also be a concern. If the adhesive is not properly applied or if the frame is not adequately clamped, the joints may not be strong enough to support the weight of the frame. Using a high-quality adhesive, applying it liberally to the mitered edges, and clamping the frame securely while the adhesive cures will help prevent this issue. If weak joints do occur, it may be necessary to reinforce them with screws or nails.
Finally, moisture damage can be a problem in bathroom environments. If the frame is not properly sealed, moisture can seep behind it and damage the mirror or the wall. Using moisture-resistant materials, applying a sealant around the perimeter of the frame, and ensuring that the bathroom is well-ventilated will help prevent this issue. If moisture damage does occur, it is important to address it promptly to prevent further deterioration.

How To Frame A Mirror

How To Frame Out That Builder Basic Bathroom Mirror For 20 Or Less

Bathroom Mirror Frames 2 Easy To Install Sources A Diy Tutorial Retro Renovation

20 Creative Diy Mirror Frame Ideas To Inspire Your Next Project Bathroom Mirrors Makeover

Diy Wood Frame Mirror Farmhouse Industrial Bathroom Joyfully Treasured

Diy Window Frame Mirror For The Bathroom Houseful Of Handmade

How To Frame Out That Builder Basic Bathroom Mirror For 20 Or Less

Diy Mirror Frame The Idea Room

How To Build A Diy Frame Hang Over Bathroom Mirror Love Our Real Life

Mirror On The Wall It All Started With Paint