Removing a Mirror from a Wall: A Comprehensive Guide
Removing a mirror from a wall can seem like a daunting task. Mirrors, often adhered with strong adhesives, can be challenging to detach without causing damage to the mirror itself or the underlying wall surface. This article provides a detailed, step-by-step guide for safely removing a mirror, minimizing the risk of breakage and wall damage. It encompasses different methods and considerations based on the type of adhesive used and the wall material.
Before commencing the removal process, it is crucial to assess the installation method. Most mirrors are attached to walls using one or a combination of the following: adhesive (mirror mastic), clips, or screws. Some mirrors are framed and simply hung like a picture, while others are directly adhered to the wall. Understanding the primary method of attachment is paramount to selecting the appropriate removal technique. A thorough examination of the mirror's edges and the surrounding wall area will usually reveal the attachment method.
Safety is of utmost importance throughout this project. Mirrors, particularly large ones, are heavy and fragile. Wearing safety glasses is essential to protect the eyes from potential glass shards. Work gloves provide a better grip and protect hands from cuts. If the mirror is large and heavy, having an assistant is highly recommended to prevent accidents during the removal process.
Preparing the Work Area
Proper preparation is key to a smooth and safe mirror removal. The first step involves protecting the floor beneath the mirror. Drop cloths, old blankets, or thick cardboard should be placed to cushion the mirror should it accidentally detach and fall. This will also protect the flooring from any debris or adhesive residue that may fall during the process.
Secondly, the surrounding wall area needs to be protected. Painter's tape can be applied to the wall around the perimeter of the mirror. This tape serves two purposes: it creates a visual boundary for the work area, preventing accidental damage to the surrounding paint or wallpaper, and it can also help prevent chipping of the paint when prying tools are used near the edges. Ensure the tape is firmly adhered to the wall for optimal protection.
Next, gather all necessary tools and materials. Having everything readily available will streamline the process and minimize interruptions. Essential tools include: a putty knife or scraper (preferably plastic to minimize scratching), a utility knife, a heat gun or hair dryer, mineral spirits or adhesive remover, safety glasses, work gloves, a level, shims, rags or cloths, and a hammer (optional, for tapping the scraper).
Finally, ensure adequate lighting in the work area. Poor lighting can make it difficult to see the edges and adhesive points, increasing the risk of damage. A portable work light can be particularly helpful for illuminating specific areas during the removal process.
Removing a Mirror Glued to the Wall
Removing a mirror glued to the wall requires patience and careful execution. Aggressive tactics can easily result in a shattered mirror or significant damage to the wall. The following steps outline a gradual and methodical approach to detachment.
The primary tool for this method is a putty knife or scraper. A plastic scraper is preferable as it minimizes the risk of scratching the mirror surface. Begin by gently inserting the scraper between the mirror and the wall at one of the corners. The objective is to create a small gap without forcing the scraper too deeply.
Once a small gap has been created, use a heat gun or hair dryer to soften the adhesive. Apply heat along the edges of the mirror, focusing on the area where the scraper is inserted. The heat will help to loosen the adhesive bond, making it easier to separate the mirror from the wall. Avoid overheating any one spot, as excessive heat can damage the mirror's backing.
Continue to gently work the scraper around the perimeter of the mirror, applying heat as needed. The goal is to gradually separate the adhesive bond along the entire edge. If resistance is encountered, do not force the scraper. Instead, apply more heat and try again. Patience is key, as rushing the process can lead to breakage.
As the adhesive begins to release, small shims can be inserted into the gap to help maintain separation. These shims will prevent the adhesive from re-adhering and will provide leverage for further separation. Start with thin shims and gradually increase their thickness as the gap widens.
Once the edges are sufficiently separated, the mirror can be carefully pulled away from the wall. If the mirror is large, it is recommended to have an assistant help with this step. Support the mirror from the front and back as it is being pulled away to prevent it from flexing and breaking. If resistance is still encountered, continue to apply heat and work the scraper until the adhesive releases completely.
After the mirror has been removed, there will likely be adhesive residue remaining on the wall. This residue can be removed using mineral spirits or a dedicated adhesive remover. Apply the remover to the residue and let it sit for the recommended time. Then, use a scraper or rag to remove the softened adhesive. Repeat the process as needed until the wall is clean. Be cautious when using solvents near painted surfaces, as some solvents can damage or remove paint.
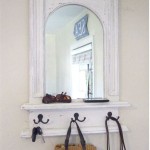
Removing a Mirror Secured with Clips and Screws
Mirrors secured with clips and screws offer a more straightforward removal process compared to those glued directly to the wall. However, care must still be taken to avoid damaging the mirror or the surrounding wall.
The first step involves locating all the clips and screws. Examine the perimeter of the mirror carefully, looking for visible clips or screw heads. Some clips may be hidden behind the mirror, so a thorough inspection is necessary. Note the type of clip being used, as this will dictate the removal method.
Once all the clips and screws have been identified, begin removing them. For screws, use a screwdriver of the appropriate size. For clips, there are generally two types: spring clips and fixed clips. Spring clips can usually be pried open with a flathead screwdriver or a putty knife. Fixed clips may require loosening a screw or sliding the clip to release the mirror.
As the clips and screws are being removed, support the mirror to prevent it from falling. If the mirror is large, an assistant is strongly recommended. Once all the fasteners have been removed, the mirror can be carefully lifted away from the wall.
After the mirror has been removed, the screw holes or clip mounting points will be visible on the wall. These can be filled with spackle or drywall compound. Apply the compound to the holes and smooth it out with a putty knife. Allow the compound to dry completely, and then sand it smooth. Finally, the wall can be painted to match the surrounding area.
Addressing Potential Wall Damage
Regardless of the removal method used, there is always a risk of damaging the wall. The extent of the damage will depend on the type of adhesive used, the type of wall material, and the care taken during the removal process. Common types of wall damage include: torn drywall paper, chipped paint, and holes from adhesive residue.
Torn drywall paper is a common occurrence when removing mirrors glued to the wall. If the paper is only slightly torn, it can be smoothed back into place with a putty knife. However, if the paper is significantly torn, it may need to be repaired with drywall compound. Apply a thin layer of compound to the damaged area and smooth it out with a putty knife. Allow the compound to dry completely, and then sand it smooth. Repeat the process as needed until the wall is smooth and even.
Chipped paint can be touched up with matching paint. Scrape away any loose or flaking paint, and then apply a primer to the bare wall. Allow the primer to dry completely, and then apply two coats of paint. Feather the edges of the paint to blend it seamlessly with the surrounding area.
Holes from adhesive residue can be filled with spackle or drywall compound. Apply the compound to the holes and smooth it out with a putty knife. Allow the compound to dry completely, and then sand it smooth. Finally, the wall can be painted to match the surrounding area.
In cases of severe wall damage, it may be necessary to replace a section of drywall. This is a more complex repair that may require the assistance of a professional. However, with careful planning and execution, most wall damage can be repaired to a satisfactory level.

How To Remove A Mirror Glued The Wall Forbes Home

How To Remove A Bathroom Mirror Lowe S

How To Safely And Easily Remove A Large Bathroom Builder Mirror From The Wall Site Title

Diy Project Removing Floor To Ceiling Mirrors From A Wall In Our House S Dining Room Jeff Geerling

How To Remove Mirror Off Wallsafely

How To Safely And Easily Remove A Large Bathroom Builder Mirror From The Wall Site Title

How To Remove A Wall Mirror Diy Weekend Project Rustic Mirrors Black

How To Remove A Bathroom Mirror Lowe S

How To Safely Remove A Wall Mirror Diy Network

How To Remove A Frameless Mirror Like Nervous Grandma