How To Frame Bathroom Mirrors: A Comprehensive Guide
Framing a bathroom mirror can significantly enhance the aesthetic appeal of the space, transforming a basic functional element into a stylish focal point. This process, while relatively straightforward, requires careful planning and execution to achieve a professional-looking result. This article details the necessary steps, considerations, and techniques involved in framing a bathroom mirror.
Assessing the Existing Mirror and Bathroom Environment
Before any physical work begins, a thorough assessment of the existing mirror and the surrounding environment is crucial. This involves considering several factors, including the mirror's size, shape, and mounting style. The shape will influence the type of frame best suited, while the size dictates the amount of framing material required.
The mounting style of the mirror is particularly important. Mirrors can be glued directly to the wall, clipped into place, or hung via brackets. Knowing the mounting style enables correct removal or adaptation for the framing process. Mirrors that are glued to the wall present more of a challenge and may require specialized techniques or professional assistance to remove without damage.
The bathroom's overall style and décor should also be considered. The frame's material, color, and design should complement the existing fixtures, tile, and paint. A modern bathroom might benefit from a sleek, minimalist metal frame, while a more traditional bathroom could be enhanced by a wood frame with ornate detailing. Consider the humidity levels inherent in bathrooms; select materials that are water-resistant or treated to withstand moisture to prevent warping, mildew, or other damage.
Finally, measure the mirror accurately. These measurements will be essential when selecting and cutting the framing material. It's advisable to measure at multiple points along the edges to account for any slight variations in shape or size. Add the desired width of the frame to these measurements to determine the overall dimensions of the framed mirror.
Selecting the Appropriate Framing Materials and Tools
The choice of framing materials is critical for both aesthetic and functional reasons. Wood, metal, and composite materials such as MDF or PVC are commonly used. Each material offers different advantages and disadvantages in terms of appearance, durability, cost, and ease of workability.
Wood provides a classic and versatile option, offering a wide range of colors, grains, and textures. However, wood is susceptible to moisture damage and requires proper sealing and finishing to protect it from the humid bathroom environment. Hardwoods like oak or maple are more durable than softwoods like pine, but also more expensive.
Metal frames, typically made of aluminum or stainless steel, offer a modern and sleek aesthetic. They are highly resistant to moisture and require minimal maintenance. Metal frames can be more difficult to work with than wood, requiring specialized cutting and joining tools. Powder-coated finishes are recommended for color and added protection against corrosion.
Composite materials like MDF (medium-density fiberboard) and PVC (polyvinyl chloride) offer a cost-effective alternative to wood and metal. MDF is easy to cut and paint but is highly susceptible to water damage if not properly sealed. PVC is waterproof and resistant to rot, making it a good choice for bathrooms, but it may not offer the same aesthetic appeal as wood or metal.
In addition to the framing material itself, you will need a range of tools, including a measuring tape, miter saw or miter box and hand saw, safety glasses, wood glue or construction adhesive, clamps, sandpaper, paint or stain (if using wood), sealant, and potentially a nail gun or screw gun depending on the chosen method of assembly and wall mounting.
The Framing Process: Step-by-Step Guide
With the materials and tools prepared, the framing process can begin. This involves several key stages, from cutting the frame pieces to assembling and attaching the frame to the mirror.
1. Cutting the Frame Pieces: Using the accurate measurements taken earlier, cut the framing material to the required lengths. A miter saw is ideal for creating clean, precise 45-degree angles for the corners of the frame. If using a miter box and hand saw, ensure the blade is sharp and the cuts are clean and accurate. Always wear safety glasses when using power tools.
2. Assembling the Frame: Once the frame pieces are cut, assemble them using wood glue or construction adhesive. Apply the adhesive to the mitered edges and join the pieces together, ensuring a tight and seamless fit. Use clamps to hold the frame together while the adhesive dries completely. Allow sufficient drying time as recommended by the adhesive manufacturer, typically at least 24 hours.
3. Finishing the Frame (if applicable): If using wood, sand the frame smooth to remove any imperfections. Apply a primer coat of paint before applying the final coat of paint or stain. Multiple thin coats of paint or stain are generally preferable to a single thick coat, as this provides a more even and durable finish. Allow each coat to dry completely before applying the next. For metal frames, ensure the finish is appropriate for a bathroom environment and resistant to corrosion.
4. Attaching the Frame to the Mirror: There are several methods for attaching the frame to the mirror, depending on the mirror's existing mounting style and the desired level of permanence. If the mirror is glued to the wall, attaching the frame to the mirror itself is often the easiest option. Construction adhesive can be used to bond the frame to the mirror's surface. Apply the adhesive evenly to the back of the frame and carefully position it around the mirror's edges. Use masking tape to hold the frame in place while the adhesive cures completely. Avoid applying excessive pressure during attachment, as this could crack the mirror.
Alternatively, if the mirror is clipped or bracketed to the wall, it may be possible to hang the frame separately over the mirror. This involves creating a separate hanging system for the frame and adjusting the placement to align with the existing mirror. This method may require some creativity and modification to ensure a secure and aesthetically pleasing result.
5. Sealing the Edges: Once the frame is securely attached, seal the edges where the frame meets the mirror and the wall using a waterproof sealant. This will prevent moisture from seeping behind the frame and causing damage to the mirror or the wall. Apply the sealant in a thin, even bead and smooth it with a finger or a sealant tool. Be sure to select a sealant that is specifically designed for bathroom use and is resistant to mildew and mold.
6. Final Inspection and Adjustments: After the sealant has dried, inspect the frame carefully to ensure it is securely attached and that the finish is neat and even. Make any necessary adjustments or touch-ups to ensure a professional-looking result. Clean the mirror surface to remove any adhesive residue or fingerprints.
Addressing Common Challenges
Framing a bathroom mirror can present several challenges, particularly for novice DIYers. Understanding these potential pitfalls and knowing how to address them can help ensure a successful outcome.
Mirrors Glued to the Wall: As previously mentioned, removing or framing mirrors that are glued directly to the wall can be difficult. Attempting to pry the mirror off the wall can easily result in breakage. If removal is necessary, consider using a specialized mirror removal tool or seeking professional assistance. Alternatively, frame the mirror in place using construction adhesive, as described above.
Uneven Walls or Mirrors: Many walls and mirrors are not perfectly flat or square. This can lead to gaps between the frame and the wall or the mirror. To address this, use shims to fill any gaps and ensure the frame sits flush. Use a level to check the frame's alignment and make adjustments as needed.
Moisture Damage: Bathrooms are inherently humid environments, which can cause damage to wood frames if they are not properly sealed. Use a waterproof sealant and consider materials that are resistant to moisture, such as PVC or metal. Regularly inspect the frame for signs of water damage and make any necessary repairs promptly.
Incorrect Measurements: Accurate measurements are essential for a well-fitting frame. Double-check all measurements before cutting the framing material. If unsure, it is always better to cut the pieces slightly larger than necessary, as they can always be trimmed down later. Precise cuts and accurate measurements will make a huge difference in the final outcome.

How To Frame Out That Builder Basic Bathroom Mirror For 20 Or Less

Diy Framed Bathroom Mirrors Living With Lady

How To Frame Out That Builder Basic Bathroom Mirror For 20 Or Less Design Mirrors Diy

Diy Bathroom Mirror Frame With Molding The Happier Homemaker

How To Frame A Mirror

Bathroom Mirror Frames 2 Easy To Install Sources A Diy Tutorial Retro Renovation

The Kids Bathroom Mirror Gets Framed House Of Hepworths

How To Frame Out That Builder Basic Bathroom Mirror For 20 Or Less

How To Frame A Bathroom Mirror For Just 10

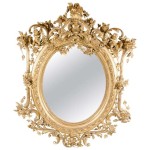
Unique Or Large Bathroom Mirrors Mirrorchic