How to Hang a Large Frameless Bathroom Mirror
Hanging a large frameless bathroom mirror can significantly enhance the aesthetics and functionality of a bathroom. These mirrors provide a clean, modern look, reflecting light and creating a perception of increased space. However, due to their size and frameless nature, proper installation is crucial to ensure safety and longevity. This article outlines a comprehensive guide to hanging a large frameless bathroom mirror, covering essential preparations, installation methods, and safety considerations.
Planning and Preparation: Ensuring a Successful Installation
Before commencing the physical installation, thorough planning and preparation are paramount. This phase involves selecting the appropriate mirror, gathering necessary tools and materials, and accurately measuring and marking the desired location.
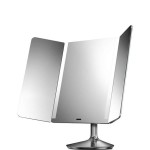
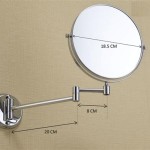
Mirror Selection: When choosing a frameless mirror, several factors warrant consideration. The size of the mirror should be proportionate to the size of the bathroom and the vanity. Consider the mirror's thickness; thicker mirrors (typically ¼ inch or 6mm) offer greater durability and are less prone to warping. It’s also advantageous to opt for mirrors with polished edges, which provide a more refined appearance and reduce the risk of chipping or cracking. Some mirrors come with pre-drilled holes for mounting, while others require adhesive or specialized mounting clips.
Tool and Material Acquisition: The required tools and materials will vary depending on the chosen installation method. However, a general list includes:
*Frameless mirror
*Measuring tape
*Level (a laser level is highly recommended for larger mirrors)
*Pencil or marker
*Stud finder
*Drill and drill bits (appropriate for the wall material)
*Screws and anchors (or mirror mounting clips/adhesive)
*Safety glasses
*Gloves
*Clean cloths
*Mirror mastic or construction adhesive (if using adhesive method)
*Caulk gun and sealant (silicone or acrylic latex caulk)
Location Marking and Measurements: Accurate measurement and marking are critical for a level and centered installation. Begin by determining the desired height of the mirror. A common practice is to position the center of the mirror at approximately eye level. Use a measuring tape to determine the mirror's dimensions and calculate the center point. Mark this center point on the wall using a pencil or marker. Using a level, draw a horizontal line at the desired height, representing the top edge of the mirror. Then, measure and mark the vertical position of the mirror's sides. It’s helpful to create a paper template of the mirror's dimensions to visualize its placement on the wall. This allows for adjustments before any permanent markings or drilling are made. Most importantly, use a stud finder to determine the location of wall studs. Whenever possible, aim to secure the mirror mounting hardware directly into wall studs for maximum support.
Surface Preparation: Before installing the mirror, ensure the wall surface is clean, dry, and free of any loose paint, wallpaper, or debris. If the wall is newly painted, allow sufficient drying time (as recommended by the paint manufacturer) before proceeding. For wallpapered walls, consider removing the wallpaper in the area where the mirror will be mounted to ensure a secure bond.
Installation Methods: Choosing the Right Approach
Several methods can be employed to hang a large frameless bathroom mirror, each with its own advantages and disadvantages. The choice of method depends on factors such as the size and weight of the mirror, the type of wall surface, and personal preference. The most common methods include using mirror mounting clips, adhesive, or a combination of both.
Mirror Mounting Clips: Mirror mounting clips are metal or plastic brackets designed specifically for securing mirrors to walls. They are available in various styles and sizes, including edge clips, J-clips, and bottom support clips. Edge clips are typically used in sets of four, positioned at the top and bottom edges of the mirror. J-clips, also used in pairs, support the mirror from beneath. Bottom support clips provide additional support for heavier mirrors. To install mirror mounting clips, follow these steps:
1.Based on the location markings, position the clips at the appropriate points on the wall. Ensure the clips are level and aligned with the mirror's edges.
2.Use a drill to create pilot holes at the marked locations. The size of the drill bit should match the size of the screws being used.
3.Insert wall anchors into the pilot holes if necessary. Wall anchors provide additional support in drywall or plaster.
4.Secure the clips to the wall using screws. Ensure the screws are tightened securely, but avoid over-tightening, which could damage the wall or the clips.
5.Carefully lift the mirror and position it within the clips. Ensure the mirror is securely seated in the clips.
Adhesive Method: The adhesive method involves using a specialized mirror mastic or construction adhesive to bond the mirror directly to the wall. This method is suitable for smooth, flat surfaces and can provide a seamless, frameless appearance. However, it requires careful application and can be more challenging to remove the mirror in the future. To install a mirror using adhesive, follow these steps:
1.Apply a generous amount of mirror mastic or construction adhesive to the back of the mirror. Apply the adhesive in vertical beads, spaced several inches apart. Avoid applying adhesive too close to the edges of the mirror to prevent squeeze-out.
2.Carefully lift the mirror and position it on the wall, aligning it with the location markings. Press the mirror firmly against the wall, applying even pressure across the entire surface.
3.Use shims or spacers to support the mirror while the adhesive cures. These shims will prevent the mirror from sliding down the wall during the drying process. Follow the adhesive manufacturer's instructions for curing time, typically 24-48 hours.
4.Once the adhesive has fully cured, remove the shims. Apply a bead of sealant (silicone or acrylic latex caulk) around the edges of the mirror to create a watertight seal and conceal any gaps.
Combination Method: For larger or heavier mirrors, a combination of mounting clips and adhesive provides the most secure and reliable installation. This method combines the mechanical support of the clips with the bonding strength of the adhesive. Follow the steps for both the mirror mounting clips and adhesive methods, ensuring compatibility between the adhesive and the clip materials.
Safety Considerations and Finishing Touches
Safety is paramount when handling large frameless mirrors. These objects can be heavy and fragile, posing a risk of injury if not handled properly. Additionally, ensuring a clean and professional finish enhances the overall aesthetic of the installation.
Safety Precautions:
*Always wear safety glasses and gloves when handling mirrors. Safety glasses protect your eyes from shards of glass, and gloves provide a better grip and protect your hands from cuts.
*Have a helper assist with lifting and positioning the mirror, especially for larger sizes. This reduces the risk of dropping the mirror and causing injury or damage.
*Work in a well-lit area to ensure clear visibility. Poor lighting can increase the risk of accidents.
*If drilling through tile, use a specialized tile drill bit and apply gentle pressure to avoid cracking the tile.
Edge Sealing and Finishing: Once the mirror is securely installed, sealing the edges prevents moisture from seeping behind the mirror, which can damage the silver backing and cause discoloration. Apply a bead of sealant (silicone or acrylic latex caulk) around the perimeter of the mirror where it meets the wall. Smooth the sealant with a wet finger or a caulking tool for a clean, professional finish. Wipe away any excess sealant with a damp cloth.
Cleaning and Maintenance: Clean the mirror with a glass cleaner and a soft cloth. Avoid using abrasive cleaners or materials that could scratch the surface. Regularly inspect the mirror for any signs of damage, such as cracks or chips. Address any issues promptly to prevent further deterioration.
By following these comprehensive guidelines, one can successfully hang a large frameless bathroom mirror, enhancing the bathroom's aesthetic appeal and functionality while ensuring a safe and long-lasting installation.

How To Install A Mirror Without Frame Merrypad

How To Hang A Frameless Mirror On The Wall With Pictures

How To Hang A Frameless Mirror On The Wall With Pictures

How To Hang A Frameless Mirror On Wall
:strip_icc()/DesireeBurnsInteriors1-f76d25cad90041c88fbae4a7dc10aab4.jpg?strip=all "2 Simple Ways To Hang A Frameless Mirror")
2 Simple Ways To Hang A Frameless Mirror

How To Hang A Hanging Mirror Without Accompanying Hardware

Wall Mount A Bathroom Mirror N Handyman

How To Hang A Large Wall Mirror Step By Tutorial

How To Hang A Frameless Mirror On Wall 3 Methods

How To Hang A Large Or Heavy Mirror
See Also