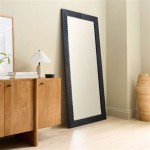
How To Install a Large Bathroom Mirror
Installing a large bathroom mirror can dramatically enhance the aesthetics and functionality of a space. However, due to the size and weight, the installation process requires careful planning and execution. This guide provides a step-by-step approach to ensure safe and successful installation.
Preparing for Installation
Before beginning the installation, gathering the necessary tools and materials is crucial. Proper preparation streamlines the process and minimizes potential issues.
- Measure the mirror and the wall space: Accurate measurements are paramount to ensure a proper fit.
- Acquire appropriate mounting hardware: Select hardware rated for the weight and size of the mirror. Consult the mirror manufacturer's recommendations for specific hardware guidance.
- Gather necessary tools: These typically include a stud finder, level, drill, screwdriver, measuring tape, pencil, and safety glasses.
- Prepare the wall surface: Ensure the wall is clean, dry, and free of any debris that may interfere with adhesion or mounting.
Locating and Marking Stud Positions
Mounting a large, heavy mirror securely requires anchoring it to wall studs. This provides the necessary support to prevent the mirror from falling.
- Use a stud finder: Run the stud finder across the wall area where the mirror will be installed to locate and mark the center of each stud.
- Verify stud location: Double-check the stud location by lightly tapping the wall. A solid sound indicates a stud, while a hollow sound suggests an empty cavity.
- Mark stud positions: Clearly mark the center of each stud with a pencil. These marks will guide the placement of the mounting hardware.
Positioning and Securing the Mounting Hardware
Careful placement and secure installation of the mounting hardware are critical for ensuring the mirror's stability. This stage requires precision and adherence to the manufacturer's instructions.
- Position the mounting hardware: Align the mounting hardware with the marked stud locations. Ensure the hardware is level and at the correct height for the mirror.
- Pre-drill pilot holes: Using a drill bit slightly smaller than the screws, pre-drill pilot holes into the marked stud locations. This helps prevent the wood from splitting.
- Secure the mounting hardware: Use a screwdriver to firmly attach the mounting hardware to the wall studs. Ensure the screws are driven straight and flush with the surface of the hardware.
Attaching the Mirror to the Wall
With the mounting hardware securely in place, the mirror can be carefully attached. This step often requires assistance due to the size and weight of the mirror.
- Enlist assistance: Have another person help lift and position the mirror against the wall and onto the mounting hardware.
- Align the mirror: Carefully align the mirror with the mounting hardware, ensuring it is level and centered.
- Secure the mirror: Depending on the mounting system, this may involve sliding the mirror onto clips, engaging hooks, or tightening screws. Follow the manufacturer's instructions precisely.
Applying Mirror Adhesive (Optional)
For added security and stability, especially with exceptionally large or heavy mirrors, mirror adhesive can be used. This provides additional bonding to the wall surface.
- Choose appropriate adhesive: Select a mirror adhesive specifically designed for bathroom environments. Ensure it is compatible with both the mirror and the wall material.
- Apply the adhesive: Following the manufacturer's instructions, apply the adhesive to the back of the mirror in a consistent pattern. Avoid applying adhesive too close to the edges to prevent it from squeezing out.
- Position and secure the mirror: Carefully position the mirror against the wall, aligning it with the mounting hardware. Apply firm pressure to ensure proper adhesion.
- Allow adequate drying time: Refer to the adhesive manufacturer's instructions for the recommended drying time before using the mirror.
Finishing the Installation
Once the mirror is securely mounted, the final steps involve concealing the mounting hardware and cleaning the mirror surface.
- Install cover caps or trim: If applicable, install any provided cover caps or trim pieces to conceal the mounting hardware and provide a finished look.
- Clean the mirror: Use a glass cleaner to remove any fingerprints, smudges, or residue from the mirror surface.
Safety Precautions
Throughout the installation process, prioritizing safety is essential. Following these precautions can help prevent accidents and injuries.
- Wear safety glasses: Protect your eyes from dust and debris generated during drilling.
- Use appropriate lifting techniques: When lifting the mirror, bend your knees and keep your back straight to avoid strain.
- Work in a well-ventilated area: If using mirror adhesive, ensure adequate ventilation to minimize exposure to fumes.
- Disconnect power: If working near electrical outlets or fixtures, disconnect the power to prevent electrical shock.

How To Install A Mirror Without Frame Merrypad

How To Frame Out That Builder Basic Bathroom Mirror For 20 Or Less

Easy Diy Tutorial Adding Trim Around A Giant Mirror For Ers

Bathroom Mirror Frames 2 Easy To Install Sources A Diy Tutorial Retro Renovation

Diy How To Frame A Builder Grade Bathroom Mirror Home And Hallow

Mirror Frame Diy How To Update A Basic Bathroom Our Faux Farmhouse

Diy Bathroom Mirror Frame Without Removing Clips Her Happy Home

How To Frame Out That Builder Basic Bathroom Mirror For 20 Or Less

Diy Bathroom Mirror Frame For Under 10 O Hayley Blog

Diy Bathroom Mirror Frame For Under 10 O Hayley Blog

