Elevate Your Bathroom with DIY Mirror Trim
A bathroom mirror is more than a functional necessity; it's a design element that can significantly impact the overall aesthetic of the space. Adding trim to your bathroom mirror can transform it from a simple fixture into a stylish focal point, adding a touch of elegance and sophistication to your bathroom décor. This DIY project is surprisingly easy and affordable, allowing you to personalize your bathroom with minimal effort and expense.
Choosing the Right Materials for Your Bathroom Mirror Trim
The first step in this DIY project is selecting the appropriate materials. The type of trim you choose will depend on your desired aesthetic and the existing bathroom décor. Here are some popular options for bathroom mirror trim:
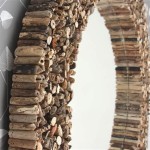
- Wood Trim: This is a classic choice for bathroom mirror trim, offering a timeless and elegant look. Wood trim comes in various styles, textures, and finishes, allowing you to choose the perfect match for your bathroom's ambiance. You can opt for stained wood for a rustic feel, painted wood for a more modern look, or even use reclaimed wood for an eco-friendly and unique touch.
- Metal Trim: Metal trim provides a sleek and contemporary look to your bathroom mirror. You can choose from various finishes like brushed nickel, stainless steel, or gold, depending on the overall color scheme of your bathroom. Metal trim is often preferred for its durability and resistance to moisture, making it a practical choice for the humid bathroom environment.
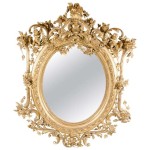
- Moulding: Moulding offers a wide range of decorative options for your bathroom mirror trim. You can find intricate patterns and designs, adding a touch of sophistication to your bathroom décor. Moulding comes in various materials like wood, plastic, or polyurethane, allowing you to select the best option based on your budget and aesthetic preferences.
- Tile: Tile is a unique option for bathroom mirror trim, offering a bold and contemporary look. You can choose from a wide range of colors, patterns, and textures to create a personalized and eye-catching design around your bathroom mirror.
Beyond the primary material, you'll also need adhesive, a miter saw for precise cuts, and a level to ensure proper alignment. Additionally, consider using painters tape to protect the surrounding area during the installation process and a sealant for durability and moisture resistance.
Steps for Installing Bathroom Mirror Trim
Once you have gathered all the necessary materials, you can begin the installation process. Here's a step-by-step guide to help you achieve a professional-looking finish:
- Measure and Cut: First, measure the dimensions of your bathroom mirror and calculate the required lengths for your trim pieces. Use a miter saw to make precise cuts at 45-degree angles, ensuring a clean and seamless fit. Be sure to account for any overlapping areas for a secure and attractive finish.
- Prepare the Surface: Before applying the trim, clean the surface of your bathroom mirror and the surrounding wall area using a damp cloth. Make sure the surface is completely dry before proceeding to the next step to ensure proper adhesion of the adhesive.
- Apply Adhesive: Use a strong and durable adhesive designed for bathroom use. Apply a thin, even layer of adhesive along the back of the trim pieces. Be careful not to apply too much adhesive as it can cause excess oozing, making the final look messy.
- Attach and Align: Carefully attach the trim pieces around the bathroom mirror, ensuring proper alignment. Use a level to ensure the trim is straight and even. Gently press down on the trim pieces, ensuring a secure bond with the surface.
- Secure and Finish: After applying the trim pieces, allow the adhesive to dry completely according to the manufacturer's instructions. Once dry, use a sealant to protect the trim from moisture and ensure long-lasting durability. You can also use a caulking gun to create a neat and seamless finish between the trim and the wall, hiding any gaps or imperfections.
Tips for Achieving a Perfect Finish
To ensure a successful DIY bathroom mirror trim project, consider these additional tips:
- Practice Makes Perfect: If you are new to DIY projects, practice cutting and joining trim pieces using scrap pieces of wood or other materials. This will familiarize you with the process and help you avoid mistakes on your actual bathroom mirror trim.
- Use a Level: Ensure the trim pieces are perfectly level and straight using a level. This will guarantee a professional-looking finish and prevent any noticeable gaps or unevenness.
- Work in Stages: Instead of attempting to attach all the trim pieces at once, work in sections to ensure proper alignment and prevent any shifting or dislodging of the trim pieces. This will help you maintain control over the installation process and achieve a more polished finish.
- Clean Up: After the adhesive is applied, use a damp cloth to clean up any excess adhesive that may have oozed out. This will ensure a clean and polished finish.
Updating your bathroom mirror with DIY trim is a cost-effective and satisfying project that can dramatically enhance your bathroom's aesthetics. By carefully selecting materials, following the installation steps, and incorporating helpful tips, you can achieve a professional-looking finish that adds a touch of elegance and sophistication to your bathroom décor.

Mirror Frame Diy How To Update A Basic Bathroom Our Faux Farmhouse

Mirror Frame Diy How To Update A Basic Bathroom Our Faux Farmhouse

Diy Stick On Mirror Frame Sawdust Sisters

Easy Diy Tutorial Adding Trim Around A Giant Mirror For Ers

Diy Framed Bathroom Mirrors Living With Lady

Diy Bathroom Mirror Frame With Molding The Happier Homemaker

How To Frame A Mirror

Mirror Frame Diy How To Update A Basic Bathroom Our Faux Farmhouse

How To Make An Easy Diy Bathroom Mirror Frame Momhomeguide Com

Diy Bathroom Mirror Frame For Under 10 O Hayley Blog