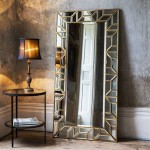
How To Make A Mirror Frame At Home
Creating a custom frame for a mirror elevates its aesthetic appeal and adds a personal touch to any space. This process can be surprisingly simple and requires minimal specialized tools, allowing individuals to tailor the frame's design to complement existing decor.
The initial step involves gathering the necessary materials. These typically include the mirror itself, framing material (wood, metal, or plastic), adhesive suitable for both the frame material and mirror, measuring tools (tape measure, ruler), cutting tools specific to the chosen frame material (saw for wood, metal snips for metal), and finishing supplies (paint, stain, sealant).
Accurate measurements are crucial for a well-fitted frame. The mirror's dimensions should be precisely measured, accounting for any bevels or rounded edges. These measurements will determine the required length and width of the frame pieces.
Selecting the appropriate frame material is essential for achieving the desired aesthetic. Wood provides a classic look and offers versatility in terms of finishing options. Metal frames create a modern or industrial feel, while plastic frames are lightweight and often more budget-friendly. The choice of material also dictates the necessary cutting tools and adhesives.
Once the material is selected, it needs to be cut according to the measured dimensions. For wooden frames, a miter saw ensures accurate angled cuts for clean joins at the corners. Metal frames may require metal snips or a saw specifically designed for cutting metal. Plastic frames can often be cut with a standard utility knife or saw.
Assembling the frame requires careful alignment and secure bonding. Wood frames often utilize wood glue and finishing nails or brads for stability. Metal frames may require soldering or specialized metal adhesives. Plastic frames typically rely on strong adhesive specifically designed for plastics. Clamps can be helpful in maintaining alignment and pressure while the adhesive sets.
Before attaching the frame to the mirror, consider the desired finish. Wood frames can be stained, painted, or varnished. Metal frames might be painted or left with a natural finish. Plastic frames can be painted with specialized plastic-compatible paint. Applying the finish before attaching the frame to the mirror simplifies the process and minimizes the risk of damaging the mirror surface.
Once the frame is assembled and finished, it can be attached to the mirror. Applying adhesive to the back of the frame ensures proper adhesion. The frame should be carefully aligned with the mirror edges and gently pressed into place. Allowing adequate drying time, as specified by the adhesive manufacturer, is critical for a secure bond.
Different frame materials necessitate specific adhesives. Wood frames often benefit from wood glue or construction adhesive. Metal frames may require epoxy or specialized metal adhesives. Plastic frames require adhesives designed for bonding plastic surfaces. Choosing the correct adhesive ensures a strong and lasting bond between the frame and the mirror.
Adding hanging hardware to the back of the frame allows for easy wall mounting. D-rings or wire hangers are commonly used options. The placement of the hardware should be carefully considered to ensure proper balance and prevent tilting once the mirror is hung.
Safety precautions throughout the process are paramount. Eye protection should be worn during cutting and sanding. Adequate ventilation is necessary when working with paints, stains, or adhesives. Gloves can protect hands from adhesives and splinters. Following manufacturer instructions for all tools and materials ensures safe and effective use.
Variations in frame design can be achieved through the use of decorative molding, embellishments, or unique paint techniques. Molding can add depth and intricacy to the frame. Embellishments, such as beads, shells, or mosaic tiles, can create a personalized aesthetic. Various paint techniques, like distressing or stenciling, offer further customization options.
Choosing the right frame width depends on the size and style of the mirror. Larger mirrors generally benefit from wider frames, while smaller mirrors can accommodate narrower frames. The frame width should also complement the overall aesthetic of the room and the desired style of the mirror.
Considering the existing decor helps to ensure that the framed mirror complements the overall aesthetic of the room. Matching the frame's style and finish to the existing furniture and color palette creates a cohesive and harmonious look.
Regular cleaning and maintenance help preserve the appearance of the framed mirror. Dusting the frame with a soft cloth prevents buildup. Cleaning the mirror surface with a glass cleaner maintains its clarity and reflectivity. Avoiding harsh chemicals or abrasive cleaners prevents damage to both the frame and the mirror.

Easy Diy Stick Framed Mirror That Looks Expensive

How To Make Any Frame Into A Mirror Stonegable

Diy Farmhouse Wood Frame Mirror She Gave It A Go

20 Easy Creative Diy Mirror Frame Ideas

How To Build A Mirror Frame Sunshine And Rainy Days

Diy Mirror Frame Ideas To Enhance Your Bathroom

Diy Rustic Mirror Houseful Of Handmade

30 Diy Mirror Frame Ideas Mint Design Blog

Diy Bathroom Mirror Frame Without Removing Clips Her Happy Home

Diy How To Make A Squiggle Mirror City Chic Decor

