How to Put LEDs on a Mirror
Adding LED lights to a mirror is a popular DIY project that can significantly enhance the look and functionality of your bathroom, vanity, or any other space. LED lights provide bright, energy-efficient illumination and create a modern, stylish aesthetic. This guide will walk you through the process step-by-step, providing clear instructions and helpful tips for a successful installation.
1. Planning and Preparation
Before beginning the installation, careful planning is crucial. This step involves determining the desired light placement, choosing the appropriate LED strip, and gathering necessary tools and materials.
Determine the Light Placement: Consider the desired effect. For example, you might want a single strip around the perimeter of the mirror, multiple strips for a dramatic effect, or strategically placed strips to highlight specific areas. Measure the mirror carefully to determine the length of LED strip required.
Choose the LED Strip: There are various types of LED strips available, each with different characteristics. Consider factors like color temperature (warm white, cool white, or daylight), brightness (measured in lumens), and waterproof rating (IP65 or IP67 for bathroom use). Non-waterproof strips are suitable for indoor use, while waterproof strips are recommended for areas prone to moisture.
Gather Tools and Materials: The following tools and materials will be needed for the installation:
- LED strip (with the desired length and specifications)
- Power supply (with the appropriate voltage and amperage for the LED strip)
- Connectors (for joining the LED strip segments)
- Wire strippers
- Soldering iron (optional)
- Solder wire (optional)
- Heat shrink tubing (optional)
- Adhesive tape or mounting clips (for securing the LED strip)
- Wire cutters
- Screwdriver (for securing the power supply)
- Electrical tape
- Measuring tape
- Level
- Safety glasses
2. Installing the LED Strip
Once you have gathered the necessary materials and planned the placement of the LED strip, you can begin the installation process.
Clean the Mirror Surface: Thoroughly clean the mirror surface with a mild cleaner and a soft cloth. Ensure the surface is completely dry before proceeding to the next step. This will ensure a secure bond for the adhesive on the LED strip.
Install the LED Strip: Depending on the chosen LED strip and your preference, there are two main methods for mounting the strip:
- Adhesive Tape Method: Peel off the protective backing on the adhesive tape on the back of the LED strip and apply it to the mirror surface, following the planned layout. Press firmly along the entire length of the strip to ensure a secure bond.
- Mounting Clips Method: Install the mounting clips to the mirror surface at regular intervals, following the manufacturer's instructions. Then, snap the LED strip onto the clips. This method provides a more secure attachment than adhesive tape and allows for easier removal and reinstallation.
Connect the LED Strip: Connect the individual LED strip segments using the provided connectors. If using a soldered connection, make sure to properly tin the wires before soldering. Protect the soldered connections with heat shrink tubing. After connecting the segments, leave some slack in the wire to avoid strain during installation.
Connect the Power Supply: Connect the power supply to the LED strip according to the manufacturer's instructions. Ensure to use the correct polarity (positive to positive and negative to negative) for the electrical connections. Secure the power supply to a stable location with screws.
3. Testing and Finishing Touches
After completing the installation, thoroughly test the LED lights to ensure they are working properly.
Test the Lights: Turn on the power supply and check the LED lights for any malfunctions or issues. Ensure that all segments are lit up and that the brightness and color temperature are to your liking. If there are any problems, troubleshoot by carefully checking the connections and ensuring all wires are securely connected.
Final Touches: Once the lights are working, you can make any necessary adjustments to the placement or wiring. If necessary, use electrical tape to secure loose wires and ensure a neat and professional installation.
Safety Precautions: Always disconnect the power supply before making any adjustments to the wiring or LED strip. Wear safety glasses to protect your eyes and use caution when handling electrical components.
Remember to follow the manufacturer's instructions for your specific LED strips and power supply. These instructions may vary depending on the brand and model. By following these steps and taking the necessary precautions, you can successfully install LED lights on your mirror, enhancing its aesthetic appeal and functionality.

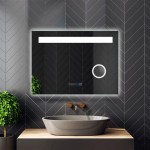
48x36 Inch Dimmable Led Lighted Bathroom Mirror Rectangle Hauschen Home Hauschenhome

How To Install A Front Lit Led Mirror Diy With No Drywall Work New Electric

Diy Led Mirror Installation Personal Tips And Review

How To Diy Vanity Mirror With Led Strip Lights

How To Diy Vanity Mirror With Led Strip Lights

How Do You Put Led Lights On A Round Mirror Ehomemart

How To Diy Vanity Mirror With Led Strip Lights

Easy Diy Led Light Up Vanity Mirror With Remote Tutorial By Yanaglo

How To Install Led Mirror Lights Installation Instruction For Technology News Global Lighting E Commerce

How To Diy Vanity Mirror With Led Strip Lights

