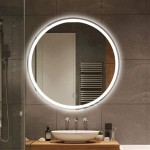
How To Put Vanity Lights Around A Mirror
Installing vanity lights around a mirror significantly enhances bathroom lighting, creating a more functional and aesthetically pleasing space. This article provides a comprehensive guide to installing vanity lights, encompassing various mounting options and essential safety precautions.
Planning and Preparation: Before beginning the installation, careful planning is crucial. Measure the mirror's dimensions accurately to determine the appropriate light fixture size and placement. Ideally, vanity lights should be slightly shorter than the mirror's width, leaving a balanced space on either side. Select a fixture style that complements the bathroom's overall design.
Choosing the Right Light Fixture: Several types of vanity lights are available, each offering distinct advantages. Horizontal bars provide even illumination across the mirror, while individual sconces offer more focused light and design flexibility. Consider the desired level of brightness and color temperature when selecting bulbs. LED bulbs are energy-efficient and long-lasting, making them a popular choice for bathroom vanity lighting.
Safety First: Electrical work always poses potential hazards. Before starting any electrical work, turn off the power to the bathroom circuit breaker. Use a voltage tester to ensure the power is completely off. If uncomfortable working with electrical wiring, consulting a qualified electrician is highly recommended.
Mounting the Fixture: The mounting process varies depending on the chosen light fixture and the existing wiring. Most fixtures come with detailed installation instructions. Generally, the process involves attaching a mounting bracket to the wall, connecting the fixture's wires to the electrical supply wires within the junction box, and securing the fixture to the mounting bracket.
Direct Wiring to a Junction Box: This is the most common installation method. The junction box should be located above the mirror, typically centered. The fixture's wires are connected to the corresponding wires in the junction box using wire nuts, ensuring secure and properly insulated connections. The junction box is usually hidden by the fixture's base plate.
Wiring with a Plug-In Fixture: Some vanity lights are designed with a plug for direct connection to a wall outlet. This method is simpler than direct wiring but requires a nearby outlet. If an existing outlet is not conveniently located, an electrician can install one.
Working with Different Wall Materials: Different wall materials require different mounting hardware. For drywall, use appropriate wall anchors to ensure a secure hold. For tile walls, specialized drill bits and anchors are necessary to avoid cracking the tile. Consult the fixture's instructions for specific recommendations based on wall type.
Positioning the Lights: The ideal height for vanity lights is generally between 65 and 78 inches from the floor. However, this can be adjusted based on individual preferences and mirror height. The goal is to provide even illumination across the face without casting harsh shadows. Mark the desired location on the wall before drilling any holes.
Connecting the Wires: When connecting the wires, carefully match the colors. Black wires connect to black (hot), white wires connect to white (neutral), and green or bare copper wires connect to the ground wire. Secure the connections with wire nuts, ensuring they are tight and completely cover the exposed wire ends.
Securing the Fixture: After the wires are connected, carefully tuck them into the junction box and mount the fixture to the wall bracket. Secure the fixture with screws, ensuring it is firmly attached. Attach the light shades or covers, if applicable.
Testing the Installation: Once the fixture is mounted, restore power to the circuit breaker. Test the lights to ensure they are functioning properly. If the lights do not work, double-check the wiring connections and ensure the power is on.
Final Adjustments: After confirming the lights are working correctly, make any necessary adjustments to the fixture's position or angle to achieve the desired lighting effect. Clean the fixture and surrounding area to remove any fingerprints or debris.
Utilizing Dimmers: Installing a dimmer switch allows for adjustable light intensity, providing flexibility for different tasks and creating ambiance. If installing a dimmer, ensure it is compatible with the chosen light bulbs.
Maintenance and Cleaning: Regularly cleaning the vanity lights will maintain their appearance and functionality. Use a soft cloth and gentle cleaning solution to wipe away dust and grime. Avoid using abrasive cleaners that could damage the fixture's finish.
Seeking Professional Assistance: While installing vanity lights can be a DIY project, complex electrical work or unfamiliar wiring situations necessitate the expertise of a qualified electrician. Consulting a professional ensures safe and compliant installation, mitigating potential hazards and ensuring optimal results.

How To Diy Vanity Mirror With Led Strip Lights

10 Diy Vanity Mirror Projects That Show You In A Diffe Light

Guide To Hanging Bathroom Vanity Lighting And Mirrors Liven Design

How To Install A Bathroom Vanity Light For Quick Update Hunter Fan

How To Diy Vanity Mirror With Led Strip Lights

Proper Configuration Of Lights Over Vanity With Placement

How To Get Your Bathroom Vanity Lighting Right

Diy Light Up Vanity Mirrors You Can Make Ohmeohmy Blog

How Do You Put Led Lights On A Round Mirror Ehomemart
How To Perfect Your Vanity Lighting

