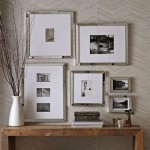
How to Make a Frame for an Oval Mirror
Adding a custom-made frame to an oval mirror can elevate its aesthetic appeal and enhance its presence in a room. Whether you desire a classic, modern, or rustic look, crafting a frame yourself allows for complete creative control and personalizes the piece. This comprehensive guide outlines the steps involved in constructing a sturdy and visually appealing frame for your oval mirror.
1. Gathering Materials and Tools
Before embarking on the framing project, it is crucial to gather the necessary materials and tools. These include:
- Wood: Choose wood that complements the style and design of the mirror. Common options include pine, oak, or poplar. Consider the desired thickness, as it will affect the frame's overall appearance and stability.
- Miter Saw or Hand Saw: A miter saw provides accurate cuts for the frame's corners, whereas a hand saw can be used for less precise cuts.
- Measuring Tape and Pencil: These tools ensure accurate measurements for the frame's dimensions.
- Wood Glue: Use a high-quality wood glue designed for woodworking projects.
- Clamps: Clamps are essential for securely holding the frame pieces together while the glue dries.
- Finishing Supplies: Depending on the desired aesthetic, finish the frame using sandpaper, stain, paint, or varnish.
- Mirror Fasteners: Secure the mirror to the frame using appropriate mirror fasteners, such as D-rings and wire, or adhesive mirror clips.
2. Measuring and Cutting the Frame
Precise measurements are crucial for a well-fitting frame. Begin by measuring the exact dimensions of the oval mirror, including its length and width. Add desired frame thickness to the measured dimensions to calculate the overall frame size. For example, if the mirror is 12 inches long and 8 inches wide, and you want a 2-inch thick frame, the frame's overall dimensions will be 16 inches long and 12 inches wide.
The frame consists of four pieces: two long sides, two short sides. Cut the wood pieces to the calculated dimensions using a miter saw or hand saw. Each piece should be cut at a 45-degree angle to create a mitered joint, ensuring a clean and professional look at the corners.
For oval-shaped mirrors, the frame's corners will not be perfectly square. Instead, they will have a slight curve that matches the mirror's oval shape. This curve will need to be shaped into the wood pieces. A miter saw can be used to create most of the cut, but the final shaping can be done by hand using a sanding block or rasp.
3. Assembling the Frame
With all the pieces cut to size, apply a thin layer of wood glue to the mitered edges of each piece. Carefully join the pieces together, aligning the mitered edges perfectly. Apply clamps to hold the frame sections firmly in place while the glue dries. Ensure that the clamps are evenly distributed and do not distort the frame's shape.
Allow the glue to dry completely before removing the clamps. The drying time varies depending on the type of glue used, so refer to the manufacturer's instructions.
4. Finishing the Frame
Once the glue has completely dried, the frame is ready for finishing. The finishing stage involves smoothing the frame's surface, applying stain or paint, and adding a protective layer if desired.
Sand the frame thoroughly using progressively finer-grit sandpaper, starting with a coarse grit for removing any rough edges and finishing with a fine grit for a smooth surface. Apply stain or paint using a brush or roller, ensuring even coverage and coverage of the entire frame.
If desired, apply a clear sealant, such as varnish or polyurethane, to protect the frame from wear and tear and enhance its durability.
5. Attaching the Mirror
Finally, attach the mirror to the frame. This can be done using mirror fasteners, such as D-rings and wire, or adhesive mirror clips. If using D-rings and wire, secure the D-rings to the back of the frame. Thread the wire through the D-rings and attach it to a hanging system on the wall.
For adhesive mirror clips, apply the clips to the back of the mirror and press them onto the frame to secure it. Ensure that the mirror is securely attached to the frame before hanging it on the wall.
By following these steps, you can create a beautiful and personalized frame for your oval mirror. The process allows you to tailor the frame's design to the mirror and your desired aesthetics, enhancing the mirror's impact and adding a unique touch to your space.

Diy Oval Mirror Frame Domestically Speaking

I Need An Idea To Frame My Oval Shaped Bathroom Mirrors Hometalk

Diy Oval Mirror Frame Domestically Speaking

20 Fantastic Diy Mirror Frame Ideas A Cultivated Nest

How To Frame A Round Mirror

Framing Oval Mirror With Mosaic Tile Bathroom Frame

Oval Rosette Mirror Confessions Of A Serial Do It Yourselfer

30 Diy Mirror Frames Scratch And Stitch

Gold Plastic Oval Mirror Makeover Confessions Of A Serial Do It Yourselfer

Diy Mirror Frame Upcycle That