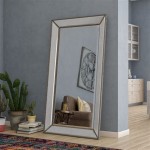
Gluing a Mirror to Wood: A Comprehensive Guide
Gluing a mirror to wood is a common task for DIY enthusiasts and professionals alike. Whether you're crafting a custom vanity mirror, fixing a broken mirror frame, or simply adding a decorative element to your home, understanding the proper techniques for adhering a mirror to wood is essential for a successful and long-lasting result.
This article will delve into the different types of glue suitable for this purpose, provide step-by-step instructions for the gluing process, and offer tips for ensuring a secure and aesthetically pleasing finish.
Choosing the Right Glue
The choice of glue is crucial for achieving a strong and durable bond between the mirror and wood. Several types of adhesive are popular for this application, each with its unique characteristics and suitability. Here's a breakdown of common options:
- Construction adhesive: A versatile option for general construction projects, construction adhesive provides a strong bond and can handle a wide range of materials. It's often preferred for larger mirrors and heavier frames, offering excellent adhesion and resistance to moisture and temperature fluctuations.
- Silicone sealant: Silicone sealant, while not typically used for primary bonding, can be effective in filling gaps and sealing edges, preventing moisture from seeping in and potentially causing damage to the wood or mirror. It's also a good choice for applications where a flexible bond is required.
- Mirror mastic: Specifically formulated for adhering mirrors, mirror mastic offers a strong and permanent bond that is resistant to moisture and temperature changes. It's particularly well-suited for mirrors with intricate shapes and larger sizes.
- Epoxy adhesive: Known for its exceptional strength and water resistance, epoxy adhesive is a good choice for heavy mirrors or applications where extreme durability is required. However, it can be more challenging to work with due to its rapid curing time and potential for messiness.
Preparing for Gluing
Proper preparation is key to ensure a successful and long-lasting bond between the mirror and wood. The following steps will help you achieve the best results:
- Clean the surfaces: Thoroughly clean both the mirror and wood surface with a mild detergent and a soft cloth. Ensure both surfaces are free from dust, debris, grease, or any other contaminants that could interfere with the glue's adhesion.
- Sand the wood surface: Lightly sand the wood surface with fine-grit sandpaper to create a slightly rough texture that will improve the glue's grip. This step is especially important for smooth surfaces like plywood or painted wood.
- Apply primer (optional): For porous wood surfaces, applying a primer can help create a smoother and more uniform surface, improving the glue's adhesion and preventing the wood from absorbing the glue, potentially weakening the bond.
- Measure and mark: Carefully measure the position of the mirror on the wood surface and mark the placement with a pencil or measuring tape. Ensure the mirror is centered and aligned before applying any glue.
Application and Curing
Once the surfaces are prepared, you can carefully apply the glue according to the chosen adhesive's instructions. Generally, the following procedure is recommended:
- Apply glue to the wood surface: Use a bead of glue along the edges and strategically placed dots on the surface of the wood. The amount of glue will vary depending on the size and weight of the mirror.
- Position the mirror: Carefully position the mirror on the wood surface, aligning it with the marked lines. Ensure the mirror is level and free of any gaps or unevenness.
- Apply pressure and secure: Apply even pressure to the mirror surface to ensure a good bond with the wood. Use weights, clamps, or a combination of both to press down on the mirror, ensuring a tight fit and preventing movement during the curing process.
- Allow the glue to cure: Refer to the manufacturer's instructions for the glue's recommended curing time. This varies depending on the type of glue used and environmental factors such as temperature and humidity.
- Remove clamps or weights: Once the glue has cured completely, carefully remove the clamps or weights, ensuring the mirror remains securely attached to the wood surface.
Additional Tips for Success
Here are some additional tips to ensure a successful and durable bond:
- Use a clean and dry workspace: This will help prevent dust and other debris from contaminating the glue and compromising its adhesion.
- Wear gloves: Gloves will protect your hands from glue residue and prevent potential skin irritation.
- Practice safe handling: Large mirrors can be heavy and fragile. Take appropriate precautions to avoid injury during handling and installation.
- Apply glue evenly: Avoid applying too much glue, as this can cause unsightly drips and make it difficult to remove any excess.
- Allow sufficient time for curing: Do not rush the curing process. Ensure the glue has completely cured according to the manufacturer's instructions before using or applying any additional weight to the mirror.

4 Easy Steps To Glue Mirror Wood

How To Glue A Mirror Wood Diy Tutorial

How To Glue A Heavy Mirror The Wall Mom Blog Society

How To Make A Diy Wood Frame Mirror With Mirrors Tea And Forget Me Nots

How To Frame A Mirror With Clips Glue The Wall

How To Glue A Mirror Wood Fast Effective Start Woodworking Now

How To Frame A Bathroom Mirror Diy Family Handyman

Diy Farmhouse Mirror Made From Shims House Of Hepworths

How To Glue Wood A Mirror Surface Hunker

Easy Driftwood Mirror The Wood Grain Cottage