What Can I Use To Stick A Mirror To Wood?
Adhering a mirror to a wooden surface requires careful consideration of several factors. The chosen adhesive must be compatible with both materials, provide a strong and durable bond, and prevent damage to the reflective coating on the mirror. Furthermore, the application process and the environmental conditions the bond will endure play significant roles in the longevity of the installation. Selecting the appropriate adhesive and application method is critical for a successful and lasting outcome.
Several types of adhesives are suitable for this task, each with its own advantages and disadvantages. Construction adhesives, specialized mirror adhesives, and certain types of epoxies are commonly used options. Consider the size and weight of the mirror when selecting an adhesive, as larger and heavier mirrors will require a stronger bond and possibly mechanical support in addition to the adhesive.
The surface preparation of both the wood and the mirror is also paramount. Clean surfaces promote better adhesion. The wood surface should be free of dust, dirt, grease, and any loose particles. The back of the mirror should also be clean and dry. Isopropyl alcohol can be used to clean both surfaces, ensuring that they are free from contaminants that could inhibit bonding.
Selecting the Right Adhesive
Choosing the right adhesive hinges on the specific requirements of the project. Factors such as the size and weight of the mirror, the type of wood, and the environmental conditions must be taken into account. Each type of adhesive possesses unique properties that make it suitable for different applications.
Mirror Mastic: Specifically formulated for adhering mirrors, mirror mastic is a widely recommended option. It is designed to be non-corrosive, preventing damage to the silvering on the back of the mirror. This is crucial because many adhesives contain chemicals that can react with the mirror's backing, leading to discoloration and degradation over time. Mirror mastic typically offers good initial tack and a strong, permanent bond. It usually comes in tubes that can be applied with a caulking gun, ensuring even distribution.
Construction Adhesives: Construction adhesives are versatile and can be used for a variety of bonding applications, including adhering mirrors to wood. However, it is important to select a construction adhesive that is specifically labeled as mirror-safe. Some construction adhesives contain solvents that can damage the mirror backing. Ensure that the chosen product is compatible with both mirror and wood, and that it provides a strong and durable bond appropriate for the weight of the mirror. Consider using a high-strength construction adhesive for larger or heavier mirrors.
Epoxy Adhesives: Epoxy adhesives are known for their exceptional strength and durability. They create a rigid bond that is resistant to moisture and temperature changes. However, epoxies can be more challenging to work with than other types of adhesives, as they typically require mixing two components together. It is also crucial to select an epoxy that is compatible with the mirror backing to prevent damage. While epoxy provides a very strong bond, its rigidity might make it less suitable for applications where there is a risk of vibration or movement.
Adhesive Tapes: Double-sided adhesive tapes, particularly those designed for mirrors, can be used for smaller, lightweight mirrors. These tapes offer a convenient and clean application method. However, they lack the long-term durability and strength of liquid adhesives. They are more susceptible to failure under heavy loads or in humid environments. Ensure the tape is rated for the weight of the mirror and suitable for the surface to which it will be applied. It is generally not recommended for large or heavy mirrors.
Preparing the Surfaces for Adhesion
Thorough surface preparation is critical for achieving a strong and reliable bond. Contaminants such as dust, dirt, grease, and loose particles can interfere with the adhesive's ability to adhere properly. Proper cleaning and preparation techniques will maximize the adhesive's contact with the surfaces, resulting in a more durable and long-lasting bond.
Cleaning the Wood Surface: The wood surface should be thoroughly cleaned to remove any contaminants. Start by wiping the surface with a clean, dry cloth to remove loose dust and debris. For greasy or oily surfaces, use a degreasing cleaner specifically designed for wood. Follow the manufacturer's instructions for the cleaner, and allow the surface to dry completely before applying the adhesive. Sanding the wood surface lightly can also improve adhesion by creating a slightly rough texture for the adhesive to grip onto. Be sure to remove all sanding dust before proceeding. If the wood has been painted or varnished, ensure the coating is sound and well-adhered. Loose or peeling paint or varnish should be removed before applying the adhesive.
Cleaning the Mirror Backing: The back of the mirror also needs to be thoroughly cleaned. Use a soft, lint-free cloth dampened with isopropyl alcohol to remove any dust, dirt, or fingerprints. Avoid using harsh chemicals or abrasive cleaners, as these can damage the reflective coating. Ensure that the isopropyl alcohol has completely evaporated before applying the adhesive. If the mirror has previously been adhered to a surface, carefully remove any residual adhesive. A plastic scraper can be used to gently scrape away the old adhesive. Take care not to scratch the mirror backing during this process. Once the old adhesive has been removed, clean the surface with isopropyl alcohol to remove any remaining residue.
Testing Adhesion on a Small Area: Before applying adhesive to the entire surface, it is advisable to test the adhesion on a small, inconspicuous area. This will help to ensure that the adhesive is compatible with both the wood and the mirror backing. Apply a small amount of adhesive to the test area and allow it to cure according to the manufacturer's instructions. Then, attempt to gently pull the mirror away from the wood. If the adhesive bonds strongly, it is likely suitable for the entire project. If the adhesive fails to bond properly, or if it damages the mirror backing, select a different adhesive. This test can save time and prevent damage to the mirror.
Application Techniques and Best Practices
The application of the adhesive is as important as the selection of the adhesive itself. Proper application techniques will ensure that the adhesive is evenly distributed and that a strong, uniform bond is achieved. Following best practices will help to prevent common problems such as air pockets and uneven surfaces.
Applying the Adhesive Evenly: Apply the adhesive in a uniform pattern to the back of the mirror. For larger mirrors, apply the adhesive in vertical beads spaced a few inches apart. For smaller mirrors, a continuous bead around the perimeter and across the center may be sufficient. Avoid applying too much adhesive, as this can create a thick layer that may not cure properly. Follow the manufacturer's instructions for the recommended application pattern and amount. Using too much adhesive can also cause the mirror to slide out of position during the curing process.
Providing Support During Curing: While the adhesive is curing, provide support to the mirror to prevent it from sliding or falling. This can be achieved using clamps, painter's tape, or temporary shims. Ensure that the support is evenly distributed and does not put undue stress on any one area of the mirror. The curing time will vary depending on the type of adhesive used. Follow the manufacturer's instructions for the recommended curing time. Avoid disturbing the mirror during the curing process to allow the adhesive to fully bond.
Ventilation and Safety Precautions: Many adhesives release fumes during the curing process. Ensure that the work area is well-ventilated to prevent the buildup of harmful vapors. Wear appropriate safety gear, such as gloves and eye protection, to protect yourself from contact with the adhesive. Follow the manufacturer's safety recommendations for the adhesive being used. If the adhesive comes into contact with your skin or eyes, wash the affected area immediately with soap and water and seek medical attention if necessary. Dispose of any unused adhesive and empty containers properly, following local regulations.
Considering Mechanical Fasteners: For large or heavy mirrors, consider using mechanical fasteners in addition to adhesive. Screws or clips can provide additional support and prevent the mirror from falling in case of adhesive failure. Ensure that the mechanical fasteners are appropriate for the type of wood and the weight of the mirror. Pre-drill pilot holes to prevent the wood from splitting. Use screws or clips that are designed to be used with mirrors, as these will typically be less likely to damage the mirror backing. Distribute the mechanical fasteners evenly around the perimeter of the mirror to provide uniform support.
Properly selecting and applying the adhesive, preparing the surfaces meticulously, and providing adequate support during curing are essential steps in successfully adhering a mirror to wood. Paying attention to these details will result in a strong, durable, and aesthetically pleasing installation.

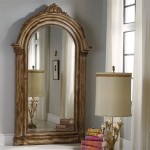
Easy Diy Stick Framed Mirror That Looks Expensive

How To Make A Diy Wood Frame Mirror With Mirrors Tea And Forget Me Nots

Diy Farmhouse Mirror Made From Shims House Of Hepworths

Easy Diy Stick Framed Mirror That Looks Expensive

How To Glue Wood A Mirror Surface Hunker

Easy Diy Stick Framed Mirror That Looks Expensive

5 Best Inspiring Simple Diy Crafts Design Ideas Wood Mirror Frame Home Decor Projects

Diy Stick On Mirror Frame Sawdust Sisters

Easy Diy Stick Framed Mirror That Looks Expensive

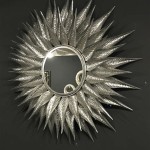
Diy Easy Wood Sunburst Mirror Actually Alli Home Decor Lifestyle