How Do You Glue a Mirror to Wood?
Adhering a mirror to wood requires specialized techniques and materials to ensure a secure and long-lasting bond. The process involves careful preparation, the use of appropriate adhesive, and proper application techniques. This article outlines the steps involved in gluing a mirror to wood, encompassing essential considerations for a successful outcome.
Preparing the Wood Surface
The success of any adhesive bond hinges on the condition of the surfaces being joined. A clean, smooth, and dry wood surface is crucial for optimal adhesion. Begin by thoroughly cleaning the wood to remove dust, dirt, grease, or other contaminants that could hinder the adhesive's grip. Use a mild detergent and a soft cloth for cleaning, then allow the wood to dry completely.
If the wood surface is rough or uneven, consider sanding it down to create a smoother, more uniform surface. This step ensures a more consistent contact area for the adhesive, resulting in a stronger bond. Avoid sanding too aggressively, as you want to preserve the integrity of the wood.
Selecting the Right Adhesive
Choosing the right adhesive is paramount in mirror-to-wood applications. Not all adhesives are created equal, and some are specifically designed for delicate and reflective surfaces. Consider the following factors when choosing an adhesive:
- Adhesive Type: Epoxy adhesives are a popular choice for mirror applications due to their strong bonding strength, water resistance, and durability. However, they can be tricky to work with as they cure quickly. Contact adhesives, often referred to as "rubber cement," are another option, providing a strong bond and easy application. However, they can be messy and might require a longer drying time.
- Drying Time: The drying time of the adhesive is crucial. Consider the project's timeframe and whether the mirror needs to be secured quickly or if it can be allowed to cure for an extended period.
- Mirror Size and Weight: The weight of the mirror plays a significant role in the adhesive's strength requirement. Larger, heavier mirrors will demand a stronger adhesive to withstand the force of gravity and prevent potential slippage.
Applying the Adhesive
Once you've chosen the adhesive, apply it according to the manufacturer's instructions. Avoid applying the adhesive directly to the mirror's surface. Instead, use a thin and even layer to the prepared wood surface. This method prevents any adhesive residue from being visible on the mirror's reflective surface.
After applying the adhesive, allow it to dry for a few minutes, allowing it to become tacky. This ensures a better bond and reduces the chance of the mirror sliding during placement.
Positioning and Securing the Mirror
Carefully position the mirror on the prepared wood surface, ensuring it is centered and aligned as desired. Use a level or a straightedge to ensure proper alignment. Once in place, gently press the mirror into the adhesive, ensuring good contact across the entire surface.
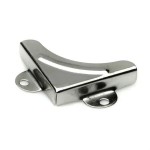
For added support and safety, consider using mirror clips or small, inconspicuous nails along the edges. These additional reinforcements prevent the mirror from becoming dislodged and ensure a secure and lasting bond.
Allowing the Adhesive to Cure
After securing the mirror, allow the adhesive to cure completely according to the manufacturer's recommendations. Avoid disturbing the mirror for the recommended time, as this could compromise the bond.
The curing process allows the adhesive to reach its full strength, ensuring a durable and reliable connection between the mirror and the wood. Once the adhesive has cured, the mirror can be handled and enjoyed.
Additional Tips for Success
Here are some extra tips to help ensure a successful mirror-to-wood bonding experience:
- Wear gloves: Protect your hands from adhesive residue by wearing gloves during the application process.
- Work in a well-ventilated area: Some adhesives emit fumes, so ensure good ventilation when using them.
- Clean up any spills immediately: Sticky adhesive residue can be challenging to remove. Clean up any spills promptly using an appropriate solvent.
- Consider using a sealant: Applying a sealant to the edges of the mirror after the adhesive has cured can help prevent moisture damage and enhance longevity.
By following these steps, you can confidently glue a mirror to wood, resulting in a secure and aesthetically pleasing outcome. Remember that proper preparation, the right adhesive, and careful application are key to a successful bonding experience.

How To Glue A Heavy Mirror The Wall Mom Blog Society

How To Make A Diy Wood Frame Mirror With Mirrors Tea And Forget Me Nots

How To Glue A Mirror Wood Fast Effective Start Woodworking Now

How To Frame A Bathroom Mirror Diy Family Handyman

Diy Farmhouse Mirror Made From Shims House Of Hepworths

How To Glue A Mirror Wood Fast Effective Start Woodworking Now

Diy Farmhouse Wood Frame Mirror She Gave It A Go

Diy Bathroom Mirror Frame For Under 10 O Hayley Blog

How To Hang A Mirror With No Slip Adhesive
Mirror Adhesive Adiseal Strong Glue For

