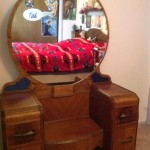
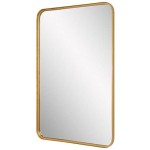
How To Paint a Mirror Frame With Metallic Wood
Updating a mirror frame with metallic wood paint offers a cost-effective method to refresh home decor and add a touch of elegance. This project is suitable for both new and existing frames, allowing for customization of style and color to seamlessly integrate with any interior design scheme. Careful preparation and the proper application techniques are essential to achieving a professional and durable finish.
The selection of appropriate materials forms the foundation of a successful painting project. Choosing a high-quality metallic wood paint specifically designed for the frame's material is crucial. Furthermore, the necessary tools, like sandpaper, primer, brushes, and drop cloths, must be gathered before commencing the process. A well-prepared workspace is also vital, ensuring adequate ventilation and protection against paint spills.
Key Point 1: Preparation is Paramount
The first step in painting a mirror frame with metallic wood paint involves meticulous preparation. This stage ensures the paint adheres correctly and results in a smooth, flawless finish. The preparation process encompasses cleaning, sanding, and priming the frame.
Begin by thoroughly cleaning the mirror frame. This removes any dirt, dust, grease, or existing finishes that could hinder paint adhesion. A mild detergent and water solution, applied with a soft cloth, are typically sufficient for this purpose. Ensure all surfaces are wiped down, paying particular attention to crevices and corners where dirt may accumulate. Once cleaned, allow the frame to dry completely before proceeding.
Sanding the frame is the next crucial step. Sandpaper removes any existing gloss or imperfections, providing a textured surface that promotes better paint adhesion. The grit of sandpaper required depends on the frame's existing finish. For glossy surfaces or frames with imperfections, use medium-grit sandpaper (around 120-grit) to initially roughen the surface. Follow this with fine-grit sandpaper (around 220-grit) to smooth out any scratches created by the medium-grit paper.
When sanding, apply even pressure and work in the direction of the wood grain, if applicable. This prevents unsightly scratches that could be visible through the paint. For frames with intricate details or carvings, use sanding sponges or small pieces of sandpaper to reach difficult areas. After sanding, thoroughly remove all sanding dust with a tack cloth or a damp cloth. Ensure the surface is completely clean and dry before moving on to priming.
Priming the mirror frame is a vital step that provides a uniform base for the metallic wood paint. Primer enhances paint adhesion, seals the surface, and prevents the paint from being absorbed into the frame material. This is particularly important for porous materials like unfinished wood. Choose a primer that is specifically formulated for the type of material the frame is made of. For example, use a wood primer for wooden frames and a metal primer for metal frames.
Apply the primer in thin, even coats, following the manufacturer's instructions. Use a high-quality brush or a spray primer for optimal coverage. Avoid applying the primer too thickly, as this can lead to drips and uneven drying. Allow the primer to dry completely before proceeding to the next step. Lightly sand the primed surface with fine-grit sandpaper to remove any imperfections or brushstrokes. Clean the surface again to remove any sanding dust before applying the metallic wood paint.
Key Point 2: Applying the Metallic Wood Paint
Once the mirror frame is properly prepared, the next stage involves applying the metallic wood paint. This requires careful attention to detail and the use of appropriate painting techniques. Proper application ensures a smooth, even, and visually appealing metallic finish.
Before opening the can of metallic wood paint, read the manufacturer's instructions carefully. Some metallic paints require stirring or shaking to properly disperse the metallic particles. Ensure the paint is thoroughly mixed before beginning the application process. Metallic paints can settle over time, and proper mixing ensures a consistent metallic sheen throughout the finish.
Apply the metallic wood paint in thin, even coats. Avoid the temptation to apply a thick coat, as this can lead to runs, drips, and uneven drying. Multiple thin coats are always preferable to a single thick coat. Use a high-quality brush or a foam brush to apply the paint. A brush allows for precise application, particularly in corners and intricate details. A foam brush provides a smooth, streak-free finish, especially on flat surfaces.
When painting, work in the direction of the wood grain, if applicable. This creates a more natural and visually appealing finish. Overlap each stroke slightly to ensure complete coverage. Avoid applying too much pressure, as this can create brushstrokes or streaks. Maintain a wet edge to prevent the paint from drying unevenly. If using a spray paint, hold the can approximately 10-12 inches from the frame and apply the paint in smooth, even strokes. Avoid holding the can in one spot for too long, as this can lead to drips and runs.
Allow each coat of paint to dry completely before applying the next coat. Refer to the manufacturer's instructions for the recommended drying time. Typically, it takes several hours for each coat to dry properly. Applying subsequent coats before the previous coat is dry can lead to a soft, uneven finish.
After the first coat of paint has dried, lightly sand the surface with fine-grit sandpaper (around 320-grit) to remove any imperfections or brushstrokes. This creates a smooth surface for the next coat of paint. Clean the surface again to remove any sanding dust before applying the second coat of paint. Apply at least two coats of metallic wood paint for optimal coverage and durability. For a richer, more intense metallic finish, consider applying three coats.
Key Point 3: Protecting the Finish
After applying the metallic wood paint, protecting the finish is essential for ensuring its longevity and durability. A protective topcoat seals the paint, prevents scratches and damage, and enhances the overall appearance of the mirror frame. This involves selecting an appropriate topcoat and applying it correctly.
Choose a clear topcoat specifically designed for use over metallic paints. A water-based polyurethane topcoat is often a good choice, as it is durable, non-yellowing, and easy to clean. Avoid using oil-based topcoats, as they can sometimes yellow over time, which can alter the color of the metallic paint. Consider the desired sheen of the topcoat. Topcoats are available in various sheens, including matte, satin, semi-gloss, and gloss. Choose a sheen that complements the metallic paint and the overall style of the room.
Apply the topcoat in thin, even coats, following the manufacturer's instructions. Use a high-quality brush or a spray topcoat for optimal coverage. Avoid applying the topcoat too thickly, as this can lead to drips and uneven drying. Multiple thin coats are always preferable to a single thick coat. When brushing, work in even strokes and maintain a wet edge to prevent the topcoat from drying unevenly.
Allow each coat of topcoat to dry completely before applying the next coat. Refer to the manufacturer's instructions for the recommended drying time. Typically, it takes several hours for each coat to dry properly. Applying subsequent coats before the previous coat is dry can lead to a soft, uneven finish. Lightly sand the topcoat with fine-grit sandpaper (around 400-grit) between coats to remove any imperfections or brushstrokes. This creates a smooth surface for the next coat of topcoat. Clean the surface again to remove any sanding dust before applying the final coat of topcoat.
Apply at least two coats of topcoat for optimal protection. For areas that are subject to frequent handling or wear and tear, consider applying three coats. Allow the final coat of topcoat to cure completely before handling or using the mirror frame. Curing typically takes several days, depending on the type of topcoat used. Refer to the manufacturer's instructions for the recommended curing time. Once the topcoat is fully cured, the mirror frame is ready to be reassembled and enjoyed. Regular cleaning with a soft cloth will help to maintain the beauty and durability of the painted finish for years to come.
By meticulously following these steps, individuals can successfully refresh a mirror frame with metallic wood paint, adding a touch of personalized elegance to their living space. The key lies in thorough preparation, careful application, and protective finishing touches, ensuring a long-lasting and visually appealing result.

Painting A Mirror Frame Easy Yet Stunning Ideas Girl In The Garage

Diy The Easiest Way To Paint A Mirror Frame

How To Paint A Mirror Frame The Easy Way By Just Woods

Knock Off Metallic Mirror Frame 3 Steps With Pictures Instructables

How To Paint A Mirror Frame Gold Easily In Two Steps

Painted Mirror Using Paint Glaze To Enhance Details Sand And Sisal

How To Paint A Mirror Frame Gold Remodelando La Casa

How To Paint A Mirror Frame Gold Remodelando La Casa

Knock Off Metallic Mirror Frame 3 Steps With Pictures Instructables

How To Paint A Mirror Frame