DIY Makeup Mirror With LED Lights: A Comprehensive Guide
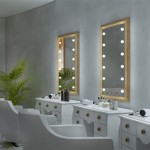
A makeup mirror with LED lights is an invaluable tool for achieving flawless makeup application. The consistent, bright illumination mimics natural daylight, allowing for accurate color matching, precise blending, and detailed work. While commercially available options can be expensive, constructing a DIY makeup mirror with LED lights presents a cost-effective and customizable alternative. This article provides a comprehensive guide to building a makeup mirror with LED lights, outlining the necessary materials, tools, and step-by-step instructions, while emphasizing key aspects of design and safety.
Selecting the Right Mirror and Frame
The foundation of any makeup mirror is, naturally, the mirror itself. The size and shape of the mirror depend on personal preference and available space. Common shapes include rectangular, square, and circular. The size should be large enough to comfortably view the entire face, typically ranging from 12x16 inches to 24x36 inches for rectangular mirrors. Consider purchasing a mirror with polished edges to enhance safety and aesthetics.
The frame serves both a functional and aesthetic purpose. It provides structural support for the mirror and offers a surface for mounting the LED lights. Wood is a popular choice for framing due to its versatility, ease of workability, and availability in various styles and finishes. Other options include metal, plastic, and even repurposed materials like old window frames. The frame's dimensions should be slightly larger than the mirror to accommodate securing the mirror within the frame and to create a border.
When selecting the frame material, consider the overall aesthetic and the level of woodworking skills. For beginners, pre-made picture frames can be adapted to serve as a makeup mirror frame. These frames often come with built-in hanging hardware, simplifying the mounting process. If constructing a frame from raw wood, select a wood species that is easy to cut, sand, and paint or stain. Pine is a common and affordable option. Ensure the frame is sturdy enough to support the weight of the mirror and the LED lights.
Before proceeding with assembling the mirror, thoroughly clean both the mirror surface and the frame. Remove any dust, debris, or fingerprints. This will ensure a clean and professional finished product.
Choosing and Installing LED Lights
The lighting system is arguably the most important aspect of a makeup mirror. LED lights offer several advantages over traditional incandescent or fluorescent bulbs. They are energy-efficient, have a long lifespan, and produce minimal heat. The color temperature of the LED lights is also crucial for accurate makeup application. A color temperature of around 5000-6000 Kelvin (K), often referred to as "daylight," is ideal for mimicking natural sunlight and providing true color representation.
LED strip lights are a popular choice for DIY makeup mirrors due to their flexibility and ease of installation. They come in various lengths, brightness levels, and color temperatures. Select LED strip lights with a self-adhesive backing for easy attachment to the frame. Alternatively, individual LED bulbs can be used, but these require more intricate wiring and mounting.
Before adhering the LED strip lights to the frame, plan the layout carefully. Decide whether to place the lights around the entire perimeter of the mirror or only on the top and sides. Ensure the lights are evenly spaced to provide uniform illumination. Measure and cut the LED strip lights to the appropriate lengths, being careful to cut only at the designated cutting points marked on the strip. These points are typically indicated by scissor icons or dashed lines.
Once the LED strip lights are cut, peel off the adhesive backing and carefully attach them to the frame. Apply gentle pressure to ensure the lights are securely adhered. If using individual LED bulbs, drill appropriately sized holes in the frame and mount the bulbs using suitable hardware. Pay attention to the wiring and ensure all connections are secure and properly insulated.
A dimmer switch is a valuable addition to a makeup mirror with LED lights. It allows for adjusting the brightness of the lights to suit different lighting conditions and preferences. Install a dimmer switch in a convenient location on the frame or the power cord. Wire the dimmer switch according to the manufacturer's instructions, ensuring all connections are secure and insulated. Test the dimmer switch to ensure it functions correctly before proceeding.
Proper wiring is crucial for the safe and reliable operation of the LED lights. Use appropriate gauge wire for the voltage and current requirements of the LEDs. Ensure all connections are secure and properly insulated to prevent short circuits. Consider using wire connectors or soldering to create secure and durable connections. Never expose bare wires, and always use appropriate electrical tape or heat shrink tubing to insulate connections. It is highly recommended to consult with a qualified electrician if unfamiliar with electrical wiring.
Assembly and Finishing Touches
After installing the LED lights, the next step is to secure the mirror within the frame. Depending on the frame design, several methods can be used to secure the mirror. One common method is to use mirror clips or mounting brackets. These clips are typically made of metal or plastic and are designed to hold the mirror securely in place. Attach the clips to the frame using screws or adhesive, ensuring they are evenly spaced around the perimeter of the mirror.
Another method is to use silicone adhesive to glue the mirror to the frame. Apply a thin bead of silicone adhesive to the back of the mirror and carefully position it within the frame. Allow the adhesive to cure completely according to the manufacturer's instructions before handling the mirror. This method provides a strong and permanent bond between the mirror and the frame.
Once the mirror is securely mounted within the frame, inspect the entire assembly for any loose connections or imperfections. Ensure the LED lights are functioning correctly and that the dimmer switch, if installed, is working properly. Clean the mirror surface again to remove any fingerprints or smudges.
Consider adding a backing to the mirror frame to protect the wiring and provide a finished look. Cut a piece of cardboard or plywood to the size of the frame and attach it to the back using screws or adhesive. Ensure the backing is securely attached and does not interfere with the operation of the LED lights or dimmer switch.
Finally, add any desired finishing touches to the makeup mirror. This could include painting or staining the frame to match the décor of the room. Apply a clear coat to protect the finish and enhance its durability. Attach hanging hardware to the back of the frame if the mirror is to be wall-mounted. Consider adding decorative elements such as rhinestones, beads, or other embellishments to personalize the mirror.
Testing the completed mirror is crucial before use. Plug in the mirror and verify that all LED lights are functioning correctly. Adjust the brightness using the dimmer switch, if installed, to ensure it operates smoothly. Inspect the wiring for any signs of overheating or electrical issues. If any problems are detected, disconnect the mirror immediately and troubleshoot the issue before using it.
Safety is paramount when working with electrical components. Always disconnect the power cord before performing any maintenance or repairs on the makeup mirror. Never expose the mirror to excessive moisture or humidity, as this could damage the electrical components and create a safety hazard. Regularly inspect the wiring and connections for any signs of wear or damage. If any damage is detected, replace the affected components immediately.
By following these steps and taking necessary safety precautions, individuals can create a professional-quality makeup mirror with LED lights that enhances their makeup application experience and adds a touch of elegance to their vanity or dressing area. The customization options allow for creating a unique and personalized mirror that meets specific needs and preferences.

Diy Light Up Vanity Mirror For 20 With Remote Lights

Modern Wood And Led Vanity Mirror Diy With Lights

10 Diy Vanity Mirror Projects That Show You In A Diffe Light

How To Diy Vanity Mirror With Led Strip Lights

How To Diy Vanity Mirror With Led Strip Lights

Modern Wood And Led Vanity Mirror 8 Steps With Pictures Instructables

20 Diy Vanity Mirror Using Led Lights And Easy

Diy Vanity Mirror I Used Any And Led Strip Lights Closet Lighting

Diy Light Up Vanity Mirrors You Can Make Ohmeohmy Blog
:max_bytes(150000):strip_icc()/makesandmunchies-c136f898cca640faa72b6209012230cb.jpg?strip=all)
7 Diy Lighted Mirror Ideas To Add A Little Extra Shine Your Space

