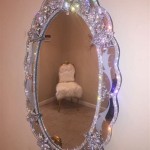
How to Make a Frame for a Frameless Mirror
Adding a frame to a frameless mirror elevates its aesthetic appeal and integrates it seamlessly into a room's decor. This process, achievable with various materials and techniques, allows for customization and personalization, offering a cost-effective way to transform a simple mirror into a statement piece.
Measuring and Planning
Accurate measurements form the foundation of a successful framing project. Using a measuring tape, carefully record the mirror's length and width. These dimensions will determine the amount of framing material required. Add extra length to each side to account for mitered corners or overlapping edges, depending on the chosen framing style. Sketching the desired frame design on paper, including dimensions and joining methods, can further aid in visualizing the final product and ensuring accurate material procurement.
Material selection impacts both the frame's appearance and durability. Wood offers a classic and versatile option, readily available in various species and finishes. Alternatively, consider engineered wood, such as medium-density fiberboard (MDF), for a smooth, paintable surface. For a more contemporary look, explore metal framing options like aluminum or stainless steel. Plastic or composite materials offer lighter, moisture-resistant alternatives. Choosing a material that complements the existing décor and the mirror's intended location is crucial.
Constructing the Frame
Once materials are gathered, the frame construction begins. If using wood, cut the pieces to the calculated dimensions, ensuring precise 45-degree angles for mitered corners. A miter saw or miter box provides the necessary accuracy for clean joins. For other materials like MDF or metal, straight cuts are typically sufficient, depending on the chosen joining technique. Employing clamps to hold the pieces securely in place during assembly ensures a stable and square frame.
Joining the frame pieces requires appropriate adhesives and fasteners. Wood glue provides a strong bond for wooden frames, reinforced with finishing nails or brads for added stability. Metal frames may require welding or specialized metal adhesives. For MDF or plastic, wood glue or construction adhesive is often suitable. Ensure the chosen adhesive is compatible with the framing material and provides sufficient strength for the intended application. Allow ample drying time for the adhesive to fully cure before proceeding.
Attaching the Frame to the Mirror
Before attaching the frame, consider adding a backing board for added support and stability, particularly for larger mirrors. A thin sheet of plywood or MDF, cut slightly smaller than the outer dimensions of the frame, serves this purpose. Secure the backing board to the frame using adhesive or screws. This step is especially beneficial when using thinner or more flexible framing materials.
Attaching the frame to the mirror requires a secure yet flexible method to accommodate potential expansion and contraction. Mirror adhesive, specifically designed for this purpose, offers a strong bond without damaging the reflective surface. Apply the adhesive in a continuous bead along the back edges of the frame or the backing board, ensuring even distribution. Carefully position the mirror onto the adhesive, aligning it precisely within the frame. Apply gentle, even pressure to ensure proper adhesion.
Finishing and Installation
Once the adhesive has cured, enhance the frame's appearance with paint, stain, or other decorative finishes. Sanding the frame beforehand creates a smooth surface for better adhesion. Multiple coats of paint or stain may be necessary to achieve the desired finish. Allow each coat to dry completely before applying the next. Consider adding a sealant or topcoat for added protection and durability, particularly in humid environments.
Installing the framed mirror depends on its size and weight. Smaller mirrors may require only picture hangers or adhesive strips. Larger, heavier mirrors necessitate more robust mounting hardware, such as D-rings and wall anchors. Ensure the chosen hardware can safely support the weight of the framed mirror. Carefully measure and mark the wall to ensure proper placement before installing the mounting hardware and hanging the mirror.
Creating a custom frame for a frameless mirror offers a rewarding DIY project that adds a personalized touch to any space. By following these steps, achieving a professional-looking result is within reach, transforming a simple mirror into a stylish and functional element of the home décor.

How To Frame Out That Builder Basic Bathroom Mirror For 20 Or Less

How To Frame Out That Builder Basic Bathroom Mirror For 20 Or Less

Diy Bathroom Mirror Frame Without Removing Clips Her Happy Home

Diy Bathroom Mirror Frame For Under 10 O Hayley Blog

Mirror Frame Diy How To Update A Basic Bathroom Our Faux Farmhouse

How To Build A Diy Frame Hang Over Bathroom Mirror Love Our Real Life

How To Install A Mirror Without Frame Merrypad

Diy Stick On Mirror Frame

Diy Wood Framed Bathroom Mirror Christina Maria Blog

How To Build A Diy Bathroom Mirror Frame The Easy Way