Elevate Your Decor: DIY Mirror Window Frame
Mirrors are a versatile design element, adding dimension, light, and a touch of elegance to any space. Window frame mirrors, a popular trend, offer a unique blend of vintage charm and contemporary style. Creating a DIY mirror window frame allows you to personalize your decor, adding a touch of your own design aesthetics. This project is achievable for those with varying crafting skills, requiring basic tools and materials.
Choosing Your Materials
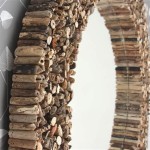
The first step involves selecting the core elements of your DIY window frame mirror: the mirror itself and the frame. The mirror can be purchased from hardware stores, craft supply shops, or online retailers in various sizes and shapes to suit your needs. For the frame, consider using readily available and cost-effective materials. Classic options include wood, moulding, or even repurposed materials like picture frames or window frames.
When selecting wood, consider the style and desired aesthetic. Pine, oak, and MDF (medium-density fiberboard) are popular choices offering different grains and finishes. For a more rustic look, reclaimed wood provides unique character. Moulded trim, found in various sizes and profiles, offers a more traditional or elegant touch. Repurposed materials can be incorporated into the frame, utilizing existing frames or even window sashes for a unique and eco-friendly approach.
The Framing Process
Once the materials are chosen, the framing process begins. Cut the frame pieces to the desired dimensions, ensuring a snug fit around the mirror. Measure carefully, making adjustments as needed. Use a miter saw for precise cuts, ensuring clean angles for a professional finish. If you’re using wood, be sure to sand down any rough edges for a smooth and even surface.
For assembling the frame, several methods can be employed. For a simple approach, you can use wood glue and clamps to secure the pieces together. Allow the glue to dry completely before proceeding. Alternatively, you can use a nail gun or brads to assemble the frame, driving the nails through the mitered corners for a secure bond. For a more sophisticated finish, consider using miter joints or dado joints for a seamless look.
Finishing Touches
With the frame assembled, it’s time to personalize the mirror with finishing touches. Sanding the entire frame, removing any imperfections and achieving a smooth surface, is crucial. Use various grit sandpaper, progressively increasing the grit for a fine finish. This step helps ensure a smooth surface for paint or stain.
When choosing a finish, consider the overall style and existing décor. A classic white paint, for instance, offers a clean and timeless look. Alternatively, a dark stain can add warmth and depth, complementing rustic or vintage styles. For added dimension, try distressing the frame, creating a weathered and antique look. Consider adding hardware like decorative hinges or door knobs for a touch of vintage charm.
After the finish has dried, attach the mirror to the frame. You can use mirror clips or a strong adhesive designed for mirror applications. Ensure the mirror is securely attached to the frame, avoiding any potential movement or damage. Before hanging your DIY window frame mirror, choose an appropriate location, considering the size and style of the piece.

Diy Window Pane Mirror

Diy Window Pane Mirror Tutorial The Lettered Cottage

Diy Window Pane Mirror

Diy Windowpane Mirror The Chronicles Of Home

Diy Rh French Window Pane Oversized Mirror The Rozy Home
:max_bytes(150000):strip_icc()/bloomingdiyer-372b1cae2a6c43af917f3bea506c11da.jpg?strip=all "20 Diy Mirror Frame Ideas To Inspire Your Next Project")
20 Diy Mirror Frame Ideas To Inspire Your Next Project

Diy Window Frame Into A Mirror Knockoffdecor Com

How To Diy A Clever Fake Window Made With Mirrors

How To Turn A Vintage Window Into Mirror An Oregon Cottage

Diy Window Pane Mirror