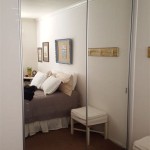
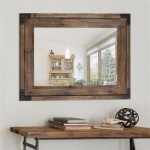
How To Mount a Mirror On the Wall With Clips
Mounting a mirror on the wall using clips offers a sleek, modern look and provides a secure hold for various mirror sizes. This method eliminates the need for framing the mirror, allowing its edges to be showcased. This guide provides a comprehensive walkthrough of the process, detailing necessary tools, materials, and step-by-step instructions for achieving a professional-looking installation.
Planning and Preparation
Before starting the mounting process, careful planning is essential. Accurate measurements ensure proper clip placement and a secure fit. Begin by measuring the mirror's height and width to determine the appropriate number and size of clips. Heavy mirrors will require more substantial clips and potentially additional wall anchors. Consider the mirror's weight and the wall material (drywall, concrete, etc.) when selecting appropriate fasteners.
The location of the mirror should be marked on the wall. Use a level to draw horizontal and vertical lines indicating the mirror's desired position. This marking will serve as a guide for placing the clips accurately. Ensure the chosen location avoids any obstructions, such as electrical wiring or plumbing, which can be identified using a stud finder.
Gathering necessary materials beforehand streamlines the installation process. Typically, this includes mirror clips, appropriate screws and wall anchors (if needed), a drill with suitable drill bits, a level, a measuring tape, a pencil, and a stud finder. Having all tools readily available ensures a smooth and efficient installation process.
Installing the Mirror Clips
With the preparatory steps completed, the next stage involves installing the mirror clips. Two types of clips are commonly used: J-clips and Z-clips. J-clips grip the bottom and side of the mirror, while Z-clips interlock, with one part attached to the wall and the other to the back of the mirror. The choice between these depends on personal preference and the specific mirror being mounted.
Begin by positioning the bottom clips according to the markings on the wall. Ensure they are level and spaced appropriately to support the mirror's weight. Use a pencil to mark the screw holes through the clip's mounting holes. Pre-drilling pilot holes, especially in harder wall materials, prevents cracking and ensures a secure fit for the screws. If necessary, insert wall anchors into the pilot holes before attaching the clips with screws.
Side clips are then installed in a similar manner. Ensure they are aligned vertically with the bottom clips and spaced evenly along the sides of the mirror. Mark the screw holes, pre-drill pilot holes, and secure the side clips to the wall with screws. The specific spacing of side clips depends on the size and weight of the mirror. Larger, heavier mirrors may require more clips for adequate support.
Mounting the Mirror and Final Adjustments
Once all clips are securely fastened to the wall, the mirror can be carefully positioned within the clips. For J-clips, slide the bottom edge of the mirror into the lower clips first, then gently lower the mirror into the side clips. For Z-clips, align the clips attached to the mirror's back with the corresponding clips on the wall and carefully interlock them.
After the mirror is placed within the clips, it is crucial to ensure its stability and proper alignment. A level can be used to verify that the mirror is hanging straight. If minor adjustments are necessary, the screws on the clips can be slightly loosened or tightened to achieve a perfectly level position.
Some clip designs include small set screws that can be tightened to further secure the mirror within the clips. If these are present, gently tighten them to prevent the mirror from shifting or vibrating. However, avoid overtightening, as this could damage the mirror or the clips.
Choosing the Right Clips and Fasteners
Selecting the appropriate clips and fasteners is crucial for ensuring a safe and secure mirror installation. Consider the mirror's weight and dimensions when choosing clips. Heavier mirrors require more robust clips with higher weight capacities. Similarly, larger mirrors will need more clips to distribute the weight evenly.
The wall material also plays a significant role in fastener selection. Drywall typically requires wall anchors to provide additional support, especially for heavier mirrors. Concrete walls, on the other hand, may necessitate specialized concrete screws or anchors. Consult a hardware professional for guidance on selecting the correct fasteners for your specific wall type.
Finally, the aesthetic aspect of the clips should also be considered. Clips are available in various finishes, such as chrome, brushed nickel, and brass, allowing you to choose a style that complements the mirror and the surrounding decor. Consider the overall design scheme when selecting clips to ensure a cohesive and aesthetically pleasing result.

How To Hang A Frameless Mirror On The Wall With Pictures

How I Installed A Really Big Mirror Merrypad Diy Network

Hanging Mirror With Ook Clips

How To Hang A Frameless Mirror On The Wall With Pictures

How To Install A Mirror Without Frame Merrypad

3 Ways To Hang A Door Mirror Wikihow

How To Install A Mirror Without Frame Merrypad

Sun Mir Ez Mount Mirror Clips Perth Art Glass

4 Mirror Wall Hanging Mounting Fixing Kit Frameless Plastic Clips

4 Mirror Wall Hanging Mounting Fixing Kit Frameless Plastic Clips