Build Your Own Wall Mirror: A Comprehensive Guide
Creating a custom wall mirror is a rewarding project, allowing for personalized aesthetics and significant cost savings compared to purchasing pre-made options. This guide provides a detailed outline of the necessary steps, materials, and safety precautions involved in building a wall mirror tailored to specific design preferences and spatial requirements. The process involves selecting appropriate materials, precise measurements and cutting, secure assembly, and safe installation. Understanding each stage is crucial for achieving a professional-looking and durable finished product.
Selecting the Right Materials
The foundation of any wall mirror project lies in choosing suitable materials. This selection process directly impacts the mirror's final appearance, longevity, and structural integrity. Key components include the mirror glass itself, the backing material, the frame, and the adhesive or mechanical fasteners used for assembly.
Mirror Glass: The type of mirror glass selected is paramount. Standard float glass mirrors are generally the most cost-effective option. However, for applications requiring enhanced clarity or durability, low-iron glass or tempered glass may be considered. Low-iron glass minimizes the greenish tint often present in standard glass, providing a truer reflection. Tempered glass is significantly stronger and shatters into small, relatively harmless pieces if broken, making it a safer choice for high-traffic areas or environments where impact is a concern. The thickness of the glass should also be considered; typically, 1/4 inch (6mm) thickness offers a good balance of stability and weight for most wall mirror applications. Ordering the mirror glass pre-cut to the exact dimensions from a reputable glass supplier is highly recommended to ensure precision and minimize the risk of breakage during the cutting process.
Backing Material: The backing material serves several crucial functions: it protects the reflective coating on the back of the mirror, provides a stable surface for attaching mounting hardware, and can contribute to the overall rigidity of the mirror assembly. Common choices include plywood, MDF (Medium-Density Fiberboard), and foam board. Plywood offers good strength and screw-holding capabilities, but it can be susceptible to moisture damage if not properly sealed. MDF provides a smooth, consistent surface and is less prone to warping than plywood, but it is heavier and can be more vulnerable to moisture. Foam board is the lightest option and is suitable for smaller mirrors or applications where weight is a primary concern, but it offers less structural support. The thickness of the backing material should be sufficient to provide adequate support for the mirror, typically ranging from 1/4 inch to 3/4 inch depending on the overall size of the mirror.
Frame Material: The frame not only enhances the aesthetic appeal of the mirror but also provides structural support and protects the edges of the glass. Wood is a popular choice for framing material due to its versatility, workability, and wide range of available styles and finishes. Options include pine, oak, maple, and walnut, each offering distinct grain patterns and characteristics. Metal frames, such as aluminum or steel, offer a sleek, modern look and are highly durable. Plastic or composite frames are also available, providing a cost-effective and low-maintenance alternative. The choice of frame material should align with the overall design scheme and the intended environment. Consider factors such as moisture resistance, ease of finishing, and compatibility with the chosen adhesive or fasteners.
Adhesives and Fasteners: Selecting the appropriate adhesive for bonding the mirror to the backing material is critical for a secure and long-lasting assembly. Mirror mastic is a specialized adhesive formulated specifically for bonding mirrors to various surfaces. It is designed to be non-reactive with the reflective coating on the back of the mirror and provides a strong, permanent bond. Construction adhesive can also be used, but it is essential to choose a formulation that is compatible with mirrors and will not damage the reflective coating. Mechanical fasteners, such as screws or staples, can be used in conjunction with adhesive to provide additional support, particularly for larger mirrors. Ensure that the fasteners are of the appropriate length and material to avoid damaging the mirror or the backing material. Consider using mirror clips or Z-clips for hanging the finished mirror, ensuring they are rated for the weight of the assembled mirror.
Mirror Construction: Step-by-Step Instructions
Once the materials are selected, the construction process involves precise cutting, careful assembly, and secure bonding. A methodical approach is essential to ensure a professional-looking and structurally sound finished product.
Preparation: Begin by preparing the work area. Ensure ample space that is clean, dry, and well-ventilated. Gather all necessary tools and materials, including measuring tape, a straight edge, a pencil, a glass cutter (if cutting the mirror glass), safety glasses, gloves, sandpaper, a drill, screws, adhesive, clamps, and a level. If cutting the mirror glass, practice on scrap glass first to develop a feel for the proper scoring technique. Ensure the backing material is cut to the desired dimensions, slightly smaller than the mirror glass to allow for a clean edge. Sand the edges of the backing material to remove any splinters or rough spots.
Mirror and Backing Assembly: Apply mirror mastic or construction adhesive to the back of the mirror glass in a uniform pattern. This can be done in vertical beads, horizontal beads, or a grid pattern. Avoid applying adhesive too close to the edges of the mirror to prevent it from squeezing out during clamping. Carefully position the backing material onto the back of the mirror, aligning the edges precisely. Apply even pressure across the entire surface to ensure good contact between the mirror and the backing material. Clamp the assembly together using clamps, ensuring that the pressure is distributed evenly. Allow the adhesive to cure completely according to the manufacturer's instructions; typically, this requires at least 24 hours. If using mechanical fasteners, pre-drill pilot holes through the backing material before inserting screws to prevent splitting the wood. Use screws that are slightly shorter than the combined thickness of the backing material and the mirror to avoid damaging the mirror surface.
Frame Assembly: If using a frame, cut the frame pieces to the appropriate length, ensuring that the corners are mitered at a 45-degree angle for a clean, professional look. Assemble the frame using wood glue and clamps, or using screws or nails. Allow the glue to dry completely before proceeding. Sand the frame smooth and apply the desired finish, such as paint, stain, or varnish. Allow the finish to dry completely before attaching the frame to the mirror assembly. Apply adhesive to the back of the frame and carefully position it around the mirror, ensuring that it is centered and aligned properly. Clamp the frame to the mirror assembly and allow the adhesive to cure completely. Alternatively, the frame can be attached using screws or nails, driven through the frame into the backing material.
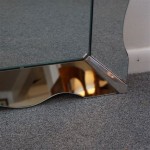
Edge Treatment: The exposed edges of the mirror can be sharp and potentially hazardous. Consider applying edge banding or edge sealant to protect the edges and improve the appearance of the mirror. Edge banding is a thin strip of material, such as wood veneer or plastic, that is applied to the edges of the mirror using adhesive or heat. Edge sealant is a liquid compound that is applied to the edges of the mirror to seal them and prevent moisture from penetrating. Both options can enhance the durability and safety of the finished mirror.
Installation and Safety Considerations
Proper installation is essential to ensure the mirror is securely mounted and presents minimal risk of falling or causing injury. Safety precautions during the entire building and installation processes are crucial.
Mounting Hardware: Select appropriate mounting hardware based on the size and weight of the mirror, as well as the type of wall it will be mounted on. For drywall, use drywall anchors or screws that are long enough to reach the studs behind the drywall. For plaster walls, use plaster screws or toggle bolts. For concrete or brick walls, use concrete screws or expansion anchors. Ensure that the mounting hardware is rated to support the weight of the mirror plus a safety margin.
Installation Procedure: Mark the desired location for the mirror on the wall, using a level to ensure that it is straight. Use a stud finder to locate studs in the wall and mark their locations. Drill pilot holes through the mounting hardware holes in the backing material into the wall, aligning with the studs or using appropriate anchors. Insert screws or bolts through the mounting hardware and into the wall, tightening them securely. Use a level to check that the mirror is level before fully tightening the screws. For larger mirrors, it may be necessary to use multiple mounting points to distribute the weight evenly.
Safety Precautions: Always wear safety glasses and gloves when handling glass to protect against cuts and eye injuries. Work in a well-ventilated area when using adhesives or finishes to avoid inhaling harmful fumes. Use caution when using power tools, such as drills and saws, and follow the manufacturer's instructions. If cutting the mirror glass, use a glass cutter specifically designed for this purpose and follow proper scoring and breaking techniques. Dispose of broken glass shards carefully to prevent injury. When installing the mirror, ensure that the wall is structurally sound and capable of supporting the weight of the mirror. If in doubt, consult a professional contractor.
By carefully considering the materials, following the construction steps, and adhering to safety precautions, one can successfully build a custom wall mirror that enhances the aesthetic appeal and functionality of any space. The finished product will be a testament to the patience, skill, and attention to detail invested in the project.
:max_bytes(150000):strip_icc()/bloomingdiyer-372b1cae2a6c43af917f3bea506c11da.jpg?strip=all "20 Diy Mirror Frame Ideas To Inspire Your Next Project")
20 Diy Mirror Frame Ideas To Inspire Your Next Project

Create A Beautiful Provincial Mirror Wall On Budget

Diy 50 Full Length Wall Mirrors Shanty 2 Chic

Diy Mirror Wall Easy

Diy 50 Full Length Wall Mirrors Shanty 2 Chic

Diy Gold Industrial Mirror Tutorials Never Skip Brunch

30 Diy Mirror Projects That Are Fun And Easy To Make

Diy Wall Mirror Pleass Use Horilla Glue Heavy Duty Tape It Sticks To Tiktok

Diy Large Paneled Wall Mirror Shanty 2 Chic

Diy Wall Mirrors Thirty Best Home Decor Projects