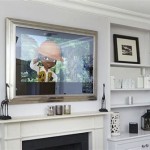
How to Add a Framed Wall Mirror
Adding a framed wall mirror can significantly enhance a room's aesthetic appeal and functionality. Whether aiming for a vintage charm or a modern minimalist look, a strategically placed mirror can create an illusion of space, reflect light, and serve as a decorative focal point. This article provides a comprehensive guide for successfully installing a framed wall mirror.
Planning and Preparation
Before beginning the installation process, careful planning and preparation are essential for a smooth and successful outcome. This involves considering the mirror's size and placement, gathering the necessary tools and materials, and preparing the wall surface.
- Determine the ideal location: Consider the room's layout, existing décor, and the desired effect when choosing the mirror's placement. Avoid placing mirrors directly opposite windows to prevent excessive glare.
- Measure the mirror and the wall: Accurate measurements ensure the mirror fits the designated space appropriately. Use a measuring tape to determine the mirror's dimensions and mark the desired position on the wall.
- Gather necessary tools and materials: Having all the required tools readily available streamlines the installation process. These typically include a stud finder, level, drill, appropriate screws and anchors, a pencil, and a measuring tape.
- Prepare the wall surface: Ensure the wall is clean and free of dust or debris. If necessary, patch any holes or imperfections and allow them to dry completely before proceeding.
Locating Wall Studs
Hanging a heavy framed mirror requires securing it to wall studs for optimal support. Locating and marking these studs is a critical step in ensuring the mirror's stability.
- Use a stud finder: A stud finder is an electronic device that detects the presence of studs behind drywall. Run the stud finder horizontally across the wall in the area where the mirror will be hung, marking the location of each stud with a pencil.
- Verify stud location: Once the studs are marked, it's advisable to verify their location by tapping lightly on the wall. A solid sound indicates the presence of a stud, while a hollow sound suggests an empty cavity.
Installing D-Rings or Wire Hangers
Most framed mirrors are equipped with D-rings or wire hangers on the back for hanging. These hardware components provide secure attachment points for mounting.
- Attach D-rings: If the mirror has D-rings, measure and mark their placement on the back of the frame, ensuring they are level and equidistant from the mirror's center. Securely screw the D-rings into the frame.
- Install wire hanger: If the mirror has a wire hanger, ensure it is securely attached to the frame. Adjust the wire length so that it is taut but not overly tight when the mirror is hanging.
Mounting the Mirror
With the preparations complete, the mirror can be mounted on the wall using appropriate fasteners.
- Mark screw locations: Hold the mirror against the wall in the desired position, ensuring it is level. Mark the location of the D-rings or wire hanger on the wall with a pencil.
- Drill pilot holes: Using a drill bit slightly smaller than the diameter of the screws, drill pilot holes at the marked locations. This prevents the wall from cracking or splitting.
- Insert screws or anchors: If the pilot holes align with wall studs, insert screws directly into the studs. If not, use appropriate wall anchors to provide secure mounting points.
- Hang the mirror: Carefully hang the mirror on the inserted screws, ensuring it is securely in place and level. Check the stability of the mirror by gently applying pressure.
Final Adjustments and Considerations
After mounting the mirror, a few final adjustments and considerations can enhance its appearance and functionality.
- Check for levelness: Use a level to ensure the mirror is perfectly straight and adjust as necessary.
- Clean the mirror: Clean the mirror surface with a glass cleaner to remove any smudges or fingerprints.
- Consider adding additional support: For particularly heavy mirrors, consider adding additional support brackets underneath the frame for added stability.
- Adjust lighting: Consider the surrounding lighting and adjust if necessary to avoid glare or shadows on the mirror's surface.
Safety Precautions
Observing safety precautions during the installation process is crucial to prevent accidents and ensure a successful outcome.
- Wear safety glasses: Protect your eyes from dust and debris by wearing safety glasses during drilling and mounting.
- Use appropriate tools: Use the correct tools for the job to prevent damage to the wall, the mirror, or yourself.
- Enlist help if needed: For large or heavy mirrors, enlist the assistance of another person to help with lifting and positioning.
By following these detailed steps and observing safety precautions, individuals can successfully add a framed wall mirror to enhance their living spaces.

Mirror Stuck On The Wall Add A Frame To An Plate Glass In Minutes Kits Bathroom Mirrors Diy
:max_bytes(150000):strip_icc()/kaylasimonehome-905941da7dd04a08af07c415df2a1fd8.jpeg?strip=all)
20 Diy Mirror Frame Ideas To Inspire Your Next Project

How To Add A Wood Frame Large Wall Mirror For Under 20 Dream Design Diy

Diy How To Add A Frame Builder Wall Mirror

How To Frame A Mirror

How To Add A Wood Frame Large Wall Mirror For Under 20 Dream Design Diy

How To Frame A Mirror Erfly House

How To Decorate Around A Mirror

How To Create A Layered Mirror Gallery Wall

Head West 29 5 In X 41 Beaded Frame Wall Mirror Black Com

