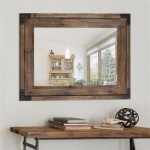
How To Make A Simple Mirror Frame
A mirror frame can add a touch of elegance and personality to any room. Whether you're looking to enhance a vintage mirror or create a stylish statement piece, making a simple mirror frame is a rewarding and achievable DIY project. This article outlines the steps involved in creating a basic mirror frame, providing a clear and concise guide for beginners.
Materials & Tools
Before embarking on your framing project, gather the necessary materials and tools. You'll need:
- Mirror
- Wood molding (choose a size and style that complements your mirror)
- Wood glue
- Finishing nails (slightly shorter than the thickness of the molding)
- Hammer
- Measuring tape
- Pencil
- Saw (for cutting the molding)
- Sandpaper (for smoothing edges)
- Paint or stain (optional, for customizing the frame)
- Paintbrush or stain applicator
- Protective gloves (optional)
Steps to Create the Frame
Once you have all the necessary materials, follow these steps to construct your simple mirror frame:
- Measure the Mirror: Carefully measure the length and width of your mirror. Add the desired width of the molding to each measurement. For example, if your mirror is 12 inches by 16 inches and you want a 2-inch wide frame, your total measurements would be 16 inches by 20 inches.
- Cut the Molding: Using a saw, cut four pieces of molding to match the measurements you calculated. Ensure clean, precise cuts for a polished finish.
- Join the Molding: Apply wood glue to the ends of the molding pieces. Join the pieces at the corners, creating a rectangular frame. Secure the joints with finishing nails, ensuring they are hammered flush with the wood.
- Sand the Frame: Once the glue has dried, carefully sand the frame to smooth any rough edges or imperfections. This step creates a consistent surface for painting or staining.
- Paint or Stain (Optional): If desired, paint or stain the frame to achieve your desired color and finish. Allow the paint or stain to dry completely before proceeding.
- Attach the Mirror: Apply wood glue to the back of the mirror. Carefully place the mirror within the frame, ensuring it is centered. Use finishing nails to secure the mirror to the frame from the back. Ensure the nails are hammered into the wood and not the mirror itself.
- Finish and Hang: Once the glue has dried, your simple mirror frame is complete. For a final touch, you can apply a clear sealant to protect the frame. Attach a hanging hardware on the back of the frame to allow for easy mounting on the wall.
Finishing Touches
To add a personalized touch to your frame, consider exploring different design elements. You can:
- Decorate the Frame: Add decorative elements like decoupage papers, embellishments, or stencils to create a unique design.
- Incorporate Distressed Finishes: Create a vintage or rustic look by distressing the frame using sandpaper or paint techniques.
- Experiment with Colors and Textures: Explore different paint colors, finishes, and textures to personalize the frame and complement your home decor.
By following these steps, you can create a stylish and personalized mirror frame that complements your unique style and adds a touch of charm to your home. Remember to use caution with tools and avoid applying excessive pressure to the mirror.

Diy Framed Mirror Jaime Costiglio

How To Build A Mirror Frame Simple Woodworking

Easy Driftwood Mirror

Walnut Mirror Frame Woodworking Project Woodsmith Plans

Diy Framed Mirror Jaime Costiglio

How To Easily Make Mirror Frame Easy Diy Hot Glue S Best Out Of Waste

How To Build A Diy Rustic Mirror Frame Tutorial Evening Woodworker

Diy Mirror Frame The Faux Martha

Walnut Mirror Frame Woodworking Project Woodsmith Plans
:max_bytes(150000):strip_icc()/alahome1-a879d69e31be4a9a9ae522028c12926d.jpg?strip=all "26 Diy Mirror Frame Ideas To Inspire Your Next Project")
26 Diy Mirror Frame Ideas To Inspire Your Next Project