Hollywood Makeup Mirror Setup Instructions
A Hollywood makeup mirror, characterized by its surrounding array of light bulbs, provides even and consistent illumination, crucial for precise makeup application. Setting up this type of mirror involves careful attention to several key aspects, including mounting, electrical connections, and dimmer switch installation, if applicable. This article details the process of setting up a Hollywood makeup mirror, ensuring a secure and functional vanity station.
Unpacking and Inventory
Before beginning any installation, the first step involves unpacking the mirror and taking a complete inventory of all components. This typically includes the mirror itself, light bulbs, a power cord, mounting hardware (screws, anchors, and brackets), and an instruction manual. Verify that all items listed in the manual are present. Missing components can lead to delays and require contacting the manufacturer or retailer for replacements. Check the mirror for any shipping damage, such as cracks or scratches. If damage is present, document it with photos and contact the seller immediately to arrange for a replacement or refund.
Once the components are accounted for, carefully review the instruction manual. The manual contains valuable information specific to the model, including safety precautions, wiring diagrams (if applicable), and troubleshooting tips. Familiarizing oneself with the manual minimizes the risk of errors during installation and ensures proper functionality of the mirror. Ignoring the manual may void the warranty or result in damage to the product or the electrical system.
It is also prudent to gather the necessary tools for installation. These tools typically include a screwdriver (both Phillips head and flathead), a drill with appropriate drill bits, a level, a measuring tape, wire strippers (if wiring is required), electrical tape, and safety glasses. Having these tools readily available streamlines the installation process and reduces the need to interrupt the work to search for missing items.
Mounting the Mirror
The mirror mounting process depends on the intended placement: wall-mounted or tabletop. A wall-mounted mirror requires careful consideration of wall structure and support. Determine the desired location for the mirror, taking into account the user's height and viewing angle. Mark the location of the mounting holes on the wall. Use a level to ensure the holes are aligned horizontally. For drywall, use appropriate wall anchors to provide secure support for the mirror's weight. If mounting to a stud, avoid using anchors and screw directly into the wood for maximum stability. Drill pilot holes at the marked locations, then insert the wall anchors (if needed). Align the mirror brackets with the holes and secure them to the wall with the provided screws.
For a tabletop mirror, the process is simpler. Typically, the mirror base or stand needs to be attached to the mirror itself using screws. Follow the instructions in the manual to properly attach the base. Ensure the base is stable and provides adequate support to prevent the mirror from tipping over. Some tabletop models may have adjustable tilt mechanisms, which should be adjusted to the desired viewing angle before securing the mirror in place.
Regardless of the mounting method, it is essential to double-check the stability of the installed mirror before proceeding. Gently push and pull on the mirror to test its security. If any wobbling or instability is detected, reinforce the mounting by tightening screws, adding additional anchors, or adjusting the base.
Electrical Connections and Bulb Installation
Safety is paramount when working with electricity. Before making any electrical connections, ensure the power is turned off at the circuit breaker. This prevents electrical shock and potential damage to the mirror or the electrical system. If unsure about handling electrical wiring, it is always recommended to consult with a qualified electrician.
Most Hollywood makeup mirrors come with a pre-wired power cord that simply needs to be plugged into a standard electrical outlet. However, some models may require direct wiring to the electrical system. In this case, carefully follow the wiring diagram provided in the manual. Connect the wires according to the diagram, ensuring proper polarity (matching black to black, white to white, and ground to ground). Use wire strippers to expose the wire ends and securely twist the wires together. Cover the connections with electrical tape to prevent short circuits. Secure the wiring within the designated junction box, following all applicable electrical codes.
Once the electrical connections are made, install the light bulbs. Most Hollywood makeup mirrors use small incandescent or LED bulbs. Ensure the bulbs are compatible with the mirror's voltage and wattage requirements. Gently screw the bulbs into the sockets, being careful not to overtighten them. Overtightening can damage the bulb or the socket. After all the bulbs are installed, clean the mirror surface with a soft cloth to remove any fingerprints or smudges.
Dimmer Switch Installation (If Applicable)
Many Hollywood makeup mirrors come with a dimmer switch that allows adjusting the brightness of the lights. This feature is highly desirable as it provides greater control over the illumination, allowing users to customize the lighting to suit their needs and preferences.
The dimmer switch may be pre-installed, or it may require separate installation. If it requires installation, the process typically involves connecting the dimmer switch to the power cord or the wiring. Follow the instructions in the manual carefully, paying close attention to the wiring diagram. Ensure the dimmer switch is compatible with the electrical system and the type of bulbs used in the mirror. Connect the wires according to the diagram, using wire strippers and electrical tape to make secure connections.
After the dimmer switch is installed, test its functionality. Turn on the power at the circuit breaker and adjust the dimmer switch to see if the lights brighten and dim smoothly. If the lights flicker or do not dim properly, double-check the wiring connections and ensure the dimmer switch is compatible with the bulbs. A faulty dimmer switch may need to be replaced. Once the dimmer switch is functioning correctly, secure it in its designated location on the mirror frame or base.
Finally, ensure all wiring is properly concealed and protected to prevent accidental contact or damage. Use cable ties or clips to organize the wiring and keep it out of the way. Inspect the entire setup to ensure everything is secure and functioning as intended.

Fenchilin Lights Hollywood Lighted Makeup Mirror User Manual

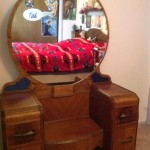
How To Assemble Vanity Dresser Mirror Step By Guide

Keonjinn Hollywood Lighted Makeup Mirror 3 Color Dimmable Led Bulbs

Keonjinn Hollywood Lighted Makeup Mirror 3 Color Dimmable Led Bulbs

32 In W X 24 H Hollywood Vanity Mirror Light Makeup Dimmable Lighted For Table Brass Gold Frame

How To Assemble Vanity Dresser Mirror Step By Guide
Fenchilin Hollywood Vanity Makeup Mirror With Lights 15 Led Tabletop Wall Metal

Gqb Hollywood Vanity Mirror With Lights 28 X 22 Inch Large Makeup 18 Bulbs 3 Color Modes And Touch Control Hd 7055

Led Makeup Vanity With S Mirror Storage White

9 Bulb Hollywood Vanity Mirror The Container
