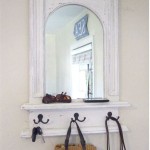
How to Replace an Old Medicine Cabinet Mirror Replacement Glass
Replacing the glass mirror in an old medicine cabinet might seem like a daunting task, but with the proper tools, materials, and a methodical approach, it is a manageable project for the average homeowner. The age and construction of these cabinets can vary significantly, requiring careful assessment and adaptation of the replacement process. This article outlines the steps involved in safely removing the old broken glass, obtaining a suitable replacement, and installing it securely within the existing medicine cabinet frame.
Before commencing work, ensure appropriate safety precautions are taken to prevent injury from broken glass. This includes wearing safety glasses, heavy-duty gloves, and appropriate clothing to protect skin from sharp edges and shards. Consider laying down a drop cloth to collect any debris and facilitate easier cleanup. The workspace should be well-lit to ensure clear visibility throughout the process.
Assessing the Existing Medicine Cabinet and Mirror
The initial step is a thorough assessment of the existing medicine cabinet. This involves identifying the type of mirror attachment, the frame material, and the overall condition of the cabinet. Older medicine cabinets may use various methods to secure the mirror, including clips, adhesives, putty, or a combination of these. Examine the edges of the existing mirror to understand how it is held in place. Note the dimensions of the mirror, including its thickness, as this information is crucial for obtaining an appropriate replacement. Check for any signs of structural damage to the frame, such as rust, rot, or warping, that might need addressing before installing the new mirror. Take clear photographs of the existing mirror and its mounting system before disassembly to use as a reference during reassembly. These photos can be invaluable when trying to remember the original configuration of clips, screws, or other hardware.
Carefully measure the mirror's dimensions using a reliable measuring tape or ruler. Measure the height, width, and thickness in multiple places, as older mirrors may not be perfectly uniform due to manufacturing variations or slight warping over time. Record the smallest measurement to ensure the replacement glass fits properly within the frame. If possible, create a template of the mirror’s shape using cardboard or paper. This template can be taken to a glass supplier to ensure an exact match, especially if the mirror has rounded corners or a non-standard shape. Document any specific characteristics of the edge, such as beveling, which may be desired in the replacement.
Removing the Old Mirror and Preparing the Frame
Removing a broken mirror requires extreme caution. If the mirror is severely shattered, it is advisable to cover it with a layer of heavy-duty tape, such as duct tape or packing tape, to help contain the glass fragments. This prevents shards from scattering during removal. Start by carefully removing any visible clips, screws, or retaining hardware that secure the mirror to the frame. These components should be stored safely for reuse during the installation process.
If the mirror is held in place with adhesive or putty, use a putty knife or a similar tool to gently separate the mirror from the frame. Work slowly and carefully, inserting the knife between the mirror and the frame to break the adhesive bond. Apply steady pressure and avoid excessive force, which could cause further breakage. If the adhesive is particularly stubborn, try heating it gently with a hairdryer to soften it. Once the mirror is loosened, carefully lift it from the frame and place it on a protected surface covered with a drop cloth.
After removing the old mirror, thoroughly clean the frame. Remove any remaining adhesive, putty, or debris using appropriate solvents or cleaning agents. Ensure the frame surface is clean, dry, and free of any imperfections that could interfere with the installation of the new mirror. If the frame is damaged, make the necessary repairs before proceeding. This may involve sanding, filling cracks, or applying a protective coating to prevent further deterioration. Pay particular attention to the areas where the new mirror will make contact with the frame, ensuring a smooth and even surface for proper adhesion and support.
Inspect the hardware removed during disassembly. Clean any clips, screws, or brackets. If any of these components are damaged or missing, acquire replacements before installing the new mirror. Take measurements or photographs of the original hardware to ensure the replacements match the size and type. Ordering the correct hardware now will save time and frustration later during the installation process.
Obtaining and Installing the Replacement Glass
With the measurements and template taken, the next step is to obtain a suitable replacement mirror. It is highly recommended to consult with a local glass supplier or hardware store that can cut the glass to the exact specifications. Provide them with the precise measurements, including the thickness, and any specific requirements, such as beveled edges or a safety backing. A safety backing can prevent the glass from shattering into sharp pieces if it breaks, making it a worthwhile investment.
When selecting the replacement glass, consider the type of glass and its reflective properties. Standard float glass is commonly used for mirrors, but other options, such as low-iron glass, can provide a clearer and more accurate reflection. Also, consider the thickness of the glass. Using a glass that is too thin can lead to warping or distortion, while using a glass that is too thick can make it difficult to install properly within the frame. The glass supplier can advise on the best type of glass for the specific application.
Before installing the new mirror, clean it thoroughly with a glass cleaner and a lint-free cloth. Inspect it carefully for any scratches, imperfections, or smudges. Handle the glass with clean gloves to prevent fingerprints from transferring. Apply a thin layer of mirror mastic or adhesive to the back of the mirror. Follow the manufacturer's instructions carefully, as different adhesives have different application requirements and curing times. Ensure the adhesive is compatible with both the glass and the frame material to prevent any adverse reactions or bonding issues. Be cautious not to apply too much adhesive, as it could squeeze out from the edges of the mirror during installation.
Carefully position the new mirror within the frame. Align it precisely with the edges and ensure it is centered. Apply gentle pressure to the mirror to ensure it makes good contact with the adhesive. Secure the mirror using the original clips, screws, or retaining hardware. Tighten the screws or clips gradually and evenly to avoid putting undue stress on the glass. If the original hardware is not available or suitable, use appropriate replacement hardware that is designed for securing mirrors. Ensure the hardware is properly aligned and tightened to prevent the mirror from shifting or falling out of the frame.
If the original method of securing the mirror involved putty, apply a bead of new putty around the edge of the mirror where it meets the frame. Use a putty knife to smooth the putty and create a clean, finished appearance. Remove any excess putty with a damp cloth. Allow the adhesive or putty to cure completely according to the product instructions before using the medicine cabinet. This will ensure the mirror is securely attached and prevent it from shifting or detaching over time.
Final Touches and Safety Inspection
Once the adhesive or putty has cured, perform a final inspection of the installed mirror. Check for any gaps, imperfections, or loose hardware. Ensure the mirror is securely attached to the frame and that it is level. If necessary, make minor adjustments to the clips or screws to achieve a perfect fit. Clean the mirror again with a glass cleaner and a lint-free cloth to remove any fingerprints or smudges.
Carefully inspect the entire medicine cabinet for any sharp edges, loose screws, or other potential hazards. Tighten any loose screws and smooth any sharp edges with sandpaper or a file. Dispose of the old broken glass properly. Wrap the glass in heavy-duty paper or cardboard and label it clearly as "Broken Glass" to prevent injury to sanitation workers. Follow local regulations for disposing of broken glass.
Consider adding a safety film to the back of the mirror to prevent it from shattering into sharp pieces if it breaks in the future. Safety film is a thin, transparent adhesive film that adheres to the back of the mirror and holds the glass fragments together in the event of breakage. It is a relatively inexpensive and effective way to enhance the safety of the medicine cabinet. Properly functioning and safely installed medicine cabinet mirrors can improve bathroom functionality.

Diy Medicine Cabinet How To Replace A

How Do I Replace A Broken Medicine Cabinet Mirror Wellfor

How To Replace A Medicine Cabinet Mirror Door Wellfor

How To Replace A Bathroom Medicine Cabinet Mirror Wellfor

How To Replace A Medicine Cabinet Mirror Doityourself Com

Ideas To Update A 60 S Mirror Medicine Cabinet Hometalk

Covering Up An Old Bathroom Medicine Cabinet With A Sliding Mirror

Bathroom Medicine Cabinet Mirror Replacement Doityourself Com Community Forums

How To Update A Medicine Cabinet Without Replacing It This Diy Life

How To Disassemble A Bathroom Mirror Medicine Cabinet Wellfor