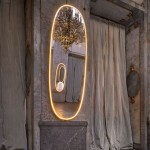
How To Frame a Mirror on the Wall
Framing a mirror elevates its appearance, transforming it from a functional object into a decorative piece. This process, while potentially intimidating, is manageable with the right tools and a methodical approach. This article provides a step-by-step guide on how to frame a mirror effectively and safely.
Measuring and Preparing the Mirror
Accurate measurements are crucial for a successful framing project. Use a tape measure to determine the exact dimensions of the mirror's surface. Record these measurements precisely. It's recommended to add a small amount (approximately 1/8 inch) to each dimension to ensure the frame will fit comfortably over the mirror's edges. This slight allowance also accounts for minor variations in frame dimensions.
Clean the mirror's surface thoroughly with a glass cleaner to remove any dust or fingerprints. A clean surface ensures proper adhesion of any adhesive materials used during the framing process. Protect the mirror's reflective surface with a drop cloth or cardboard while working to prevent scratches or damage.
Selecting the Frame and Materials
The frame choice significantly impacts the mirror's overall aesthetic. Consider the existing decor of the room and the mirror's intended purpose when selecting a frame style. Options range from simple, minimalist frames to ornate, decorative ones. Materials also vary, including wood, metal, and plastic. Choose a material that complements the mirror's size and weight. For larger, heavier mirrors, a sturdy wood or metal frame provides better support. Lightweight frames are suitable for smaller mirrors.
Along with the frame, gather the necessary materials. These typically include: strong adhesive suitable for both glass and the frame material, finishing nails or screws, a hammer or screwdriver, picture hanging hardware (such as D-rings or wire), and measuring tools like a level and ruler. Opt for an adhesive specifically designed for mirrors to ensure a secure and lasting bond and prevent damage to the reflective surface. Quality materials contribute to a more professional and durable finished product.
Constructing the Frame
If the frame is purchased pre-assembled, this step involves confirming its dimensions match the mirror and preparing it for attachment. If assembling the frame from individual pieces, follow the manufacturer's instructions carefully. Accuracy during assembly ensures a square and properly fitting frame. Use appropriate clamps to hold the frame pieces together securely while the adhesive sets. This ensures strong joints and a stable frame structure.
Once the frame is assembled, apply the adhesive to the back edges of the frame. Follow the adhesive manufacturer's instructions regarding application and drying time. Carefully position the mirror onto the adhesive-coated frame, ensuring even contact and pressure across the entire surface. Support the mirror and frame while the adhesive cures completely. This prevents slippage and ensures a strong bond between the frame and the mirror.
Securing and Hanging the Framed Mirror
After the adhesive has fully cured, further secure the frame to the mirror using finishing nails or screws. Place these fasteners strategically along the frame's inner edges, ensuring they do not protrude through the frame's front surface. Countersink the fasteners and fill the holes with wood putty for a seamless finish, if desired. This step provides additional stability and reinforces the bond between the mirror and frame.
Attach appropriate picture hanging hardware to the back of the frame. The type of hardware depends on the weight and size of the framed mirror. D-rings and wire are commonly used for heavier pieces, while smaller mirrors might use sawtooth hangers. Ensure the hanging hardware is securely attached to the frame and can support the weight of the mirror. Use a level when marking the wall for hanging to ensure the mirror hangs straight.
Select the appropriate hanging method for the wall type. Drywall requires different fasteners than brick or concrete. Use wall anchors if necessary to provide additional support. Carefully hang the framed mirror on the wall, ensuring it is secure and level. Step back and admire the finished product, a beautifully framed mirror that enhances the room's decor.
Optional Finishing Touches
For added protection and a more polished look, consider applying a sealant to the frame. This can help prevent moisture damage and enhance the frame's durability. Choose a sealant appropriate for the frame material. Additionally, decorative elements can be added to personalize the framed mirror. These could include small embellishments, paint, or other artistic touches that complement the room's style.

How To Frame A Mirror

How To Frame Out That Builder Basic Bathroom Mirror For 20 Or Less

How To Frame Out That Builder Basic Bathroom Mirror For 20 Or Less

Diy Stick On Mirror Frame Sawdust Sisters
:max_bytes(150000):strip_icc()/kaylasimonehome-905941da7dd04a08af07c415df2a1fd8.jpeg?strip=all)
20 Diy Mirror Frame Ideas To Inspire Your Next Project

How To Add A Wood Frame Large Wall Mirror For Under 20 Dream Design Diy

How To Frame A Mirror
:max_bytes(150000):strip_icc()/bloomingdiyer-372b1cae2a6c43af917f3bea506c11da.jpg?strip=all)
20 Diy Mirror Frame Ideas To Inspire Your Next Project

How To Add A Wood Frame Large Wall Mirror For Under 20 Dream Design Diy

How To Frame A Mirror Erfly House

