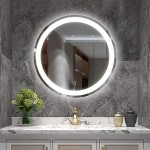
Hanging A Large Frameless Mirror: A Comprehensive Guide
Large frameless mirrors can dramatically enhance the aesthetic appeal of any space, offering a sleek, modern look while simultaneously creating the illusion of greater size and light. However, unlike framed mirrors which typically come with pre-installed hanging hardware, installing a large frameless mirror requires careful planning, the right tools, and a sound understanding of different mounting techniques. This article will provide a detailed guide to safely and effectively hanging a large frameless mirror, outlining the necessary preparations, appropriate adhesive and mounting hardware options, and step-by-step instructions to ensure a secure and visually appealing installation.
Key Point 1: Preparation and Planning
Prior to commencing the installation process, meticulous preparation is paramount. This involves accurately assessing the wall, determining the desired mirror placement, and gathering all necessary tools and materials. Skipping this step can lead to significant complications and potential damage to both the mirror and the wall.
Wall Assessment: The first step is to thoroughly examine the wall onto which the mirror will be mounted. Identify the type of wall construction (drywall, plaster, concrete, etc.) as this will dictate the appropriate anchors and fasteners required. Use a stud finder to locate wall studs. Utilizing studs for anchoring is always preferable as it provides the strongest and most secure hold. If studs are not accessible in the desired location, appropriate drywall anchors or concrete anchors must be selected based on the weight of the mirror and the wall's capacity.
Mirror Placement: Carefully consider the mirror's position. Precise measurements are crucial. Measure the height and width of the mirror and use a level and measuring tape to mark the desired location on the wall. Double-check these measurements to ensure symmetry and alignment. Consider the mirror’s reflection and how it will interact with the room's existing features and light sources.
Tool and Material Gathering: Assemble all necessary tools and materials before starting the installation. This includes, but is not limited to: a level (preferably a long level), measuring tape, pencil, stud finder, drill (with appropriate drill bits for the wall type), safety glasses, work gloves, a clean cloth, painter's tape, mirror adhesive, mounting clips (if using), and appropriate anchors and screws based on the wall type and mirror weight. Having everything readily available will streamline the process and minimize potential delays.
Key Point 2: Choosing the Right Adhesive and Mounting Hardware
Selecting the correct adhesive and mounting hardware is crucial for a secure and long-lasting installation. Different options exist, each with its own advantages and disadvantages. The choice depends largely on the mirror's size and weight, the wall type, and personal preference.
Mirror Adhesive: Mirror adhesive is specifically formulated to adhere to the silvered backing of mirrors without causing damage. It is designed to be neutral in pH and non-corrosive. Regular construction adhesive should never be used as it can react with the mirror backing and cause discoloration or delamination over time. Choose a high-quality mirror adhesive that is compatible with the mirror's backing material. Read the manufacturer's instructions carefully regarding application and curing time.
Mounting Clips: Mounting clips provide mechanical support to the mirror, supplementing the adhesive. They are particularly important for larger and heavier mirrors. Clips are typically made of metal or plastic and are installed along the top, bottom, and sides of the mirror. The size and quantity of clips required will depend on the mirror's dimensions and weight. Ensure that the clips are designed specifically for frameless mirrors, as they typically have a low profile to minimize visibility.
Anchors and Screws: When securing mounting clips or direct mounting hardware to the wall, appropriate anchors and screws are essential. For drywall, use drywall anchors that are rated to support the weight of the mirror. Toggle bolts are a strong option for heavier mirrors. For concrete or masonry walls, use concrete screws or expansion anchors. Always consult the anchor manufacturer's specifications to ensure that the chosen anchor is suitable for the wall type and the weight of the mirror. Use screws that are long enough to penetrate the anchor securely and provide a firm hold.
Direct Mounting Hardware: Some frameless mirrors can be mounted directly to the wall using specialized hardware that attaches to the back of the mirror. This typically involves bonding metal plates or brackets to the mirror backing and then screwing those plates to the wall. This method requires meticulous application of a suitable adhesive to the mirror backing and careful alignment during installation. Refer to the hardware manufacturer's instructions for detailed guidance.
Key Point 3: Step-by-Step Installation Process
The installation process requires careful attention to detail and adherence to the following steps:
Step 1: Preparing the Mirror: Clean the back of the mirror with a clean, lint-free cloth. This ensures proper adhesion. If using adhesive-backed mounting plates, carefully peel off the protective backing and firmly press the plates onto the designated areas on the mirror's backing. Follow the manufacturer's instructions regarding placement and curing time of the adhesive.
Step 2: Applying Mirror Adhesive: Apply a generous bead of mirror adhesive to the back of the mirror in vertical rows, spaced approximately 6-8 inches apart. Avoid applying adhesive too close to the edges of the mirror, as this can cause it to squeeze out during installation. The adhesive should be applied evenly to ensure proper adhesion across the entire surface.
Step 3: Installing Mounting Clips (If Using): If using mounting clips, position them according to the pre-determined measurements. Use a level to ensure that the clips are aligned horizontally and vertically. Mark the screw locations on the wall with a pencil. Pre-drill pilot holes if necessary, based on the wall type and anchor requirements. Insert the appropriate anchors into the pilot holes and securely screw the clips into place. Avoid over-tightening the screws, as this can damage the clips or the wall.
Step 4: Positioning and Mounting the Mirror: With the assistance of another person (particularly for larger mirrors), carefully lift the mirror and align it with the marked location on the wall. Gently press the mirror against the wall, ensuring that it makes contact with both the adhesive and the mounting clips (if used). Maintain pressure for several minutes to allow the adhesive to begin to set. Use painter's tape to temporarily secure the mirror in place while the adhesive cures fully.
Step 5: Securing the Mirror with Clips: If using mounting clips, carefully slide the mirror into the clips, ensuring that it is securely seated. The clips should provide firm support to the mirror without exerting excessive pressure. If the clips are adjustable, fine-tune their position to ensure that the mirror is perfectly level and plumb.
Step 6: Curing and Final Inspection: Allow the mirror adhesive to cure completely according to the manufacturer's instructions. This typically takes 24-48 hours. During this time, avoid disturbing the mirror. Once the adhesive has fully cured, remove the painter's tape and inspect the installation. Ensure that the mirror is securely mounted and that there are no gaps or loose areas. If necessary, make minor adjustments to the mounting clips to ensure a perfect fit.
It is vital to heed safety precautions during the entire process. Wearing safety glasses and work gloves protects against potential hazards. It’s also vital to have assistance when handling larger mirrors to avoid breakage and potential injury. Consulting with a qualified professional is highly recommended when dealing with exceptionally large or heavy mirrors, or when unsure about any aspect of the installation process.
Properly installed, a large frameless mirror will offer years of aesthetic enhancement and increased perceived space. The careful consideration of wall type, weight, appropriate materials, and precise execution of the installation steps are crucial for a safe and visually appealing outcome.

How To Install A Mirror Without Frame Merrypad

How To Hang A Frameless Mirror On The Wall With Pictures

How To Hang A Frameless Mirror On Wall
:strip_icc()/DesireeBurnsInteriors1-f76d25cad90041c88fbae4a7dc10aab4.jpg?strip=all "2 Simple Ways To Hang A Frameless Mirror")
2 Simple Ways To Hang A Frameless Mirror

How To Install A Mirror Without Frame Merrypad

How To Hang A Hanging Mirror Without Accompanying Hardware

How To Hang A Frameless Mirror On The Wall With Pictures

How To Hang A Large Wall Mirror Step By Tutorial

How To Hang A Large Or Heavy Mirror

How To Hang A Frameless Mirror On The Wall With Pictures