How to Mount a Wall Mirror: A Comprehensive Guide
Mounting a wall mirror can significantly enhance a room's aesthetic appeal, creating a sense of spaciousness and reflecting natural light. While seemingly straightforward, achieving a secure and aesthetically pleasing installation requires careful planning, the right tools, and a methodical approach. This article outlines the process of mounting a wall mirror, emphasizing safety and precision throughout each step.
Key Point 1: Preparation and Planning
Prior to commencing the physical installation, thorough preparation and planning are crucial. This phase involves selecting the appropriate mirror, determining the ideal location, and gathering the necessary tools and materials. Neglecting this initial stage can lead to complications during the installation process and potentially compromise the integrity of the mounted mirror.
Mirror Selection: Mirrors come in various shapes, sizes, and weights. The choice should complement the room's décor and serve the intended purpose. Larger mirrors create a more dramatic effect and amplify the sense of space, while smaller mirrors may serve a more functional or decorative role. It is imperative to consider the weight of the mirror, as this will directly impact the type of mounting hardware required. Heavier mirrors demand sturdier anchors and fixings to ensure secure and stable installation.
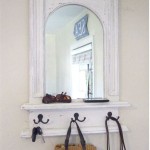
Location Determination: The position of the mirror plays a vital role in its overall impact. Consider factors such as natural light sources, existing furniture, and the room's focal points. Avoid placing mirrors where they might reflect cluttered areas or create unwanted glare. Before making any marks on the wall, temporarily hold the mirror in place to visualize the final outcome and make any necessary adjustments. Take into account the height at which the mirror will be mounted. Eye-level placement is generally recommended, but this may vary depending on the specific design and function of the mirror.
Tool and Material Acquisition: Gathering all the necessary tools and materials before starting the installation will streamline the process and minimize interruptions. Essential tools include a tape measure, level, stud finder, pencil, drill, drill bits (appropriate for the wall type and anchor size), screwdriver, safety glasses, and work gloves. Depending on the mirror's hanging system and the wall type, additional materials may be required, such as wall anchors (e.g., drywall anchors, toggle bolts, or concrete screws), mounting brackets, screws, and protective pads to prevent scratches on the wall.
Safety Precautions: Safety should be paramount throughout the mirror mounting process. Always wear safety glasses to protect the eyes from dust and debris. Work gloves will provide a better grip and prevent hand injuries. Before drilling into the wall, inspect the area for any electrical wiring or plumbing pipes. Using a stud finder can help avoid drilling into pipes or wires. If you are unsure about the presence of utilities behind the wall, consult with a qualified electrician or plumber.
Key Point 2: Installation Process
With the preparation phase complete, the next step is to proceed with the installation. This involves marking the wall, drilling pilot holes, attaching the mounting hardware, and finally, hanging the mirror. Accuracy and attention to detail are crucial during this stage to ensure a secure and level installation.
Marking the Wall: Using a tape measure and level, accurately mark the desired location of the mirror on the wall. If the mirror has pre-attached mounting hardware, measure the distance between the mounting points and transfer these measurements to the wall. Use a level to ensure that the marks are perfectly horizontal. If the mirror does not have pre-attached hardware, determine the center of the mirror and mark the wall at that point. The center point will serve as a reference for aligning the mirror during installation.
Drilling Pilot Holes: Based on the type of wall and the size of the mounting hardware, select the appropriate drill bit. For drywall, use a drill bit slightly smaller than the diameter of the wall anchor. For wood studs, use a drill bit that is slightly smaller than the diameter of the screw. For concrete or brick walls, use a masonry drill bit. Carefully drill pilot holes at the marked locations on the wall. Ensure that the drill is held perpendicular to the wall to create straight and accurate holes. The depth of the pilot holes should be sufficient to accommodate the wall anchors or screws.
Installing Wall Anchors: If the mirror is not being mounted directly into studs, wall anchors are necessary to provide additional support. Choose wall anchors that are appropriate for the weight of the mirror and the type of wall. Drywall anchors are suitable for lighter mirrors, while toggle bolts or concrete screws are recommended for heavier mirrors. Insert the wall anchors into the pilot holes and tighten them according to the manufacturer's instructions. Ensure that the anchors are securely fastened and flush with the wall surface.
Attaching Mounting Hardware: Once the wall anchors are in place, attach the mounting hardware (e.g., brackets, hooks, or clips) to the wall using screws. Ensure that the screws are the correct size and length for the mounting hardware and the wall anchors. Tighten the screws securely, but avoid over-tightening, which could damage the wall or the mounting hardware. Double-check that the mounting hardware is aligned and level before proceeding.
Hanging the Mirror: With the mounting hardware securely attached to the wall, carefully lift the mirror and align it with the hardware. If the mirror has pre-attached hanging wire or D-rings, hook them onto the mounting brackets. If the mirror is designed to be directly mounted to the wall, align the mounting holes with the screws on the hardware and slide the mirror into place. Ensure that the mirror is securely seated on the mounting hardware and that it is level. Use a level to make any necessary adjustments.
Key Point 3: Final Adjustments and Securing the Mirror
After the mirror is hung, a final inspection and necessary adjustments are required to ensure it's securely and aesthetically pleasing. This includes verifying the level, tightening any loose screws, and taking measures to prevent future movement or damage.
Leveling and Alignment: Employ a level to meticulously verify that the mirror is perfectly horizontal. Even a minor tilt can be visually distracting. If any adjustments are needed, carefully reposition the mirror until it is precisely level. Additionally, examine the alignment of the mirror in relation to its surroundings. Ensure that it is centered on the wall or aligned with other architectural elements in the room.
Securing the Mirror: Once the mirror is level and aligned, double-check all screws and fasteners to ensure they are firmly tightened. This is particularly important for heavier mirrors, as any looseness can compromise their stability. Consider using locking washers or thread-locking compounds to prevent screws from loosening over time due to vibrations or temperature changes.
Preventing Movement and Damage: To prevent the mirror from shifting or moving, especially in high-traffic areas, consider using small adhesive pads or bumpers on the back of the mirror where it contacts the wall. These pads will provide a cushioned barrier and prevent scratches or damage to both the mirror and the wall. Check the mirror periodically, especially after any significant shifts in temperature or humidity, to ensure that it remains securely mounted and level. Minor adjustments may be needed over time.
Addressing Potential Issues: Inspect the surrounding wall area for any signs of stress or damage caused by the installation. If any cracks or holes are visible, repair them promptly using appropriate patching compounds or fillers. Touch up the paint if necessary to conceal any imperfections. Additionally, ensure that the area around the mirror is clear of any obstructions that could potentially bump into or damage the mirror.
Cleaning and Maintenance: Once the mirror is securely mounted, clean the surface with a suitable glass cleaner to remove any fingerprints, dust, or smudges. Use a soft, lint-free cloth to avoid scratching the mirror. Regular cleaning will help maintain the mirror's clarity and reflectivity. Avoid using abrasive cleaners or scouring pads, as these can damage the mirror's surface. With proper care and maintenance, a well-mounted wall mirror can enhance the beauty and functionality of any room for years to come.
By following these detailed steps and exercising caution throughout the process, one can successfully mount a wall mirror, adding both functionality and aesthetic appeal to any living space.

How To Hang A Heavy Full Length Leaner Mirror On The Wall House Of Hepworths

How To Hang A Wall Of Mirrors The Handyman

How To Hang A Heavy Mirror Diy Family Handyman

How To Hang A 100 Pound Mirror On Drywall Quora

Gymax 13 In W X 47 H Modern Rectangle Wood Full Length Over The Door Mirror Hanging Hooks Wall Mount Dressing Black Gym10444 Home Depot

Simple Mount 30 In Heavy Duty Mirror And Picture Hanger Hm 30d The Home Depot

Bathroom Mirror No Drill Wall Hung Mount Ee Singapore

32 Convex Mirror Mount On Wall E Weal

Adhesive Wall Mount Mirror Do Not Paste On Painted Walls Furniture Home Living Decor Mirrors Carou

Tangkula Full Length Over The Door Mirror Hanging Hooks Wall Mount Dressing Black Target