Adding A Frame To A Mirror: A Comprehensive Guide
Mirrors, often seen as solely functional objects, possess the potential to significantly enhance a room’s aesthetic. A simple, unframed mirror can appear stark and utilitarian. By adding a frame, the mirror is transformed into a decorative element, integrated seamlessly into the overall design scheme. The process of framing a mirror is a relatively straightforward DIY project, allowing for considerable customization and cost savings compared to purchasing a pre-framed mirror.
This article will provide a comprehensive guide to framing a mirror, covering material selection, measuring techniques, cutting methods, and various construction methods. The suitability of each method will be discussed, enabling an informed decision about the most appropriate approach to framing a mirror for a specific application.
Understanding the Key Considerations Before Starting
Prior to initiating the framing process, several factors warrant careful consideration. These considerations will directly impact the aesthetic outcome, structural integrity, and longevity of the framed mirror. Ignoring these preliminary steps can result in a product that is aesthetically displeasing, structurally unsound, or potentially damaging to the mirror itself.
Mirror Size and Shape: The dimensions and shape of the mirror are paramount. Accurate measurements are critical for ensuring a well-fitted frame. Irregularly shaped mirrors, such as ovals or arches, require more precise measuring and cutting techniques than rectangular or square mirrors. Consider creating a template using paper or cardboard to accurately replicate the shape before cutting the frame material.
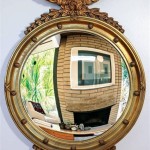
Frame Style and Material: The style of the frame should complement the existing décor of the room. Options range from simple, minimalist designs to ornate, decorative frames. The material used for the frame profoundly influences the aesthetic and durability. Wood, metal, and plastic are common choices. Wood offers warmth and versatility, metal provides a sleek and modern look, and plastic is cost-effective and moisture-resistant. Consider the moisture levels in the room. For bathrooms, moisture-resistant materials or specially treated wood are essential to prevent warping or decay.
Mounting Method: How the framed mirror will be mounted affects the overall design and construction. Will it be hung on a wall, or will it lean against a surface? If wall-mounted, the weight of the mirror and frame must be considered, and appropriate hanging hardware should be selected to ensure secure installation. The frame construction must be robust enough to support the weight of the mirror and any associated hardware.
Materials and Tools Required
Successful mirror framing necessitates the correct tools and materials. Utilizing inappropriate tools can compromise the quality of the cuts, resulting in an ill-fitting frame or damage to the mirror itself. Similarly, selecting substandard materials can lead to structural instability or an undesirable aesthetic outcome. A thorough review of the required materials and tools will mitigate potential issues during the construction process.
Frame Material: This can be wood (pine, oak, poplar), metal (aluminum, steel), or plastic (PVC). The choice depends on the desired style, durability, and cost.
Measuring Tools: A tape measure, ruler, and square ensure accurate measurements and right angles. For curved mirrors, a flexible measuring tape and a compass are helpful.
Cutting Tools: A miter saw is ideal for cutting wood or metal at precise angles, especially for creating mitered corners. A hand saw can also be used, but requires more skill to achieve accurate cuts. A plastic cutter or utility knife is suitable for cutting plastic frame materials. For metal, a metal-cutting blade is necessary.
Fastening Materials: Wood glue, screws, nails, or construction adhesive are used to assemble the frame. The choice depends on the frame material and the desired level of durability. For attaching the mirror to the frame, mirror mastic is specifically designed to adhere mirrors without damaging the reflective backing.
Finishing Materials: Paint, stain, varnish, or sealant can be used to finish the frame and protect it from moisture and damage. The choice depends on the frame material and the desired aesthetic. For wood, sanding sealer and primer may be necessary before painting.
Safety Equipment: Safety glasses, gloves, and a dust mask are essential to protect the eyes, hands, and respiratory system during cutting and sanding operations.
Step-by-Step Guide to Framing a Mirror
The framing process involves several distinct steps, each requiring careful attention to detail. Accuracy in measurement, cutting, and assembly is crucial for achieving a professional-looking result. The following steps provide a detailed guide to framing a mirror, assuming a rectangular or square mirror and a wood frame.
Measure the Mirror: Accurately measure the length and width of the mirror. Ensure the measurements are precise to within 1/16 inch. These measurements will determine the inner dimensions of the frame.
Calculate Frame Dimensions: Decide on the desired width of the frame. This width will be added to each side of the mirror. For example, if the mirror is 24 inches wide and 36 inches long, and the frame width is 2 inches, the outer dimensions of the frame will be 28 inches wide and 40 inches long. For a standard mitered frame, the length of each frame piece will be slightly longer than half the perimeter to account for the 45-degree miter cuts.
Cut the Frame Pieces: Using a miter saw, cut the frame pieces to the calculated lengths, ensuring that each corner is cut at a 45-degree angle. For a simpler butt-joint frame, cut the pieces to the exact dimensions of the mirror plus the frame width on each side.
Assemble the Frame: Apply wood glue to the mitered or butt-jointed edges of the frame pieces. Clamp the pieces together using corner clamps or bar clamps. Ensure the corners are square before the glue dries. For added strength, reinforce the corners with screws or nails. Pre-drilling pilot holes prevents the wood from splitting.
Sand and Finish the Frame: Once the glue is dry, sand the frame to create a smooth surface. Start with a coarse grit sandpaper (e.g., 120 grit) and gradually move to a finer grit (e.g., 220 grit). Apply a wood filler to any gaps or imperfections. Wipe away any sanding dust. Apply a primer if painting the frame. Apply the desired finish (paint, stain, varnish or sealant) according to the manufacturer’s instructions. Allow the finish to dry completely before proceeding to the next step.
Attach the Mirror to the Frame: Apply a generous bead of mirror mastic to the back of the mirror. Carefully center the mirror within the frame. Press the mirror firmly against the frame, ensuring even contact. Use painter's tape to secure the mirror in place while the adhesive cures. Allow the adhesive to cure completely according to the manufacturer’s instructions, typically 24-48 hours.
Install Hanging Hardware: If the mirror will be wall-mounted, install appropriate hanging hardware on the back of the frame. D-rings with wire or sawtooth hangers are common options. Ensure the hardware is securely attached and can support the weight of the mirror and frame.
Final Inspection: Inspect the finished framed mirror to ensure the mirror is securely attached to the frame, the corners are properly aligned, and the finish is smooth and even. Clean the mirror surface to remove any smudges or fingerprints.
Alternative methods for simpler frame construction exist. For instance, using a prefabricated frame from a craft store can greatly reduce cutting and joining steps. The mirror can be secured into the pre-made frame using clips or a robust adhesive.
Another method involves creating a "floating" frame, where the frame sits slightly away from the edge of the mirror, creating a visual gap. This can be achieved by using spacers between the mirror and the frame during installation.
The success of any mirror framing project relies on accurate preparation, careful execution, and attention to safety. By following the guidelines in this article, a personalized and aesthetically pleasing framed mirror can be achieved, enhancing any living space.

How To Frame Out That Builder Basic Bathroom Mirror For 20 Or Less

Easy Diy Tutorial Adding Trim Around A Giant Mirror For Ers

How To Frame A Bathroom Mirror

How To Add A Frame Your Bathroom Mirror

Diy Mirror Frame Remodelaholic

Diy Stick On Mirror Frame Sawdust Sisters

Mirror Stuck On The Wall Add A Frame To An Plate Glass In Minute Kits Large Bathroom Mirrors Diy

How To Add A Frame Your Big Builder Mirror Easy Diy

Diy Stick On Mirror Frame Sawdust Sisters

How To Frame A Mirror Erfly House