Adding a Wood Frame to a Mirror Wall: A Comprehensive Guide
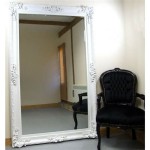
Mirror walls have long been a popular design choice for enhancing the perceived size of a room and amplifying natural light. However, a large, unframed mirror wall can sometimes appear stark or unfinished. Adding a wood frame can dramatically transform the aesthetic, introducing warmth, texture, and a defined focal point to the space. This article will provide a detailed guide on how to add a wood frame to an existing mirror wall, covering everything from planning and material selection to installation and finishing.
Before embarking on this project, careful consideration should be given to the existing mirror wall. Assess its dimensions, overall condition, and how it is attached to the wall. Understanding these factors will influence the frame design, material choices, and installation techniques. It is also crucial to consider the style of the room and the desired aesthetic outcome. A rustic, reclaimed wood frame will create a vastly different ambiance compared to a sleek, modern frame painted in a neutral color.
Key Point 1: Planning and Design Considerations
Proper planning is essential for achieving a professional and visually appealing result. This stage involves taking precise measurements, selecting appropriate materials, and designing a frame that complements both the mirror wall and the surrounding decor.
The first step is to accurately measure the overall dimensions of the mirror wall. Measure the height and width at multiple points, as minor variations could exist. These measurements will serve as the basis for calculating the required length of lumber for the frame. It is advisable to add a slight buffer, perhaps an extra inch or two to each dimension, to account for potential errors during cutting and assembly. This allows for trimming and adjustments during the installation process.
Next, determine the desired width of the frame. This dimension is subjective and depends on the overall size of the mirror wall and the desired visual impact. A wider frame will create a bolder statement, while a narrower frame will provide a more subtle enhancement. As a general guideline, a frame width of 2 to 4 inches is often suitable for most mirror walls. Consider creating a mock-up using cardboard or construction paper to visualize different frame widths before making a final decision.
Material selection is a crucial aspect of the design phase. Various types of wood can be used for the frame, each offering distinct characteristics in terms of appearance, durability, and cost. Softwoods like pine and fir are relatively inexpensive and easy to work with, making them suitable for beginners. Hardwoods like oak, maple, and cherry offer greater durability and a more refined aesthetic, but they are also generally more expensive and require more specialized tools for cutting and shaping. Reclaimed wood provides a unique, rustic appearance and is an environmentally conscious choice. Regardless of the wood type selected, ensure that it is properly dried and free from knots or defects that could compromise its structural integrity.
The frame design should complement the overall style of the room. For a modern aesthetic, consider a simple, clean-lined frame with a minimalist profile. A more traditional design might incorporate decorative moldings or ornate carvings. Consider the edge profile of the frame; a square edge provides a contemporary look, while a rounded or beveled edge offers a softer, more traditional feel. Once the design and materials are finalized, create a detailed sketch or diagram outlining the dimensions, angles, and joinery methods to be used. This will serve as a visual guide throughout the construction process.
Key Point 2: Constructing the Wood Frame
Constructing the wood frame requires precision, patience, and the use of appropriate tools. The process typically involves cutting the lumber to size, joining the pieces together, and sanding the frame to achieve a smooth, uniform surface.
Using a miter saw or a hand saw with a miter box, carefully cut the lumber to the required lengths, ensuring that the corners are cut at a 45-degree angle to create a seamless square or rectangular frame. Accuracy in cutting is paramount, as even slight discrepancies can result in gaps or misalignments at the corners. Double-check each cut against the design diagram before proceeding. If using a power saw, wear appropriate safety glasses and hearing protection.
Once the pieces are cut, join them together using a suitable joinery method. Several options are available, including miter joints reinforced with wood glue and nails or screws, biscuit joints, or pocket hole joints. Miter joints are aesthetically pleasing but can be structurally weak without reinforcement. Biscuit joints and pocket hole joints provide greater strength and stability. When using wood glue, apply it liberally to the mating surfaces and clamp the frame together until the glue is fully cured, typically for at least 24 hours. Clean any excess glue immediately with a damp cloth.
After the frame is assembled and the glue is dry, carefully inspect all joints for any gaps or imperfections. Fill any small gaps with wood filler and allow it to dry completely before sanding. Using progressively finer grits of sandpaper, starting with 80-grit and progressing to 120-grit and then 220-grit, sand the entire frame to create a smooth, uniform surface. Pay particular attention to the corners and edges, ensuring that they are flush and free from splinters. A sanding block or orbital sander can be used to expedite the sanding process. After sanding, remove all dust with a tack cloth.
Key Point 3: Installing the Frame on the Mirror Wall
Installing the wood frame onto the mirror wall requires careful planning and execution to ensure a secure and aesthetically pleasing result. The method of attachment will depend on the type of mirror, its existing mounting system, and the weight of the frame.
Before attaching the frame, consider how it will be secured to the mirror wall. If the mirror has exposed edges, construction adhesive approved for use on mirrors can be applied to the back of the frame. Apply the adhesive in a continuous bead around the inside perimeter of the frame and in several zigzag patterns across the surface. Press the frame firmly against the mirror wall, ensuring that it is properly aligned. Support the frame with shims or temporary bracing while the adhesive cures, typically for 24 to 48 hours. Alternatively, if the mirror has a small gap between the edge of the mirror and the surrounding wall, small L-brackets can be attached to the back of the frame and then screwed into the wall studs for added support. These brackets should be concealed behind the frame and mirror.
Another method involves using mirror mastic and strategically placed adhesive pads or double-sided tape to temporarily hold the frame in place while the mastic cures. The adhesive pads should be thin enough to allow the frame to sit flush against the mirror wall. After applying the mastic and adhesive pads, carefully position the frame onto the mirror wall and apply pressure to ensure good contact. Use painter's tape to secure the frame in place and prevent it from shifting while the mastic cures. Avoid using excessive force when applying pressure, as this could damage the mirror.
Once the adhesive has fully cured, carefully remove any temporary shims, bracing, or tape. Inspect the frame to ensure that it is securely attached and properly aligned. If any adjustments are needed, carefully make the necessary corrections before proceeding to the finishing stage.
The final step involves finishing the wood frame to protect it from moisture and wear and to enhance its aesthetic appeal. This may involve staining, painting, or applying a clear coat finish. If staining, choose a stain color that complements the surrounding decor and apply it evenly to the frame using a brush or cloth. Allow the stain to dry completely before applying a clear coat finish, such as polyurethane or lacquer, to protect the stain and enhance its durability. If painting, apply a primer coat to prepare the surface for the topcoat. Choose a high-quality paint in the desired color and apply it in thin, even coats, allowing each coat to dry completely before applying the next. Lightly sand between coats to create a smooth, flawless finish. A clear coat finish can also be applied over the paint for added protection and durability. Regardless of the chosen finish, ensure that it is compatible with the type of wood used and the surrounding environment.
:max_bytes(150000):strip_icc()/kaylasimonehome-905941da7dd04a08af07c415df2a1fd8.jpeg?strip=all "20 Diy Mirror Frame Ideas To Inspire Your Next Project")
20 Diy Mirror Frame Ideas To Inspire Your Next Project

How To Add A Wood Frame Large Wall Mirror For Under 20 Dream Design Diy

How To Add A Wood Frame Large Wall Mirror For Under 20 Dream Design Diy

How To Add A Diy Wood Frame Bathroom Mirror Design

How To Frame A Mirror

Diy Full Length Mirror

Diy Wood Framed Bathroom Mirror Christina Maria Blog

Pin On Home Decor

Rustic Reflections Simple Mirror Frame With A Weathered Look Canadian Woodworking

How To Add A Wood Frame Large Wall Mirror For Under 20 Dream Design Diy