Aged Mirror Glass DIY: A Guide to Creating Antique Charm
Timeworn beauty often holds a special allure. Whether it's a vintage piece of furniture or a weathered antique, the patina of age can imbue objects with a unique sense of history and character. For those seeking to replicate this aesthetic in their own homes, aging mirror glass can be a rewarding DIY project. This process, also known as "distressing" or "antiquing," involves creating the appearance of age using a variety of techniques, allowing you to transform ordinary mirror glass into captivating pieces that exude vintage charm.
Understanding the Process
Age manifests itself in various ways on glass. The surface might develop a cloudy patina, subtle etching, or even tiny cracks known as "crazing." While real aging takes centuries, DIY techniques aim to replicate these effects in a controlled and manageable way. Common methods include:
- Chemical etching: Using specialized etching solutions, you can create a frosted or cloudy effect on the mirror's surface, resembling the weathering of ancient glass.
- Sandblasting: This technique uses a stream of abrasive particles to etch designs or patterns onto the mirror, producing a textured look with a vintage feel.
- Paint techniques: Applying layers of paint, glazes, or other coatings can create the illusion of aged glass, mimicking the subtle imperfections that develop over time.
- Crazing techniques: Techniques like applying crackle medium allow you to intentionally create a network of fine cracks on the mirror's surface, mimicking the natural crazing that occurs with time.
The choice of technique depends on the desired look and level of detail. For subtle aging, chemical etching or paint techniques might be ideal. For more dramatic results, sandblasting or crazing techniques offer greater control and creative possibilities.
Essential Materials and Tools
Before embarking on the project, it's important to gather the necessary materials and tools. While specific requirements may vary depending on the chosen aging technique, essential items include:
- Mirror glass: Choose a mirror that suits your desired size, shape, and style. Pre-cut mirror pieces are readily available, or you can cut mirrors to size using a glass cutter.
- Etching solution: This solution is key for creating a frosted effect. Choose a solution specifically designed for etching glass, following the manufacturer's instructions carefully.
- Sandblasting equipment (optional): If you're opting for sandblasting, you'll need a sandblasting cabinet or a portable sandblasting unit, along with appropriate safety gear.
- Paint brushes, sponges, or applicators (optional): Depending on the chosen paint technique, you'll need brushes, sponges, or applicators to apply the coatings evenly and create the desired texture.
- Protective gear: Always wear protective gear like gloves, eye protection, and a mask when handling etching solutions or abrasive materials.
- Work area: Choose a well-ventilated workspace with a smooth, flat surface to work on. Protect the work surface with a drop cloth or similar material.
By ensuring you have all the necessary materials and tools, you can ensure a smooth and successful aging process.
Tips for Success
To achieve a convincing aged mirror glass effect, consider these tips for success:
- Practice on scrap glass: Before working on your actual mirror, practice the chosen technique on scrap glass. This allows you to experiment and fine-tune your approach before applying it to your final piece.
- Start with a light touch: When etching or sandblasting, begin with a light touch and gradually increase the intensity if needed. This prevents excessive etching or sandblasting, ensuring a more subtle and authentic aged look.
- Use multiple layers: For paint techniques, applying multiple thin layers of paint or glazes can create a more realistic aged effect than one thick layer. This allows the layers to interact and create subtle variations in color and texture.
- Experiment with textures: For paint techniques, try using different brushes, sponges, or applicators to create varying textures. This can add further realism and visual interest to the aged effect.
- Add finishing touches: After aging the mirror, consider adding finishing touches such as a distressed frame or antique-style hardware to complete the vintage aesthetic.
By following these tips, you can ensure that your DIY aged mirror project achieves its intended effect, transforming ordinary mirror glass into captivating pieces that exude a timeless charm.

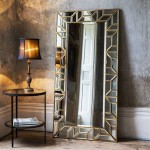
How To Antique A Mirror Tutorial Jenna Sue Design

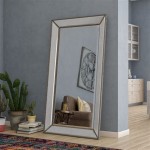
The Ultimate Guide On Diy Antique Mirrors So Much Better With Age

How To Antique A Mirror Tutorial Jenna Sue Design

Diy Antique Mirror Easy To Do And Looks Authentic My Creative Days

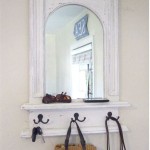
How To Antique A Mirror Easy Diy Tutorial

The Ultimate Guide On Diy Antique Mirrors So Much Better With Age

How To Antique A Mirror From The Front With Paint Average But Inspired

How To Antique A Mirror 9 Fast Diys Shelterness

How To Diy Antiqued Mercury Mirror Glass 17 Apart

How To Antique Mirror Using Paint Stripper And Bleach Decor Adventures