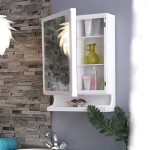
DIY Bathroom Storage Mirror: A Comprehensive Guide
Bathroom storage is a perpetual challenge, especially in smaller spaces. A DIY bathroom storage mirror offers a stylish and functional solution by combining the necessity of a mirror with the practicality of hidden storage. This guide provides detailed instructions and helpful tips for creating a custom storage mirror tailored to individual needs and preferences.
Planning and Preparation
Careful planning is crucial for a successful DIY project. This initial stage involves several key steps:
*Assess Storage Needs:
Determine the types and quantity of items requiring storage. This will inform the size and internal configuration of the mirror. *Measure the Space:
Accurately measure the wall space where the mirror will hang. Consider surrounding fixtures and ensure sufficient clearance for opening and closing the cabinet. *Choose a Design:
Select a design that complements the existing bathroom décor. Options range from a simple recessed medicine cabinet to a more elaborate mirrored cabinet with adjustable shelves. *Gather Materials:
Once the design is finalized, create a comprehensive list of necessary materials, including wood, mirror glass, hinges, handles, and fasteners.Building the Frame
The frame serves as the foundation of the storage mirror and should be sturdy and moisture-resistant. Consider using plywood or medium-density fiberboard (MDF) specifically designed for bathroom environments.
*Cut the Wood:
Cut the wood pieces according to the chosen design dimensions. Ensure precise cuts for a seamless frame assembly. *Assemble the Frame:
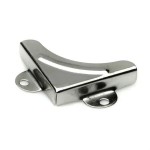
Use wood glue and screws to assemble the frame. Reinforce joints with corner braces for added stability. *Apply a Protective Finish:
Seal the frame with a waterproof sealant or primer to protect it from moisture damage. This step is crucial for longevity in a humid bathroom environment.Installing the Mirror
Installing the mirror requires precision and care to avoid damage. Safety precautions are essential when working with glass.
*Attach Mirror Clips:
Install mirror clips along the inside edges of the frame. These clips will hold the mirror securely in place. *Insert the Mirror:
Carefully place the mirror into the frame, ensuring it sits flush against the clips. *Secure with Backing:
Apply a thin layer of mirror adhesive or use a backing board to further secure the mirror and prevent movement.Adding Shelves and Internal Storage
The internal storage configuration can be customized to suit individual needs. Shelves, compartments, and even small drawers can be incorporated.
*Install Shelves:
Measure and cut shelves to fit within the frame. Use shelf brackets or supports to secure them in place. *Add Compartments:
Consider creating compartments for specific items using dividers or small boxes. *Integrate Drawers:
For smaller items, consider installing small drawers within the cabinet using appropriate hardware.Mounting the Mirror
Proper mounting is crucial for safety and stability. Ensure the wall can support the weight of the mirror and its contents.
*Locate Wall Studs:
Use a stud finder to locate wall studs for secure mounting. *Install Mounting Hardware:
Attach appropriate mounting hardware, such as D-rings or French cleats, to the back of the frame. *Hang the Mirror:
Carefully hang the mirror on the wall, ensuring it is level and secure.Finishing Touches
The finishing touches complete the project and enhance its functionality and aesthetic appeal.
*Install Doors or Hinges:
If the design incorporates doors, install hinges and ensure they operate smoothly. *Attach Handles or Knobs:
Choose handles or knobs that complement the bathroom décor and provide a comfortable grip. *Seal Gaps and Edges:
Apply caulk or sealant around the edges of the mirror to create a seamless finish and prevent moisture intrusion.Customization Options
Personalize the storage mirror with various customization options to create a unique piece.
*Lighting:
Integrate LED lighting strips around the mirror's perimeter or inside the cabinet for enhanced illumination. *Decorative Elements:
Add decorative molding, trim, or paint to the frame to match existing bathroom décor. *Internal Organization:
Use organizers, trays, and hooks within the cabinet to maximize storage space and keep items tidy.Maintenance and Care
Regular maintenance will ensure the longevity of the DIY bathroom storage mirror.
*Clean the Mirror:
Regularly clean the mirror surface with a glass cleaner and a soft cloth. Avoid abrasive cleaners that can scratch the surface. *Check for Moisture:
Periodically inspect the frame and internal components for signs of moisture damage. Address any issues promptly to prevent further deterioration. *Tighten Hardware:
Check and tighten screws and hinges periodically to maintain stability and prevent loosening over time.
Diy Bathroom Mirror Storage Case Shanty 2 Chic

Diy Bathroom Mirror Storage Case Shanty 2 Chic

How To Turn A Mirror Into Medicine Cabinet Diy Bathroom

Diy Bathroom Mirror Storage Case Shanty 2 Chic

Diy Medicine Cabinet At Home With Ashley

How To Turn A Mirror Into Medicine Cabinet Diy Bathroom

Diy Bathroom Mirror Storage Case Shanty 2 Chic

Great Mirror Storage Ideas The Owner Builder Network Diy Bedroom Small Space Bathroom For Bedrooms

Diy Bathroom Cabinet Liz Marie Blog

Easy Medicine Cabinet Makeover Lovely Lucky Life

